9 Simple Tips for Smart Phone Photography
I have some good camera gear, and many of my favourite photos are ones that I have taken on SLR, with carefully chosen aperture, speed and composition. But there are some that still really like that I have taken on my old pocket Casio 2 Megapixel camera, and still quite a number I’ve take on my phones over the years.
There are two main advantages with camera phones
– They are compact, and generally you always have them with you.
– They are always ‘connected’ to social media and the internet. Take photo, upload or email… done. These days, often if you have to wait to share your photo, the moment has passed.
Cameras are designed to take photos… phones are devices that ‘can’ take photos. It is amazing how rapidly phone tech is changing though, and with my last couple of phones, I have selected them with decent imaging being a high priority. Companies are also playing with ‘cameras that also act as phones’, such as Samsung’s Galaxy S4 Zoom, so I suspect the lines will be blurred even more in the future.
Remember that having an expensive camera doesn’t automatically make you take wonderful photos, and anyone can can take pretty good photos on a reasonable quality phone camera if they stop and think… and this is especially true if you are only planning to upload them to social media and don’t need an A3 print copy on canvas.
In the mean time though, I have learned a few simple tips that I use, and hope these can help others.
Decrudding
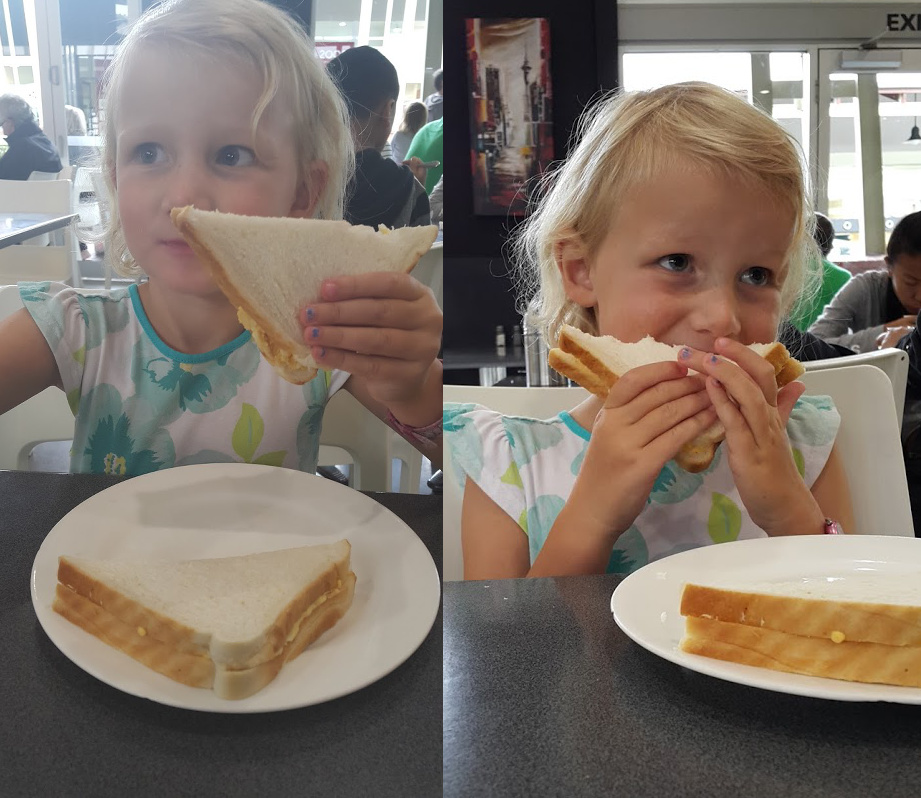
This is the most useful tip I can offer. Before you take any photo, give your camera glass a quick once over with your shirt tail or down your jeans. The likelihood of your phone lens being clean, dust, fingerprint and moisture free once it has been sitting in your pocket or in your handbag is close to zero.
The tiny lenses on these cameras notice any spot and the number of images I see on facebook that I can tell this is a problem is very high. When I snapped the pic to the right, I was bewildered at how poor the quality was…. then I gave the lens a quick wipe.
Focus
Get your focus right. By default, your phone will normally focus on whatever is in the centre of the screen. If your phone supports ‘touch to take photo’ this can help you get the item you are interested in to be in focus. Rather than clicking the shutter button, you touch the screen wherever you like on the right subject.
Volume button for the clicker
Did you know that on must phones, the volume button also acts as the shutter button? This can really help you when you are holding your phone in an awkward way eg up high, and will help you keep the phone steady when you take the shot. This setting might not be on by default on your phone so check the menus.
Click, edit, post
When you take a photo, you will be unlikely to get the cropping, and colour perfect every time. I can’t take a photo with a level horizon to save my life. Most phone photos I do a simple re-crop, minor rotate, run it though an enhancer app to get the contrast or colour a bit nice and maybe add a tiny bit of vignetting. It takes just seconds with the right apps and makes a huge difference to the result.
 Never zoom… crop instead
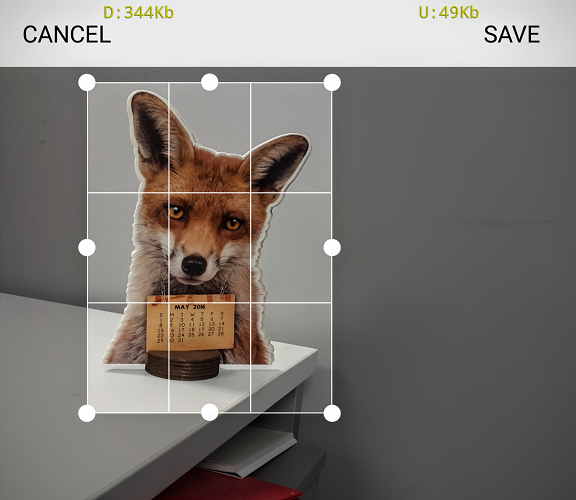
I would never bother using the Zoom feature of a phone camera – in fact I always recommend that people turn it off so you can’t accidentally bump the zoom control. Why? Well your phone doesn’t really have a zoom at all. All it is doing is enlarging what few pixels you have (sometimes called digital zoom).
You are far better off just taking the photo from far away, and when you have a good shot, using an app to crop the stuff you need and straighten it up etc. You can usually get a better result like this, as you can see the bits you want to cut out later on the screen and not be moving around so much.
Use your phone’s photo modes
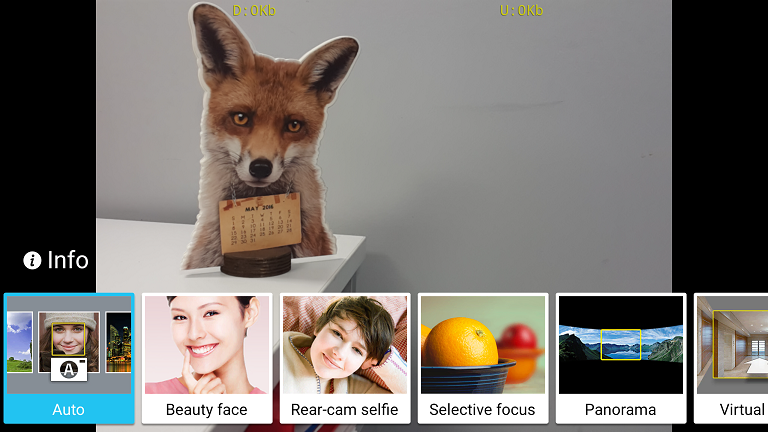
Most phone camera apps have a few extra features you should explore. ‘Auto’ is not always best, as Samsung, iPhone and other phone camera apps, all tend to have ‘modes’ such as low light shot, a special panorama shot, portrait/beauty enhancing mode and more. Experiment with them and see what they do.
My Samsung phone even has a ‘Selective Focus’ mode that can (sort-of) make a photo look like you have a very low depth of field and put the background stuff out of focus. Can work pretty well for close up/macro style photos uploaded to social media.
Install some helper apps
Your phone will have an app to take photos, and likely some sort of ‘gallery’ app that lets you view them and maybe manipulate them slightly (crop, rotate etc). Don’t be afraid to get some more apps, and there are some that really help you to make an ‘ok’ phone photo into a great one.
Here are a couple of ideas:
- A collage app (such as Pic Collage) can allow you to put a bunch of photos together in a sequence. Uploading 4 photos in an arty collage can often look much nicer than uploading all 4 individually.
- Perfectly Clear was a great app that I found. Apparently they charge a lot for the PC desktop version, but as an app it is only a few dollars. This app does some pretty good ‘autocorrection’ and can really help adjust a photo if you have poor light. You can also do some ‘Cosmopolitan style’ auto enhancing of people shots, such as teeth whitening, face thinning and eye widening. Just don’t overdo it!
- Aviary Photo Editor is a very useful enhancer from Adobe that allows you to use artful effects, sharpen, soften or saturate photos. You can also draw your own captions, doodles and frames etc for social media fun. There are plenty more of these types of apps around depending on how simple or complex you want you editing features.
- I tend to make use of the Google Photos app a lot. It uploads my photos to my google cloud and allows me to make albums and share them online easily. It also has a pretty good set of enhancers, and the ‘auto enhance’ does a pretty good job.
- On Android, you can even replace the whole camera app with something like the excellent and free Open Camera. It has useful enhancements such as more control over aperture, horizon leveling, different grid patterns, and it is optimisable for left and right hand users.
Vertical Video Syndrome

My pet hate. Have you ever seen those ‘johnny-on-the-spot’ news reports that have a skinny video taking up the middle of the screen and blurry stuff on each side? The reason is that someone has taken the video with their phone held vertically and the TV people generally add some blurry mirrored effects to fill up the other 70% of the screen rather than leaving it black. Whenever you take a video, turn your camera sideways. Yes – every time. There are more technical explanations, but trust me here – if someone has a landscape style video and you play it on your phone, you can just turn your phone around. You can’t take your 50″ TV off the wall and rotate it 90 degrees. So you can’t get little Billy in the frame unless you shoot it vertically? Take a few steps back.
Is it ever sensible to shoot vertical video? I’d like to encourage ‘never’, but if you are taking a video of one person, and you are sure the only viewing will be on a phone on social media, then maybe vertical is ok. Apps like snapchat are making this more popular, but remember… these videos are designed to always be viewed on a phone.
50 photos? post a few
This is more of a social media tip. If you take 50 photos of your 3 year old jumping on the trampoline, unless every single one is a masterpiece or you are just targeting grandma, people will get bored after looking at the 3rd or 4th. Ensure you just post a few of the best, generally 1-8 is a good limit for a facebook post. A simple 4 or 6 photo collage (see above) can reduce the numbers further so you may only need to post one.