Kogan Smart Glass Kettle 1.7L and Tasmota
Changes
2021-10-21 V1: Started Documenting
2021-10-24 V2: The Tuya values to keep warm do not match other documentation on the internet. I’ve tested each and fixed it below. Also, I was having issues with the temp showing unknown in HA (it changes from the temp to ‘unknown’ every couple of seconds). This is obviously just a HA thing that I’ll have to fix as TuyaReceived values come and goes from MQTT.
2021-10-24 V3: Fixed the temp value showing unknown, my sensor value name wasn’t exactly the same as the unique sensor ID in the Jinja2 template.
Summary
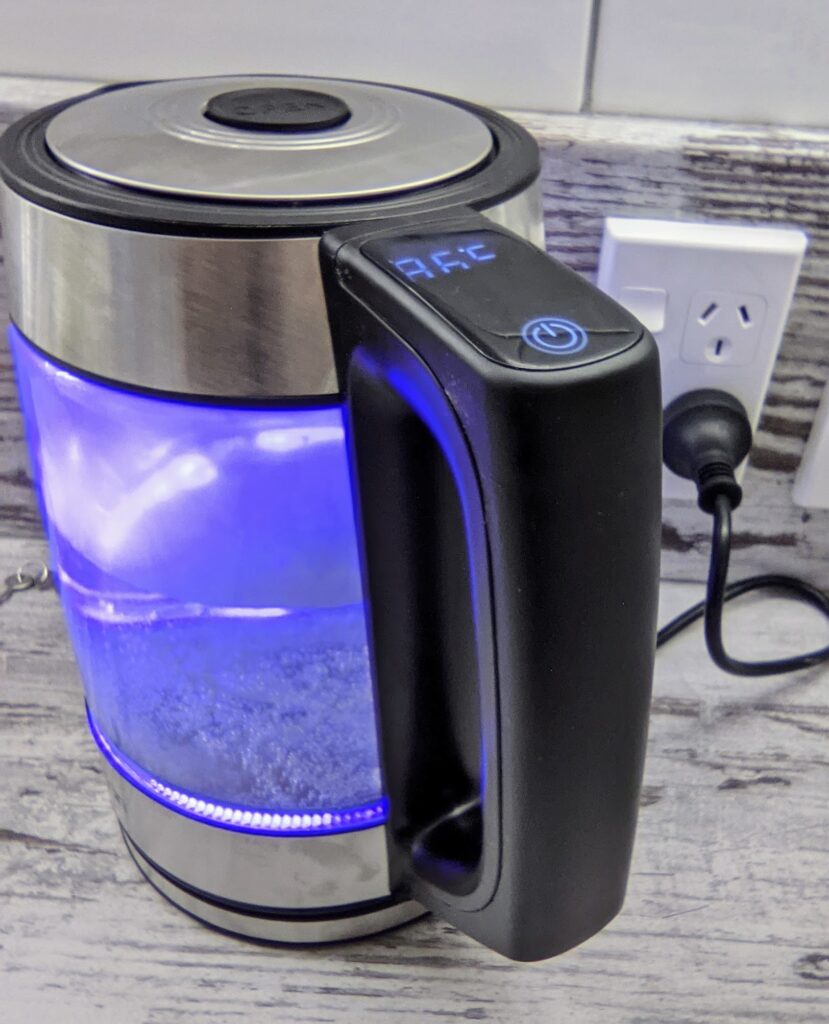
I paid NZ$50 plus $19 Delivery for a “Smart Kettle” and Flashed it with Tasmota for Home Assistant control.
Why flash with Tasmota?
https://siytek.com/what-is-tasmota-an-introduction-to-the-cloud-free-smart-home/
Kettle Smart Details
Features
- Remote on/off
- Read Temperature Remotely
- Keep warm (a few different temp options)
Product Info
Be wary that they have a few smart kettles in their range, and not all of them with an ESP8266 inside. It is also quite possible not that because it is a Tuya device, they may have changed the ESP8266/TYWE3S with something else, eg a WR1 module. If it has this, you won’t be able to flash it (as at Oct 2021), but you only need +5V, GND, TX/TX so it should be easy enough to replace with another ESP8266 board such as an ESP12F.
This kettle originally sold for $160 but it looks like no one bought it
https://www.dicksmith.co.nz/dn/buy/kogan-smarterhome-17l-smart-glass-kettle/
https://www.kogan.com/nz/buy/kogan-smarterhome-17l-smart-glass-kettle/
- Delivery was a bit slow from Australia to New Zealand, about 6 weeks (took 4 weeks from order to actual shipping for some reason)
- This isn’t a high end kettle, it is a very plasic-y, light weight kettle. The top button sticker wasn’t stuck on very straight (you can’t really see this with the overall cover on though) and they didn’t bother to stick down the buzzer to anything inside. Does the job though and a glass kettle is always more geeky. Having the ability to turn it on remotely is actually quite useful for me.
- One thing that annoys me with the flashed Kettle is the controller goes offline when you remove the kettle from the base… I hate my controllers going offline. A small gripe though, and it would only be solved if the electronics were in the base.
Flashing Info
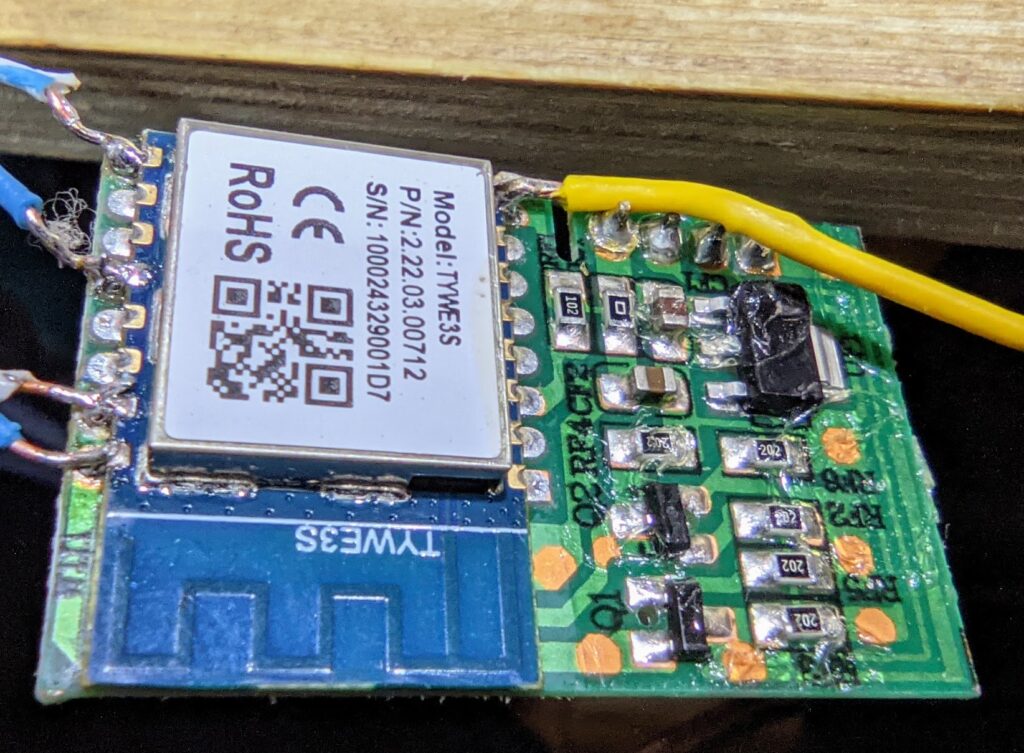
- Contains a TYWE3S (Tuya esp8266 module)
- Tuyaconvert methods unlikely to work (as at Oct 2021) but I didn’t try
- Tuya modules like this have a partner MCU and the esp8266 uses the hardware serial to talk to it. You need to break the serial lines to program it (or hold the MCU in a reset state)
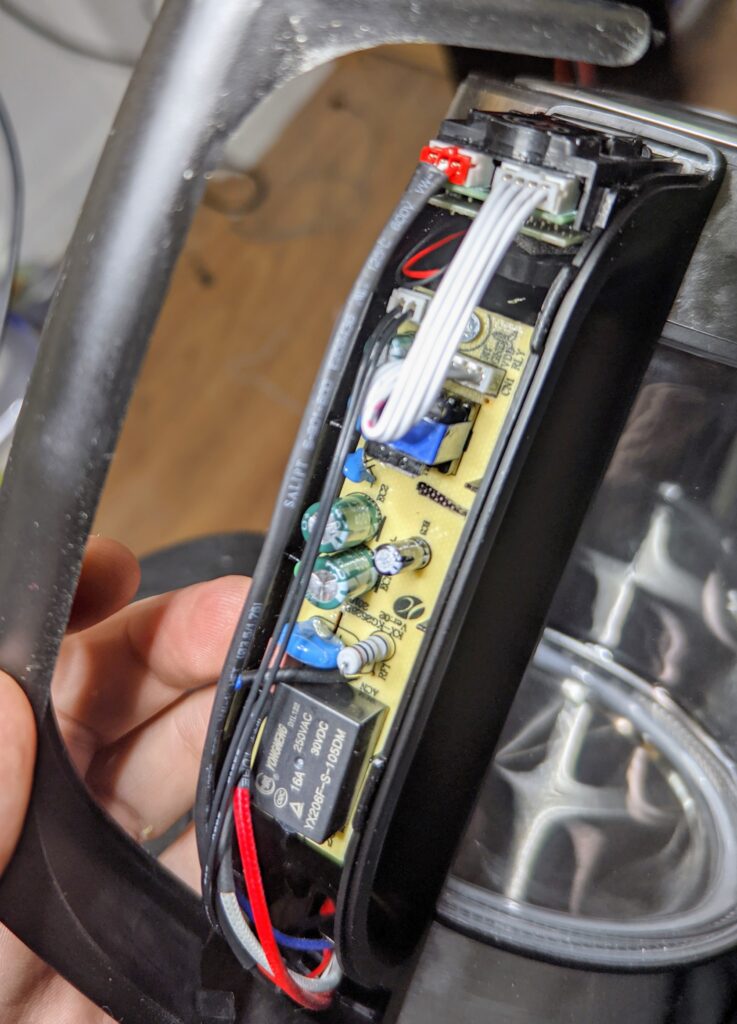
- Everything is contained on a couple of boards (piggybacked) in the top of the handle, and it is relatively easily removed to work on. The MCU is on the top board with the touch switches, LEDs etc and TYWE3S on the bottom board. There is also a mains board with relay etc in the hangle, but you don’t need to touch that.
- I separated the two boards (which means desoldering 4 pins) so the serial to the MCU was broken then tacked wires on the TYWE3S to flash it. This I found was probably the easiest way, as the MCU wasn’t easily accessible.
Photos
(More photos at the end)
Order of actions
- Pry off the plastic handle cover (just needs a spudger, easy to remove)
- Unplug the two plugs that go to the control board set
- Pry out the side clips and pull the board holder out (away from the jug) – it slides out once the clips are out of their holes
- Prise the two boards out of the plastic holder
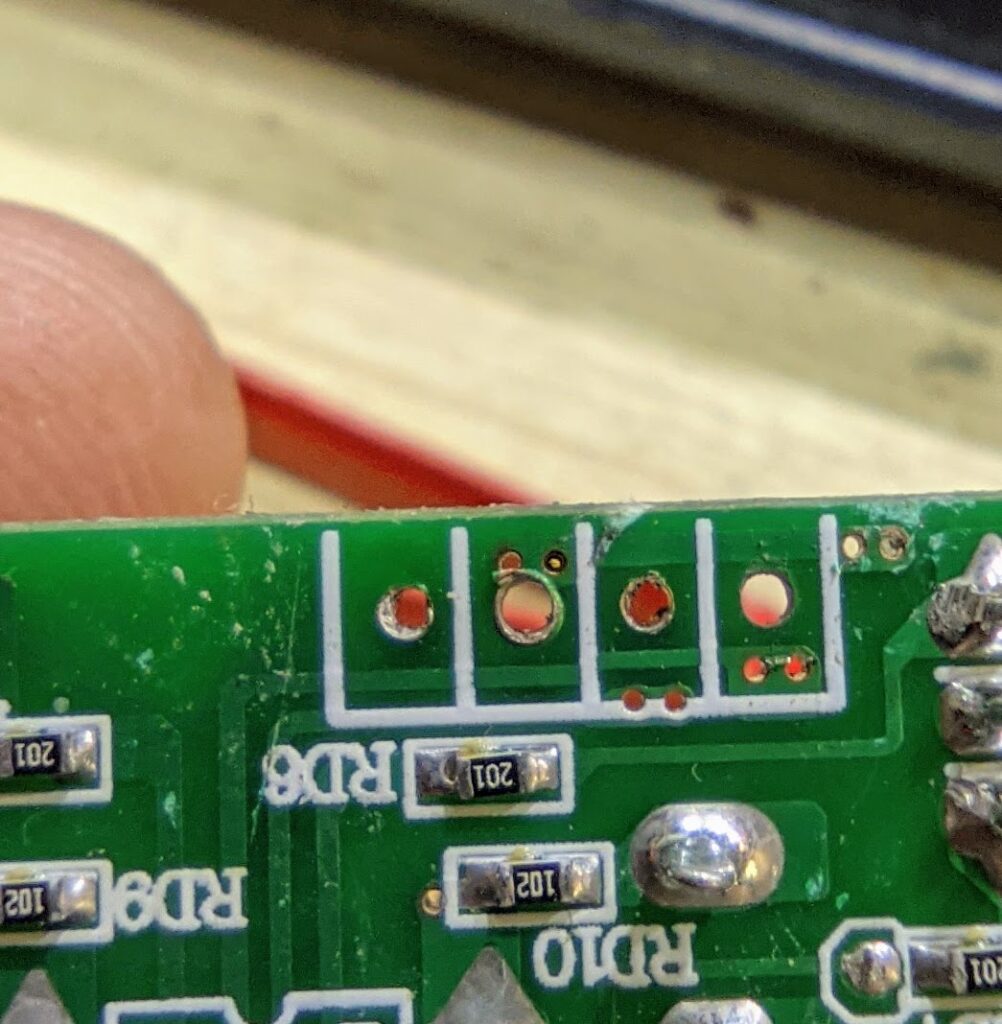
- Desolder the 4 pins holding the two boards together (might take a bit of work with a solder sucker and/or desolder wick)
Additional Link: https://community.home-assistant.io/t/kogan-1-7l-smart-kettle/209527/19 - Solder some wires to the TYWE3S board (Tx,Rx,3.3V,GND,GPIO0) using this guide https://tasmota.github.io/docs/devices/TYWE3S/
- Flash tasmota with an FTDI and Tasmotizer or similar method.
- re-solder the pins between the two boards and reassemble.
- note that the buzzer on mine had double sided tape on it, but they didn’t bother sticking it to anything. Now is a good time to stick it to the back of the board somewhere (see pic)
Tasmota Config
This is the Tasmota config I used:
{"NAME":"Kogan Kettle","GPIO":[255,107,255,108,255,255,0,0,255,255,255,255,255],"FLAG":0,"BASE":54}The template on Github seems to be wrong as at Oct 2021, all the 1s should be 255s I suspect (255 is user, 1 is DHT11)
https://github.com/arendst/Tasmota/blob/development/TEMPLATES.md
However the template on the Blakadder Tasmota database seems to be correct (at October 2021)
https://templates.blakadder.com/kogan-KASMCDSKTLA.html
Be sure you give the tasmota command below to publish all Tuyareceived data to topic.:
setoption66 1 Home Assistant Config
Some of the templates found on the internet for HA were a bit confusing (especially having not used Jinja2 templating before, but this is what I eventually managed to get working for reading temp, switching on and off and keeping the kettle in its various warm modes.
Also, in the value template , ensure the sensor name matches your sensor name/unique ID. If you don’t it will try and read values from TuyaReceived and they won’t match (and therefore show ‘Unknown’ every few seconds, rather than just reshow the current sensor value)
Obviously these go in configuration.yaml , or other files if you have a more complex HA setup.
This got me started
https://community.home-assistant.io/t/kogan-smart-kettle/165466/11
Weirdly, I was a bit stumped when I copied some configuration from a HA post, and eventually found there must have been a unicode or similar problem with the degree symbol. Looks like it was the capital C for celsius and was a different character set or symbol. This prevented the jinja2 matching of the dropdown input selects with the automation to publish to MQTT. You sould be ok to copy/paste from here.
Read Temperature
Get the current temperature value as sensor.kettle_temp. Remember the MQTT state and availability topic will depend on what name you have assigned to your Tasmota device. (Mine being tasmo-kkettle-3773-portable )
You will need to use MQTT availability, otherwise values go on/offline.
sensor:
- platform: mqtt
  unique_id: kettle.temp
  name: "Kettle Temperature"
  state_topic: "tele/tasmo-kkettle-3773-portable/RESULT"
  availability_topic: "tele/tasmo-kkettle-3773-portable/LWT"
  payload_available: "Online"
  payload_not_available: "Offline"
  value_template: >
    {% if value_json.TuyaReceived['5'].DpIdData %}
      {{ value_json.TuyaReceived['5'].DpIdData | int(base=16) }}
    {% else %}
      {{ states('sensor.kettle_temp') }}
    {% endif %}
  unit_of_measurement: "°C"
Switch On and Off
Simple switch to turn it off and on (yes, the state is reflected back via MQTT). The kettle obviously still has its standard kettle functionality, i.e. if you turn if on, it will turn off when boiled, and I assume if there is no water in it it will switch off pretty quickly too (I’m not testing that…)
switch:
  - platform: mqtt
    name: kettle
    unique_id: kettle.power
    state_topic: "stat/tasmo-kkettle-3773-portable/POWER"
    command_topic: "cmnd/tasmo-kkettle-3773-portable/POWER"
    availability_topic: "tele/tasmo-kkettle-3773-portable/LWT"
    payload_on: "ON"
    payload_off: "OFF"
    payload_available: "Online"
    payload_not_available: "Offline"
    optimistic: false # Don't really need this with Availability topic
    retain: false
Keep Kettle Warm Selections
Input select and automation to set the TuyaSend4 values to keep the kettle warm. The payload command is mapped for each of the dropdown selects.
input_select:
  kettle_set:
    name: Keep Kettle Warm
    initial: "OFF"  # The initial value is the first one in the list anyway
    options:
    - "OFF"
    - "40°C"
    - "50°C"
    - "60°C"
    - "80°C"
    - "90°C"
Home Assistant Automation
Again, these go in automations.yaml , unless you have a more complex HA configuration setup (I store each of my automations in a seperate yaml file)
Note that some TuyaSend4 values listed elsewhere on the internet for the keep warm temps were one value out for each temperature (also not there is NO keep warm value for 70 degrees). it is possible that some kettle models or firmware is different.
Keep the kettle warm
- id: set_the_kettle
  initial_state: true   # Automation is enabled on restart
  alias: Set the Kettle
  trigger:
    entity_id: input_select.kettle_set  # This must match the input_select name
    platform: state
  action:
    service: mqtt.publish
    data:
      topic: cmnd/tasmo-kkettle-3773-portable/TuyaSend4
      payload: '{% set mapping = { "OFF":"102,5", "40°C":"102,0",
        "50°C":"102,1", "60°C":"102,2", "80°C":"102,3",
        "90°C":"102,4" } %} {% set dta = trigger.to_state.state %}
        {{ mapping[dta] }}
        '
Some Potentially Relevant Links
- https://templates.blakadder.com/kogan-KASMCDSKTLA.html
- https://community.home-assistant.io/t/kogan-1-7l-smart-kettle/209527
- https://community.home-assistant.io/t/kogan-smart-kettle/165466
- https://community.openhab.org/t/kogan-1-7l-smart-glass-kettle-running-tasmota/106043
- https://tasmota.github.io/docs/TuyaMCU-Devices/
- https://www.ozbargain.com.au/node/499455?page=2
Photo Gallery


Awesome article, thank you! That took a lot of work and it’s appreciated
Hey thanks, hopefully it was helpful