Flashing a Mi Home 1S LED Desk Lamp with ESPHome
Changes
2024-09-06 V1.1 minor change in esphome yaml to fix the way it handles efuse
2024-09-06 V1.0 First version
Summary
NOTE: see 1.1 change. Based on this post
https://community.home-assistant.io/t/xiaomi-mi-led-desk-lamp-1s-error-integration/787346
I found that this Xiaomi Lamp had an esp32 in it and could pretty easily be flashed with ESPHome. I always like commercial products that can be reflashed with open source and non cloud based firmware, so thought it might be a useful addition to my work desk. This is a pretty low effort product to flash.
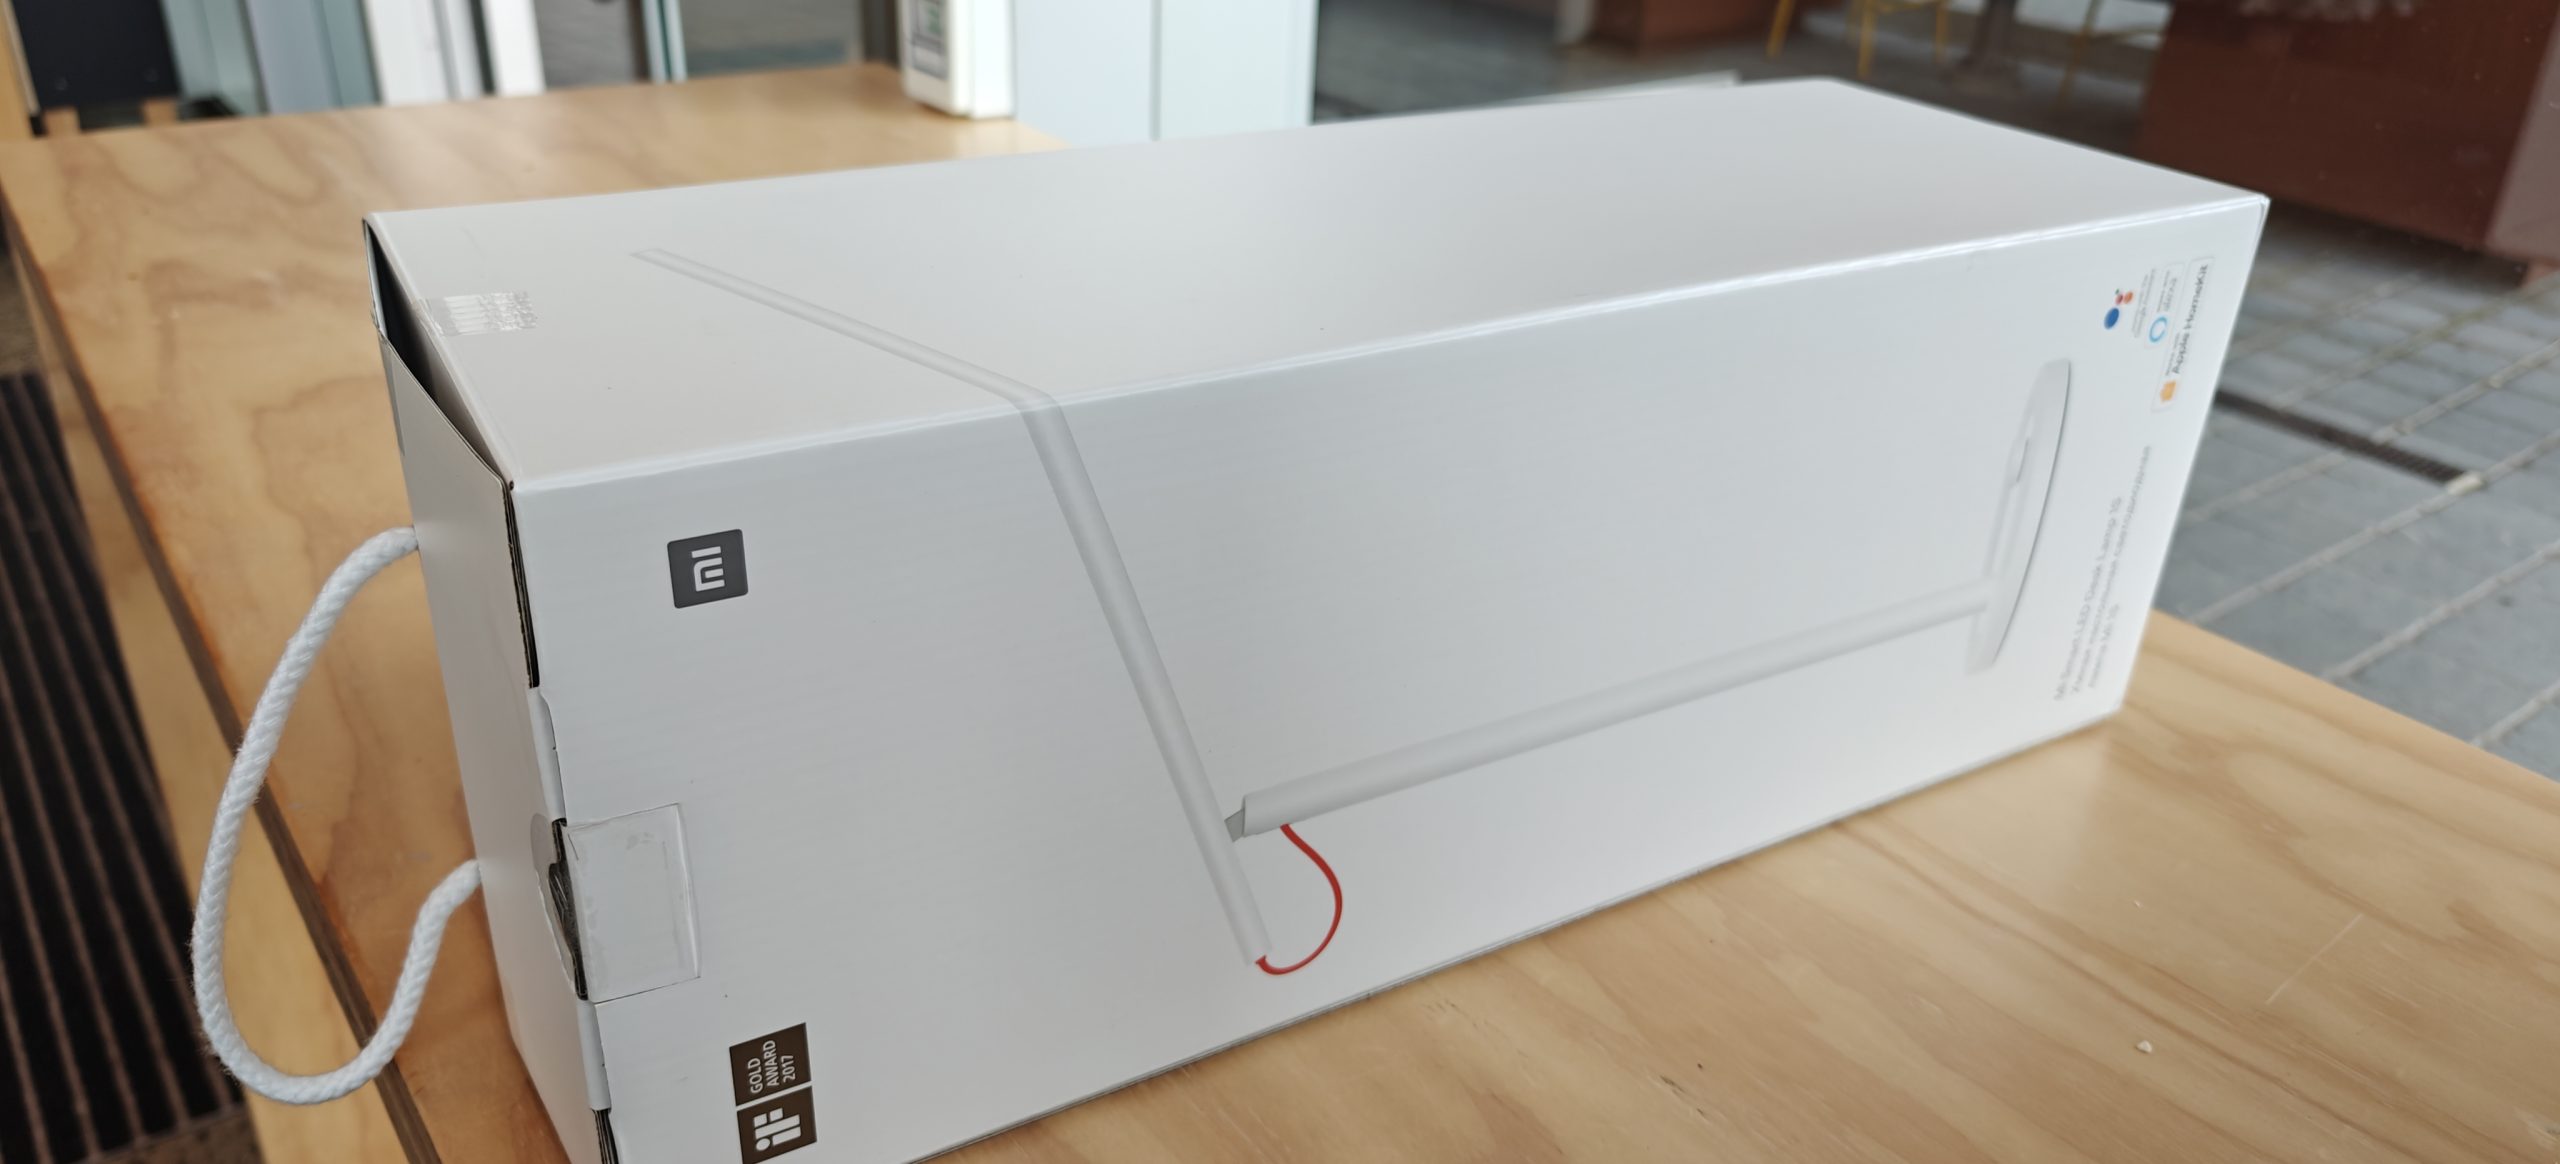
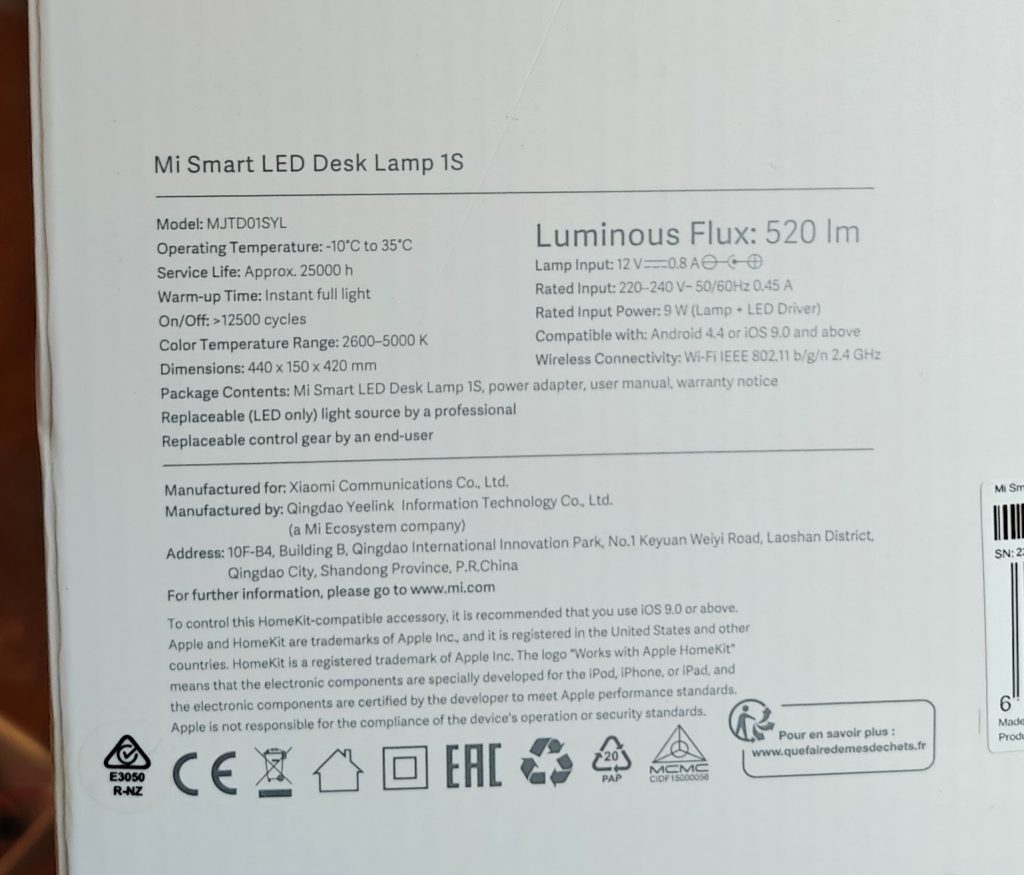
The lamp is just a bar of LEDs (warm white and cool white) on a stand, and you can tilt the bar up and down. To move the bar sideways, you need to spin the whole base. The bar can nicely bow down completely if you wan it out of the way (it comes with a little foam clip to clamp the arm to the stand for transport/packing)
I purchased the lamp from PB Tech in NZ for around NZ$70, but they have had it cheaper and on special. There are other Xiaomi lamps, including the smart pro with a higher lumen output, but I haven’t attempted looking inside one of those.
Process
Opening up the lamp
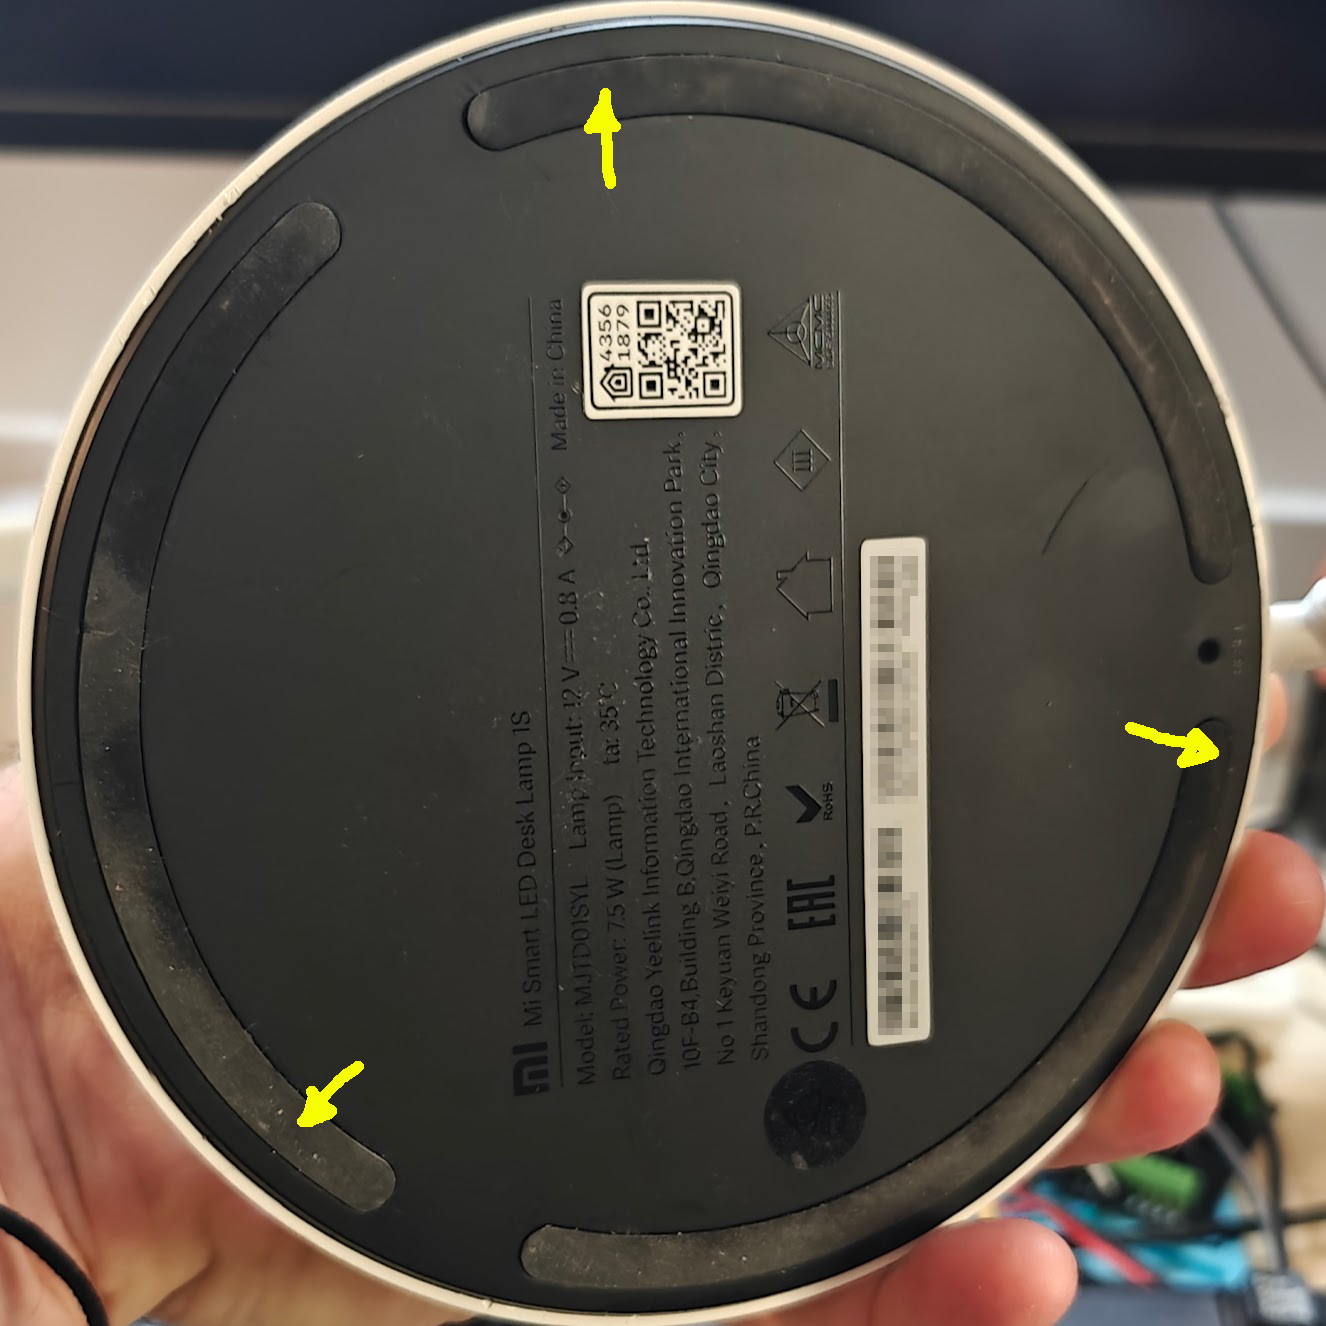
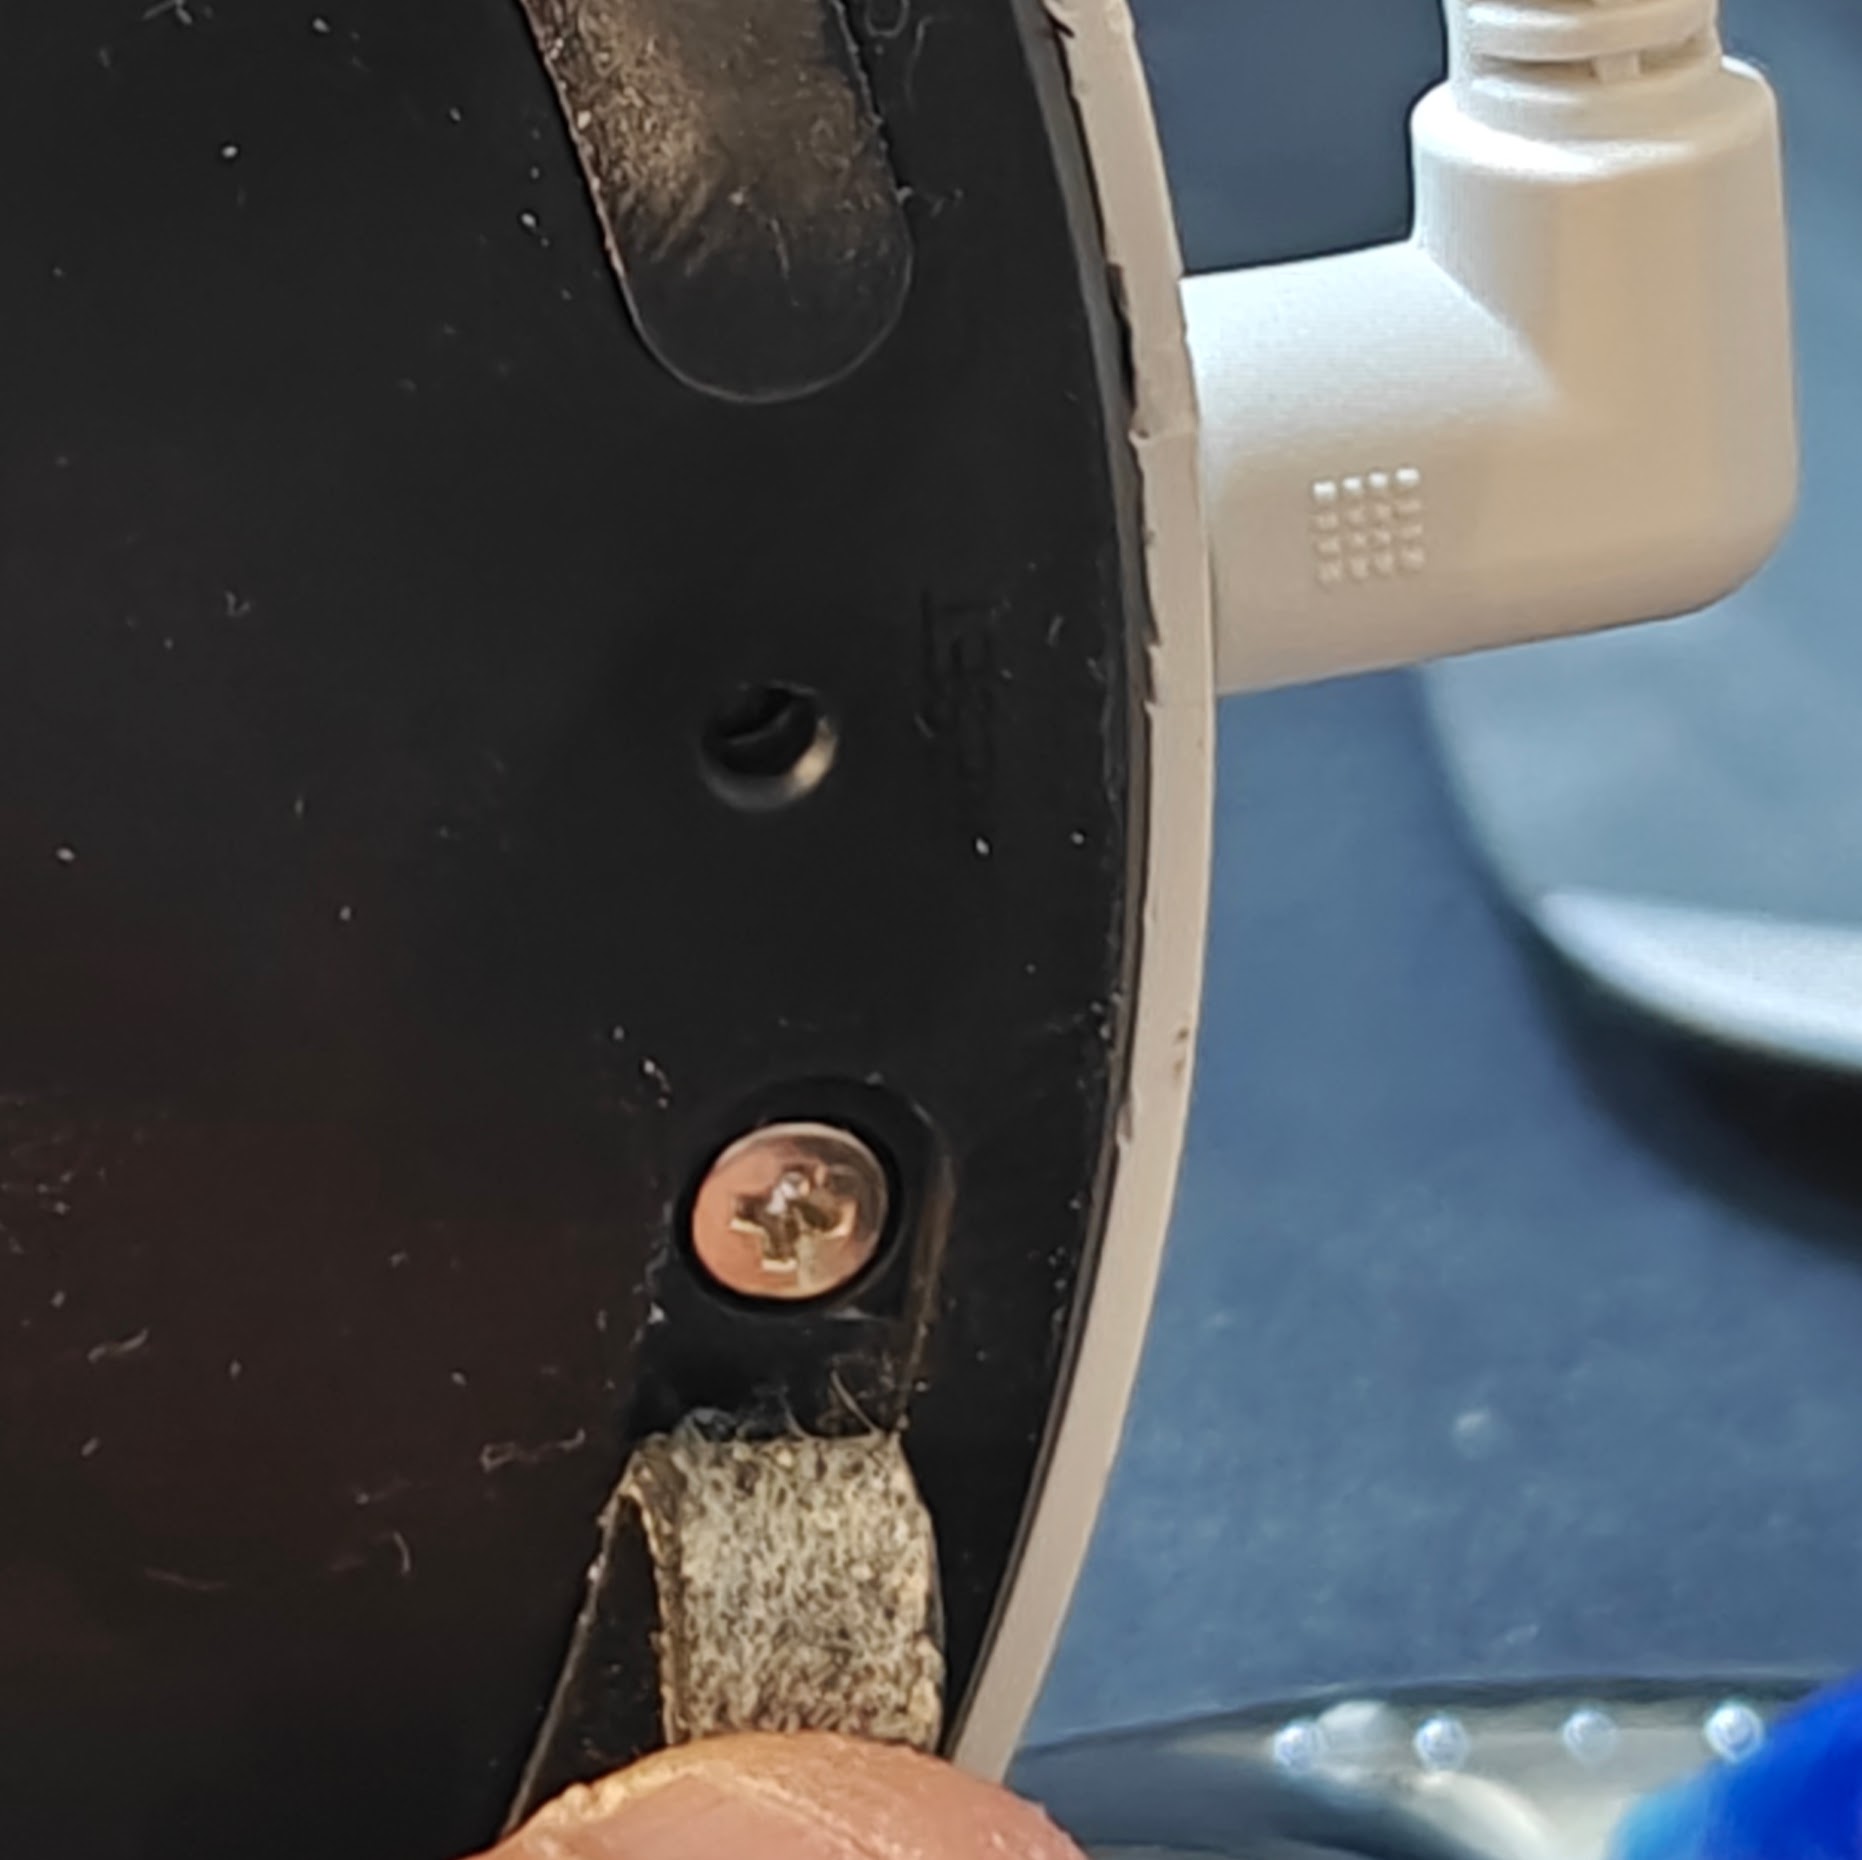
It is pretty easy to open up, but you need to find the 3 Philips head screws which are under the rubber foot strip. Have a look at the images to see the layout and prise up the rubber in the areas needed. It should just stick back down by itself when finished.
The first screw is just to the right of the power entry and the other two are spaced evenly as thirds.
The hole directly in line with the power entry is for reset.

Connecting up to USB serial
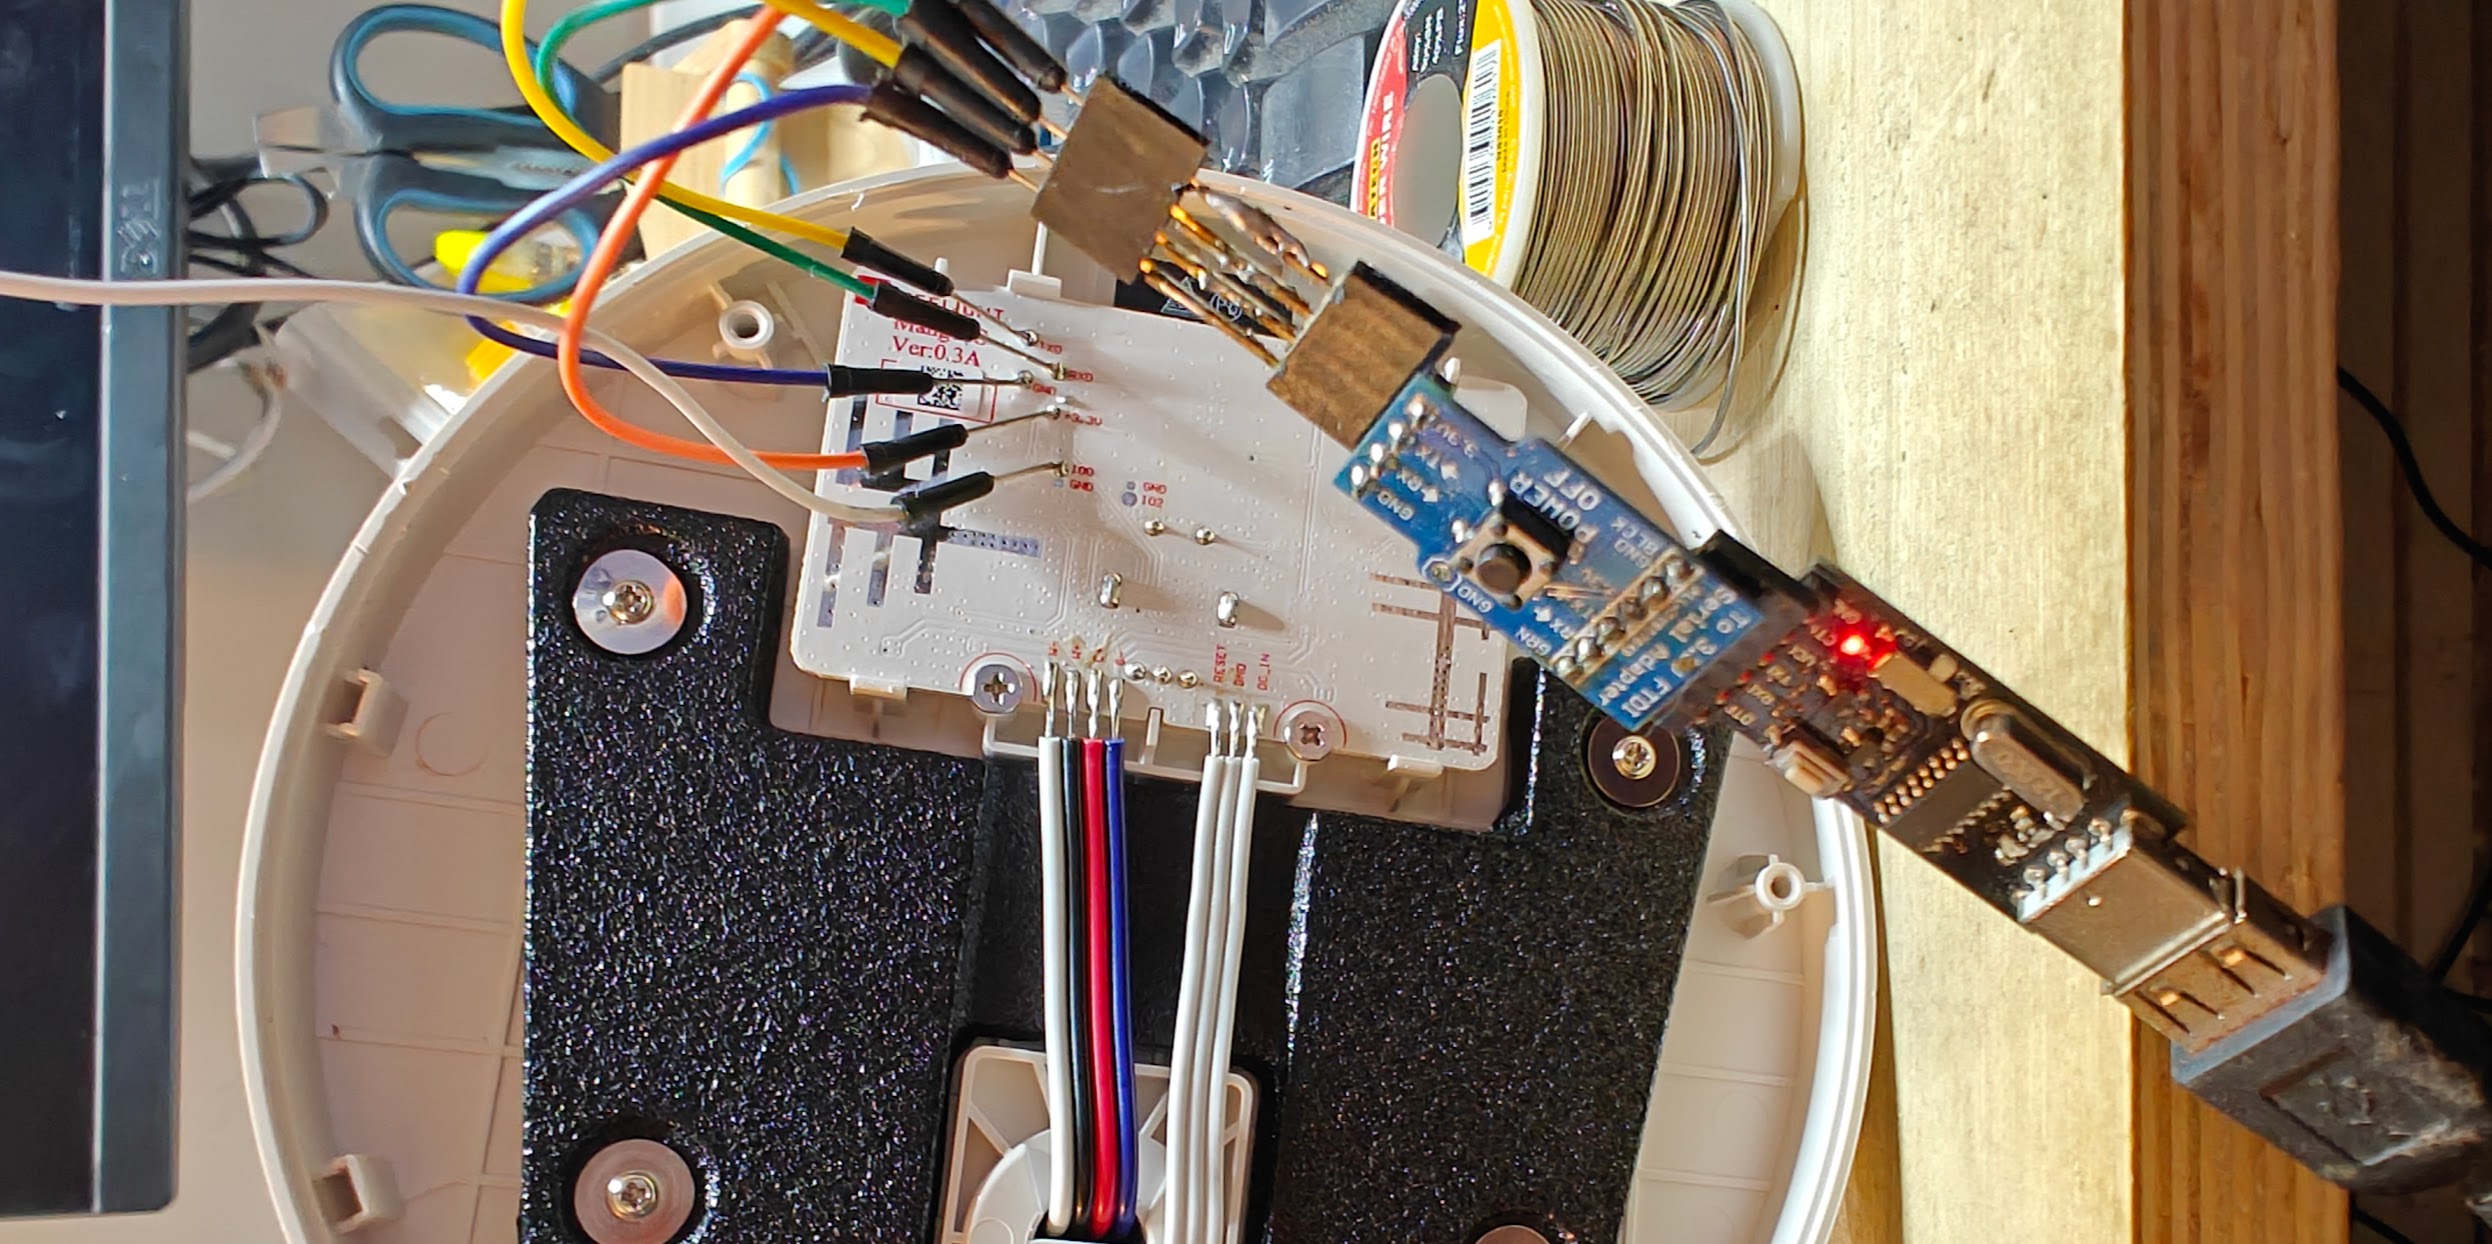
Use your usual goto method for connection up a usb to serial adapter or sometimes called a FTDI adapter.
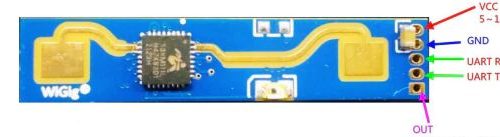
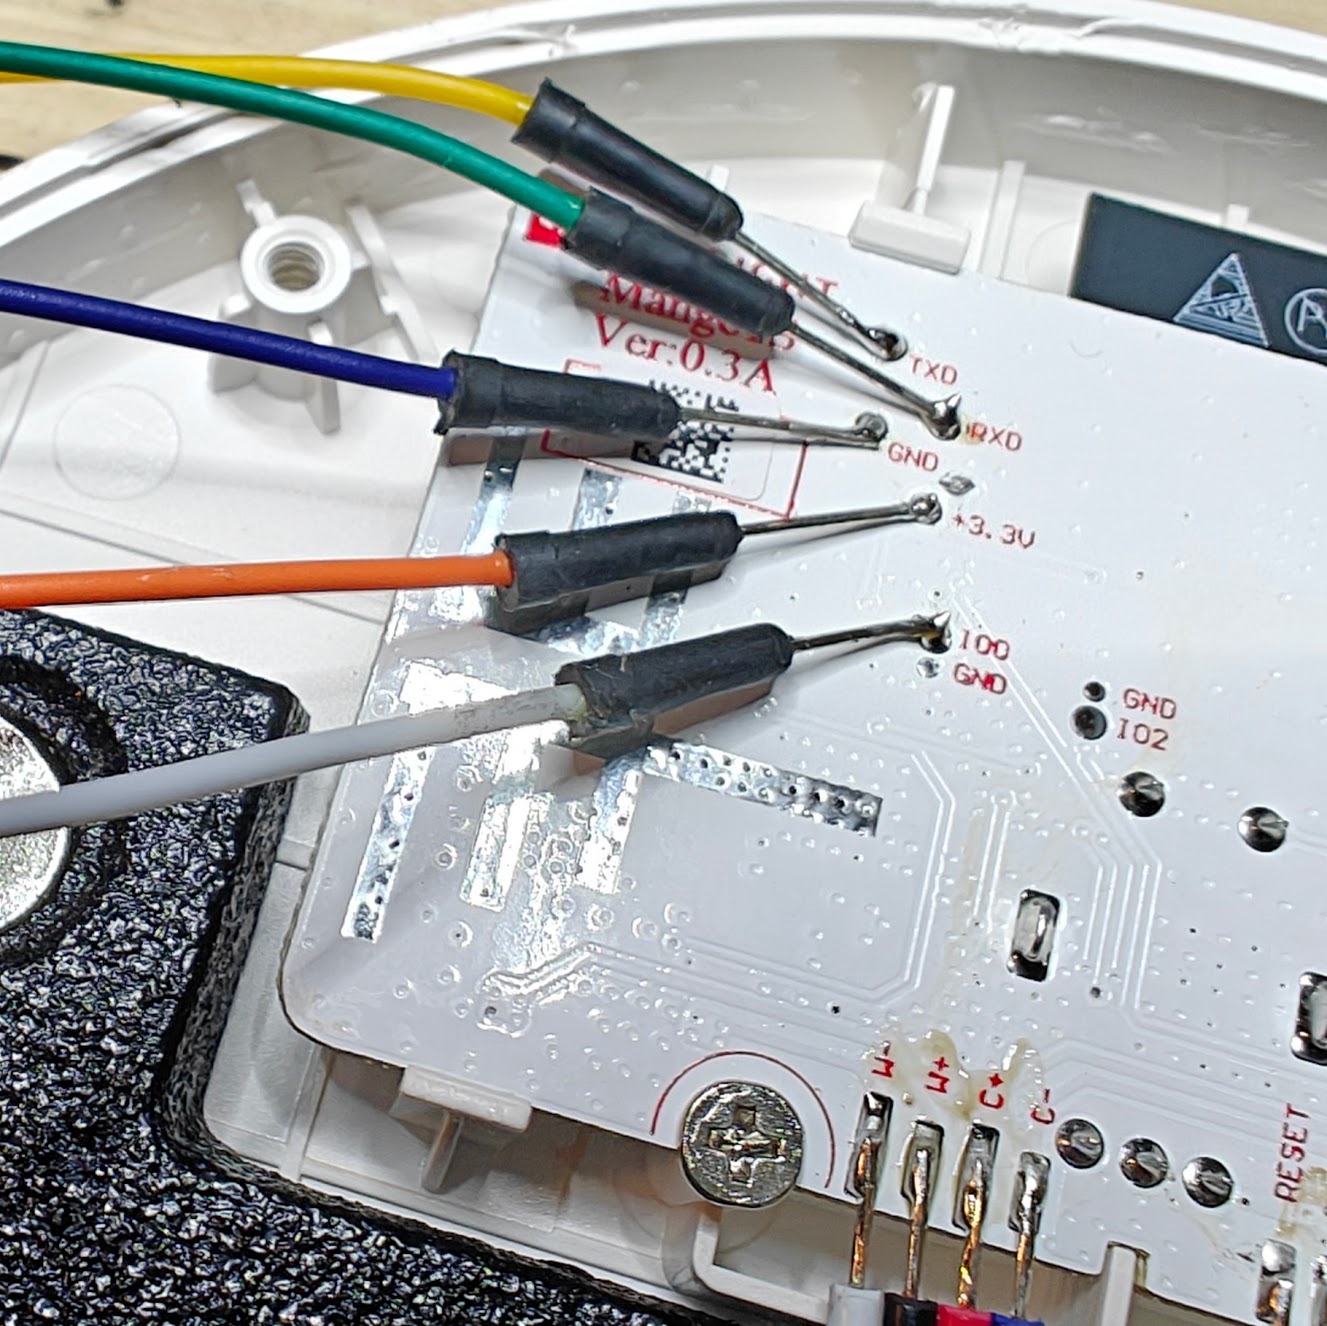
The pins you’ll need are all nicely exposed and labelled on the back of the board so you don’t need to remove anything at all once the back cover is off.
I soldered up wires to +ve, GND, TX, RX, and D0. I wasn’t sure whether I’d need D0 for putting the chip into flash mode, so I soldered a wire on anyway. Turns out I did.
I like to use this little module from superhouse which was designed for sonoff devices, but I find it handy as it brings the 4 needed pin to a single row header. I also made a female to female header socket from a couple of pin headers.

Flashing ESPHome
Build your ESPHome yaml file (mine is below … which is pretty heavily commented) and use a tool such as ESP Home Web to flash it to your esp32.
I tried one flash and it wouldn’t communicate, but holding the D0 wire to GND and restarting the esp32 with the power button on the serial adapter seemed to put it into flash mode and it worked on the second try.
Obviously just watch which way around your serial pins are connected, TX -> RX and RX -> TX.
Finishing up
- Test that the unit communicates to your Home Assistant and/or MQTT setup.
- Test the functions are working:
- The light should switch on and off with a press and release of the knob, and turning the knob should ramp the output up and down.
- Colour temp can be changed by pressing down the knob and turning it at the same time (not sure what the original factory firmware did)
- Also the functions can obviously be changed from the head end.
- Unsolder the temporary pins/wires for flashing.
- Screw the base back on and press back the rubber foot strip.
ESPHome YAML
The original yaml I worked from I found here. Thanks to the person who did the initial work to figure out the I/O.
#############################################
#############################################
# Mi Smart LED Desk Lamp 1S
# ESP32, LED Strip with variable white colour temp, rotary encoder
# https://www.mi.com/global/product/mi-led-desk-lamp-1s/
#############################################
#############################################
#############################################
# SECRETS
# Secrets file is usually at config/secrets.yaml
# or config/esphome/secrets.yaml
# depending on your setup with HA
#############################################
# SECRETS FILE needs these specific secrets:
# esp-midesklamp1s_api_key
# esp-midesklamp1s_ota_pass
# esp-midesklamp1s_static_ip (Optional)
# esp-midesklamp1s_gateway (Optional)
# esp-midesklamp1s_subnet (Optional)
#
# SECRETS FILE needs these generic Secrets:
# wifi_ssid
# wifi_password
# fallback_ap_password
# mqtt_server
# mqtt_username
# mqtt_password
# web_server_username (Optional)
# web_server_password (Optional)
#############################################
#############################################
# VARIABLE SUBSTITUTIONS
# Give the device a useful name & description here
# and change values accordingly.
#############################################
substitutions:
device_name: esp-midesklamp1s
friendly_name: "Mi 1S Lamp Office"
description_comment: "Office Desk Lamp with variable white colour temp and rotary encoder for brightness"
# if NOT using a secrets file, just replace these with the passwords etc (in quotes)
api_key: !secret esp-midesklamp1s_api_key # unfortunately you can't use substitutions in secrets names
ota_pass: !secret esp-midesklamp1s_ota_pass # unfortunately you can't use substitutions in secrets names
wifi_ssid: !secret wifi_ssid
wifi_password: !secret wifi_password
fallback_ap_password: !secret fallback_ap_password
# Add these if we are giving it a static ip, or remove them in the Wifi section
#static_ip_address: !secret esp-midesklamp1s_static_ip
#static_ip_gateway: !secret esp-midesklamp1s_gateway
#static_ip_subnet: !secret esp-midesklamp1s_subnet
mqtt_server: !secret mqtt_server
mqtt_username: !secret mqtt_username
mqtt_password: !secret mqtt_password
mqtt_topic: "esphome" # main topic for the mqtt server, call it what you like
web_server_username: !secret web_server_username
web_server_password: !secret web_server_password
update_time: 60s # update time for for general temp sensors etc
#############################################
# ESPHome
# https://esphome.io/components/esphome.html
#############################################
esphome:
name: ${device_name}
friendly_name: ${friendly_name} # appears as main name on the esphome page in HA
comment: ${description_comment} # appears as comment on the esphome page in HA
#min_version: 2024.6.0
#############################################
# ESP Platform and Framework
# https://esphome.io/components/esp32.html
#############################################
esp32:
board: esp32doit-devkit-v1
framework:
type: esp-idf # Suggest using the ESP-IDF Framework. Changing from 'arduino' to 'esp-idf' needs a cabled flash to correct partitions
version: recommended # recommended, latest or dev
# these just for the esp32doit-devkit-v1 and Mi S Lamp
sdkconfig_options:
CONFIG_FREERTOS_UNICORE: y
advanced:
ignore_efuse_mac_crc: true
ignore_efuse_custom_mac: true #added in 2024-11 as a fix https://community.home-assistant.io/t/xiaomi-mi-led-desk-lamp-1s-error-integration/787346
#############################################
# ESPHome Logging Enable
# https://esphome.io/components/logger.html
#############################################
logger:
level: INFO # INFO Level suggested, or DEBUG for testing
#baud_rate: 0 #set to 0 for no logging via UART, needed if you are using it for other serial things (eg PZEM)
#esp8266_store_log_strings_in_flash: false
#tx_buffer_size: 64
#############################################
# Enable the Home Assistant API
# https://esphome.io/components/api.html
#############################################
api:
encryption:
key: ${api_key}
#############################################
# Enable Over the Air Update Capability
# https://esphome.io/components/ota.html?highlight=ota
#############################################
ota:
- platform: esphome
password: ${ota_pass}
#############################################
# Safe Mode
# Safe mode will detect boot loops
# https://esphome.io/components/safe_mode
#############################################
safe_mode:
#############################################
# Wifi Settings
# https://esphome.io/components/wifi.html
#
# Power Save mode (can reduce wifi reliability)
# NONE (least power saving, Default for ESP8266)
# LIGHT (Default for ESP32)
# HIGH (most power saving)
#############################################
wifi:
ssid: ${wifi_ssid}
password: ${wifi_password}
#power_save_mode: LIGHT #https://esphome.io/components/wifi.html#wifi-power-save-mode
#manual_ip: #optional static IP address
#static_ip: ${static_ip_address}
#gateway: ${static_ip_gateway}
#subnet: ${static_ip_subnet}
ap: # Details for fallback hotspot in case wifi connection fails https://esphome.io/components/wifi.html#access-point-mode
ssid: ${device_name} fallback AP
password: ${fallback_ap_password}
ap_timeout: 30min # Time until it brings up fallback AP. default is 1min
#############################################
# Web Portal for display and monitoring
# Turning this off is probably a good idea to save resources.
# https://esphome.io/components/web_server.html
#############################################
#web_server:
# port: 80
# auth:
# username: ${web_server_username} #probably a good idea to secure it
# password: ${web_server_password}
#############################################
# MQTT Monitoring
# https://esphome.io/components/mqtt.html?highlight=mqtt
# MUST also have api enabled if you enable MQTT
#############################################
mqtt:
broker: ${mqtt_server}
topic_prefix: ${mqtt_topic}/${device_name}
username: ${mqtt_username}
password: ${mqtt_password}
discovery: True # enable entity discovery (true is default)
discover_ip: True # enable device discovery (true is default)
#############################################
# Time Component
# https://esphome.io/components/time/index.html#time-component
# Sync with HA Time. Probably not really necessary.
#############################################
time:
- platform: homeassistant
id: homeassistant_time
#############################################
# Text Sensors
# https://esphome.io/components/text_sensor/index.html
#############################################
text_sensor:
- platform: version
name: ${friendly_name} Version
- platform: wifi_info
ip_address:
name: ${friendly_name} IP Address
#############################################
# General Sensors
# https://esphome.io/components/sensor/index.html
#############################################
sensor:
- platform: uptime # Uptime for this device
name: ${friendly_name} Uptime
update_interval: ${update_time}
- platform: wifi_signal # Wifi Strength
name: ${friendly_name} Wifi Signal
update_interval: ${update_time}
# Mi Desk Lamp 1S Configuration
- platform: rotary_encoder
id: rotation
pin_a: GPIO27
pin_b: GPIO26
resolution: 2
on_value:
then:
- if:
condition:
# Check if Button is pressed while rotating
lambda: "return id(button).state;"
then:
# If Button is pressed, change CW/WW
- lambda: |-
auto min_temp = id(light1).get_traits().get_min_mireds();
auto max_temp = id(light1).get_traits().get_max_mireds();
auto cur_temp = id(light1).current_values.get_color_temperature();
auto new_temp = max(min_temp, min(max_temp, cur_temp + (x*10)));
auto call = id(light1).turn_on();
call.set_color_temperature(new_temp);
call.perform();
else:
# If Button is not pressed, change brightness
- light.dim_relative:
id: light1
relative_brightness: !lambda |-
return x / 25.0;
# Reset Rotation to 0
- sensor.rotary_encoder.set_value:
id: rotation
value: 0
#############################################
# Binary Sensors
# https://esphome.io/components/binary_sensor/index.html
#############################################
binary_sensor:
- platform: gpio
id: button
pin:
number: GPIO33
inverted: True
mode: INPUT_PULLDOWN
on_click:
then:
- light.toggle:
id: light1
transition_length: 0.2s
#############################################
# Base Output Component
# https://esphome.io/components/output/index.html#base-output-configuration
#############################################
output:
- platform: ledc # Cool White LED PWM
pin: GPIO2
id: output_cw
frequency: 40000Hz
power_supply: power
- platform: ledc
pin: GPIO4 # Warm White LED PWM
id: output_ww
power_supply: power
frequency: 40000Hz
#############################################
# Power Supply Component
# https://esphome.io/components/power_supply.html#power-supply-component
#############################################
power_supply:
- id: power
pin: GPIO12
enable_time: 0s
keep_on_time: 0s
#############################################
# Light Component
# https://esphome.io/components/light/index.html#light-component
#############################################
light:
- platform: cwww # https://esphome.io/components/light/cwww.html#cold-white-warm-white-light
id: light1
default_transition_length: 0s
constant_brightness: true
name: "${friendly_name} Light"
cold_white: output_cw
warm_white: output_ww
cold_white_color_temperature: 4800 K
warm_white_color_temperature: 2500 K # 2500k is the original value of the lamp. To correct binning for 2700k to look more like 2700k use 2650k instead
restore_mode: ALWAYS_ON
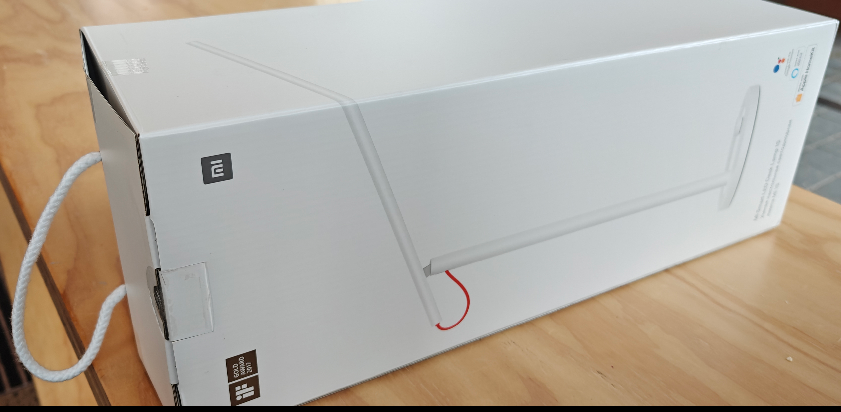
gamma_correct: 0Lamp Specs on the box
Improvements
Some improvements I’ll potentially make to the yaml:
- Ramp up and down of the LED when switching it on/off etc is always nicer than an abrupt change, so I’ll likely lengthen this.