Xiaomi BLE LCD Thermometers in Home Assistant
Summary
Using esphome in an ESP32 dev board to pull the values of some LCD temp sensors (with BLE) and integrate them into home assistant.
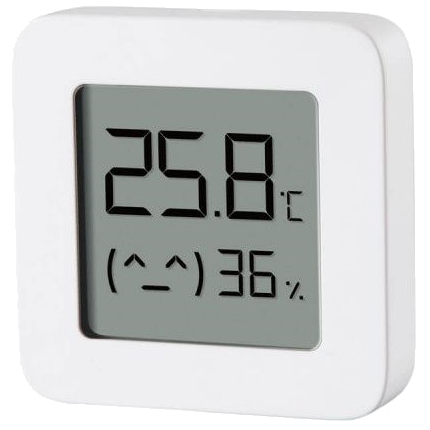
https://www.aliexpress.com/item/4001110925366.html
“XIAOMI Mijia Bluetooth Thermometer 2 Wireless Smart”
Sensors are around NZ$8.50 incl GST each, when I bought 4 of them.
You need an ESP32 board such as the ESP32 D1 Mini . I found a couple of ESP32 boards cheap at the local hobbiest store (Jaycar Duinotech ESP32) but had a couple of issues with them that I solved here.
Once set up as below, the sensors will appear in the ESPHome monitoring web page for the ESP32 device, and also and be integrated into Home Assistant as individual temp/humidity devices.
Method
I followed this youtube howto from a year or so back. It is “mostly” correct.
Part 1 https://www.youtube.com/watch?v=Be5zWukjV9I&t;
Part 2 https://www.youtube.com/watch?v=l5ea7lQWpMk
Device Configuration Instructions
- Turn the units on (do this one at a time if you have multiple)
- Go to the TELink Flasher page https://pvvx.github.io/ATC_MiThermometer/TelinkMiFlasher.html. I suggest doing this on your phone as it needs to be a device with bluetooth.
- Use the tool to connect to the device, and grab the Mi Keys. Note them down. You won’t need them if flashing the custom ATC firmware (this is a better way), but keep for future if ever needed. It is possible though to do this with the stock Xiaomi firmware.
- Flash the latest custom ATC firmware (it is already loaded in the web page)
- Check the website below if you want to know what the settings do (eg you can change to Fahrenheit, remove the little comfort smiley face, and extend the battery life with less reporting)
https://github.com/atc1441/ATC_MiThermometer - For Advertising type, choose “MIJIA (Mi Home)”. Previous notes (including the howto youtube video) said “Mi” or “Mi Like”, but this works for me.
- Take note of the new name of the device, it will be something like ATC_91E1BB (which is the end of the MAC address)
ESPHome Setup Instructions
- Use ESPHome to flash the ESP32 (instructions, including the Home Assistant integration is elsewhere, but it is pretty simple once the concepts are grasped)
- An example (my esphome config file) is below. You as minimum need to remember the esp32_ble_tracker: line and one config for each sensor.
- Note that the Bindkey is a dummy key (with the ATC firmware you just need the dummy key – make one up)
- Put the MAC address for the device(s) and label the Temp/Humidity/Battery for each of the devices with unique names. The MACS all appear to start with A4:C1:38 (and then the rest is contained in the name). You can find the full MAC with the TELink page if needed.
ESPHome Config file
esphome:
  name: bttemps

esp32:
  board: nodemcu-32s

#  framework:
#    type: arduino

esp32_ble_tracker:

# Enable logging
logger:

# Enable Home Assistant API
api:
  encryption:
	key: "xxxxxxxxxxxxxxxxxxxxxxxxxxxxx"

ota:
  password: "xxxxxxxxxxxxxxxxxxxxxxxxxxxxxxxxxxxxxx"

wifi:
  ssid: !secret wifi_ssid
  password: !secret wifi_password

  # Enable fallback hotspot (captive portal) in case wifi connection fails
  ap:
	ssid: "BtTemps Fallback Hotspot"
	password: "xxxxxxxxxxxxxxxxxxxx"

captive_portal:

# Web server for monitoring and control
web_server:
  port: 80
  auth:
	username: user
	password: !secret web_server_password

# MQTT Monitoring
mqtt:
  broker: 192.168.1.256
  topic_prefix: esphome/bttemps
  username: username
  password: !secret mqtt_password

###################################################################################
## Help with Mi Bluetooth Temp Sensors
## Youtube Howto https://www.youtube.com/watch?v=l5ea7lQWpMk&t=0s
## https://pvvx.github.io/ATC_MiThermometer/TelinkMiFlasher.html
## https://esphome.io/components/sensor/xiaomi_ble.html?highlight=ble#lywsd03mmc
## Tasmota Info: https://tasmota.github.io/docs/Bluetooth/
###################################################################################

sensor:
  - platform: xiaomi_lywsd03mmc
	# ATC_121212
	mac_address: "A4:C1:38:12:12:12"
	#dummy bindkey
	bindkey: "e2f413da42899a0c1c8f3bfa17e4511d5"
	temperature:
	  name: "Fridge Temperature (BTTS01)"
	humidity:
	  name: "Fridge Humidity (BTTS01)"
	battery_level:
	  name: "Fridge Monitor Battery Level (BTTS01)"
  - platform: xiaomi_lywsd03mmc
	# ATC_343434
	mac_address: "A4:C1:38:34:34:34"
	#dummy bindkey
	bindkey: "e5f418daf699a0c188f7bf917e1565d8"
	temperature:
	  name: "Freezer Temperature (BTTS02)"
	humidity:
	  name: "Freezer Humidity (BTTS02)"
	battery_level:
	  name: "Freezer Monitor Battery Level (BTTS02)"
  - platform: xiaomi_lywsd03mmc
	# ATC_5A5A5A
	mac_address: "A4:C1:38:5A:5A:5A"
	#dummy bindkey
	bindkey: "eef418eaf69910c18843bfd17e4565d7"
	temperature:
	  name: "Lower Fridge Temperature (BTTS03)"
	humidity:
	  name: "Lower Fridge Humidity (BTTS03)"
	battery_level:
	  name: "Lower Fridge Battery Level (BTTS03)"
  - platform: xiaomi_lywsd03mmc
	# ATC_BCBCBC
	mac_address: "A4:C1:38:BC:BC:BC"
	#dummy bindkey
	bindkey: "eaf415daf699a0c188f3bfd17e4565d6"
	temperature:
	  name: "Lower Freezer Temperature (BTTS04)"
	humidity:
	  name: "Lower Freezer Humidity (BTTS04)"
	battery_level:
	  name: "Lower Freezer Monitor Battery Level (BTTS04)"
Notes:
- Remember the devices will only connect to one host at a time, so if it is connected to the ESP32 you can’t change parameters with the TELink app.
- I plan to use these for fridge/freezer monitoring… but yet to see if they will accurately report temps below zero or even function at those low temperatures