5 Steps to DIY Home Automation

You can spend thousands on home automation equipment. You could get yourself an ecosystem like Apple Homekit, Samsung Smart-Things, Control4 or many others, however with just some moderate techo skills you can set up or convert your home to pretty awesome home control with DIY.
My take on home automation is that it should be pretty much invisible. Things should do what you want them to do with little fuss, and when you need them done. You still want switches on walls for lights, and displays to show things such as temperature. Nobody wants to have to get a phone out just to switch their bedroom light on.
The way I suggest below has items hidden in walls, allows for home retrofit with not too much wall smashing or cable running, and having everything inside your home controlled by you means there is no network security risk or cloud service to rely on.
With any technical project you do need to have some form of technical competency. This especially is the case with home automation where it deals with mains (lighting/electrical) so ensure you are competent to do it and of course that your local regulations allow it. Also, doing the below will often require some basic soldering, and being comfortable with following instruction about how to upload firmware.
Step 1: Get some controllers
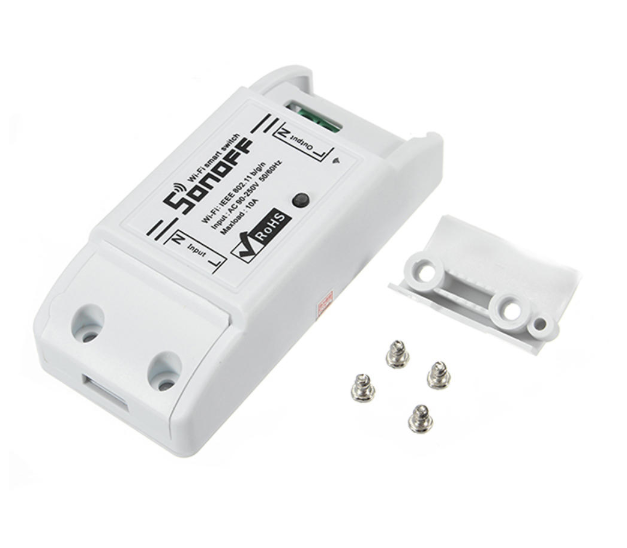
I love Zemismart light switches, and the various Sonoff products, which are are a cheap controller from Chinese company iTead. These companies both make great IoT or home automation modules. The majority of their WiFi products:
- Connect directly to the mains (no plugpacks or batteries)
- Have one or more relays in them to switch mains, and at least 10A switching
- Have wifi to connect to your home network
- Have some other connections to enable other sensors to connect (some you may have to wire into the board directly)
- Have a nice housing rather than just a bare board, and are electrically well designed
- Need no other supply (the low voltage for the electronics is all generated onboard from the mains)
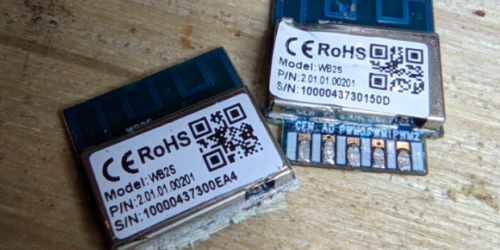
- and… most importantly, have standard, common esp8266 processors, so although they come with iTead’s firmware in them that will connect to their own cloud controlled apps etc, you can replace it with your own.
Step 2: Get some new firmware
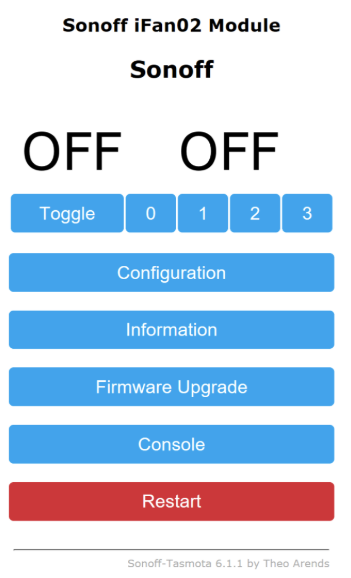
There are a few different projects to produce home automation controllers for products such as the Sonoff. One of the best of them is Tasmota. Tasmota is a great and easy replacement and is designed to fit as many features into the small memory space of the sonoff as possible. You can still use a sonoff as it comes from the factory, but you’ll need to use iTead’s phone app and cloud service.
Tasmota seems to support many different devices (not just sonoffs) and includes web control, MQTT control and other useful control functions. It is also one of the most well maintained, stable and reliable home automation firmware projects around.
Getting the firmware into the Sonoffs is not a difficult process, but in most cases will involve some simple soldering (not always), an FTDI device (eg this one) which are usually just a few $, and using some tools such as the Arduino IDE or this guide shows how to use the Atom text editor and PlatformIO
Tasmota is very full featured, and some will say quite bloated (compared to say ESPHome, which I also use) but you can actually use a lot of features in Tasmota without any of these additional Home Automation steps, and a bloated install does not generally impact the speed of operation. They have a scripting language inbuilt, can talk to each other directly (for some shared features) and have a fully comprehensive web interface for setup. You can even recompile Tasmota with some even more complex code for more added features.
Step 3: Get yourself an MQTT Server
Although not totally required (you can switch Tasmota devices on and off with various phone apps or via a web interface), MQTT is a standard and open way of getting home automation stuff talking together. There are actually commercial servers online that you can use too, but again, I prefer to keep it in house if you can so your devices aren’t talking across the insecure internet.
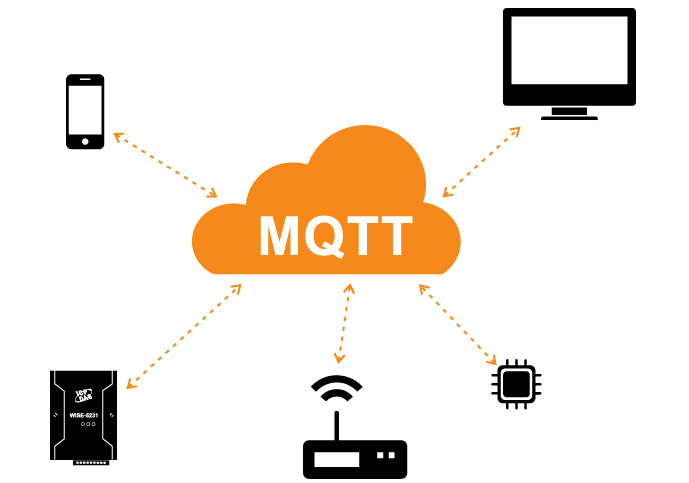
Think of an MQTT server as a box or database that all the devices talk to. You can make a switch that sets a field in the database to either on or off. This is not much use by itself, but imagine then you had a relay controlling your lights that was continually looking at this database field. When it saw ‘on’ it would change the relay and turn the lights on. Now imagine you can add another switch that does the same for two way control. And then an app on your phone that sets the same field so you can turn it on and off from bed. And now a sensor that detected how dark it was and set the field to ‘on’ automatically if it gets too dark. And now one that randomly changes the field every few hours when you were away on holiday. And… well you get the picture.
An MQTT server can be built on an always running PC or server that you have at home (eg a small intel NUC), but even more simply on a Raspberry Pi.
Step 4: Set up some Control Software
Again, not totally needed as if you have a whole bunch of things talking back to and reading from MQTT you already have a functioning home automation system. But you don’t yet have a lot of “smarts”.
What if you (in the above example) wanted to turn the light on when it got dark, but only if you were home. And then maybe switch it off again 3 hours later. You need some “control software” to set up these automated tasks.
There are many types of home automation control software available. Some run on Windows, or Macs, but my two favourites (free of course) are best to run again on an “always on” server… or again Raspberry Pi (even better, use the same one that the MQTT server is on). The couple I mostly recommend are:
Node Red
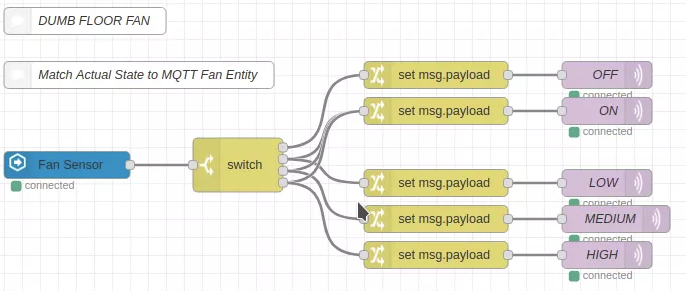
Node Red is a great an easy to use way of making Home Automation ‘rules’ or smart functionality. Rules are created graphically with blocks that can be dragged and dropped. I often use it to create control rules before I put them in to something like Home Assistant below, but there is no reason not to use this as your main automation tool.
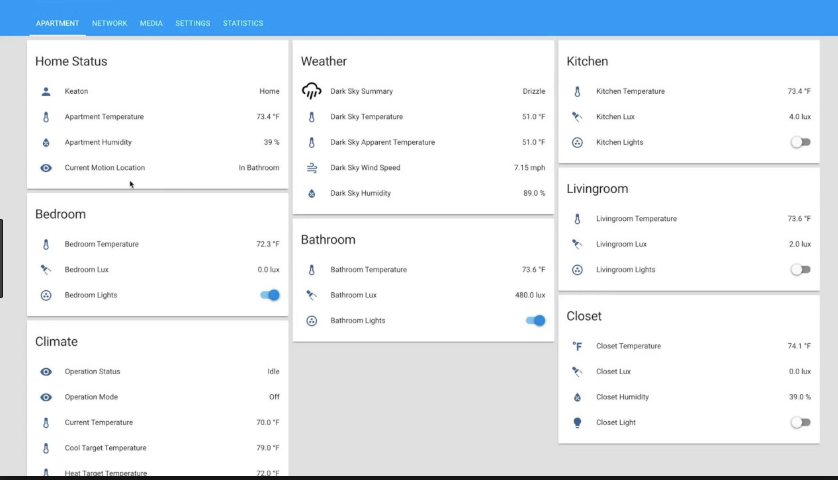
Home Assistant
Again, you can create complex rules and functions for your home automation and Home Assistant is more ‘script’ based with text files to allow you to do this. HA is useful if you have some (at least basic) programming experience, but the barrier to entry is reasonably low due to the vast numbers of ‘recipes’ already available in the community forums.
There is also no problem running multiple automation tools, I usually have both Node Red and Home Assistant running all the time.
Step 5: Build some client devices
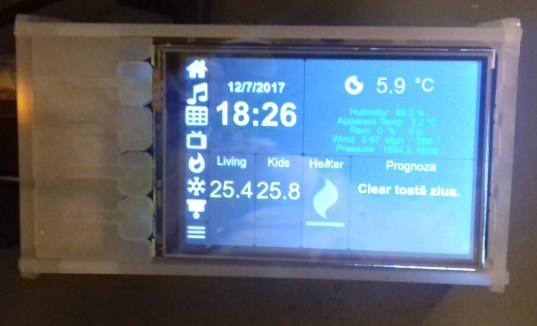
Finally, you really want a way for people to see information such as ‘what temperature the pool is’, or have some buttons knobs to ‘change the brightness of the home theatre lighting’.
This can be done with a combination of hardware (eg displays or knobs connected to controllers such as Sonoffs), or virtual buttons in a browser, phone app or wall mounted screens. All of these devices just query or input stuff live, from the MQTT database.
Some References:
- https://www.home-assistant.io/ Home assistant, MQTT and more easily installed on a Raspberry Pi.
- http://noderedguide.com/ Basic tutorials to get up and running with Node Red
- BRUH Automation Useful videos on how to set up and configure Home Assistant with various projects (No longer an active youtube poster, but still relevant videos)
- https://www.juanmtech.com/ A bunch of Home Assistant Tutorials
- Random Nerd Tutorials Some Home Automation project tutorials
- MQTT Setup How to set up the Mosquitto MQTT broker on linux
- Cloud MQTT A non-self hosted MQTT service
- Grafana Want to graph MQTT or home automation stuff over time? Grafana is a good option.