Dual Dashcam for the BYD Atto 3
Introduction
Dash cameras are great, and I like having them in all of our cars. The first one I installed was around 9 years ago and they have saved us a few times when involved in a fender-bender that wasn’t our fault, and really helped a couple of times when there has been a carpark ding. Insurance companies generally don’t question dashcam footage.
Our 2023 BYD Atto 3 has 5 cameras that I’m aware of, mainly for the 360 degree parking system, but only one is a recording dashcam (the one at the front top centre of the windscreen).
Although the Atto has a recording dashcam, I decided however that I’d install an aftermarket front and rear dashcam in the Atto.
The issues I have with the BYD factory dashcam:
- Recording is only at the front
I’m used to having a front and rear camera now, which is essential if you get hit from behind. - Archiving not simple
I like to have an easy to access button to save video or take a photo (in the Atto you can save video, but you need to go to the screen menus). - No Parking Record
The Atto camera doesn’t record when parked (only when the car is engaged), which fundamentally misses out on a great feature for any EV – it is so easy to power things continually from the large battery that is on hand. There are sparse rumours about having “Sentry mode” rolled out to the Atto one day in a firmware update (similar to Tesla’s parking recording), but I’m not holding my breath. - “Just” 1080p
The Atto camera seems to be 1080p resolution which is fine, but again I’ve been spoiled with higher resolutions, which makes getting information later so much nicer. - Redundancy is better
Finally, for driving, a redundant dash cam setup is a great asset. At least twice we’ve had recordings fail on a dashcam when I’ve needed them (the SD cards take a hammering), and on a couple of our daily drivers in the past I’ve installed dual front dashcams.
Disclaimer
This is NOT a howto guide, but just my adventure in completing this on my own vehicle. Do not attempt something like this unless you are very familiar with the cars, electronics and the processes below. This is a complex and not inexpensive vehicle, and as well as breaking something, you could cause additional electrical problems, panel/glass damage or more.
I have installed cameras and other systems in many cars previously (old and brand new) and my background includes years of working with electronics, software engineering and vehicles.
Camera choice and planning
Camera:
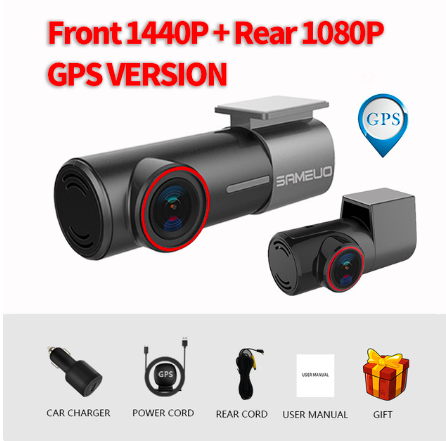
I don’t tend to spend huge amounts on cameras, or buy the big name brands but have found a few I like that aren’t too expensive. This time I decided on a slim tube-style front camera with small rear. Aliexpress sell this Sameuo brand model that was around NZ$150 for front 1440p, rear 1080p model. This is only the second of these I’ve bought, but it seems fine and the reviews are good. Easy access buttons, slim tube style, GPS logging to metadata, has Wifi/App access (which is fine for setup, but normally I wouldn’t bother using… just pull the SD card) and has red highlights to match the car 🙂
Camera mounting locations:
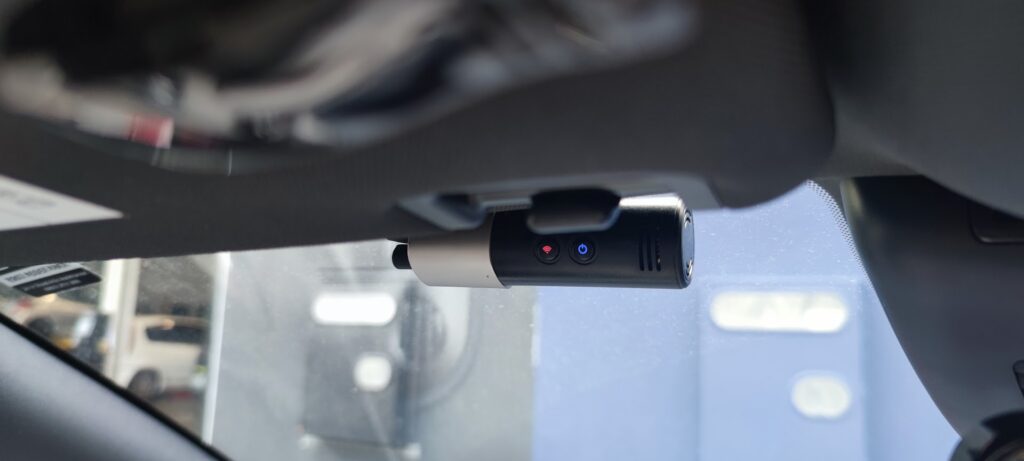
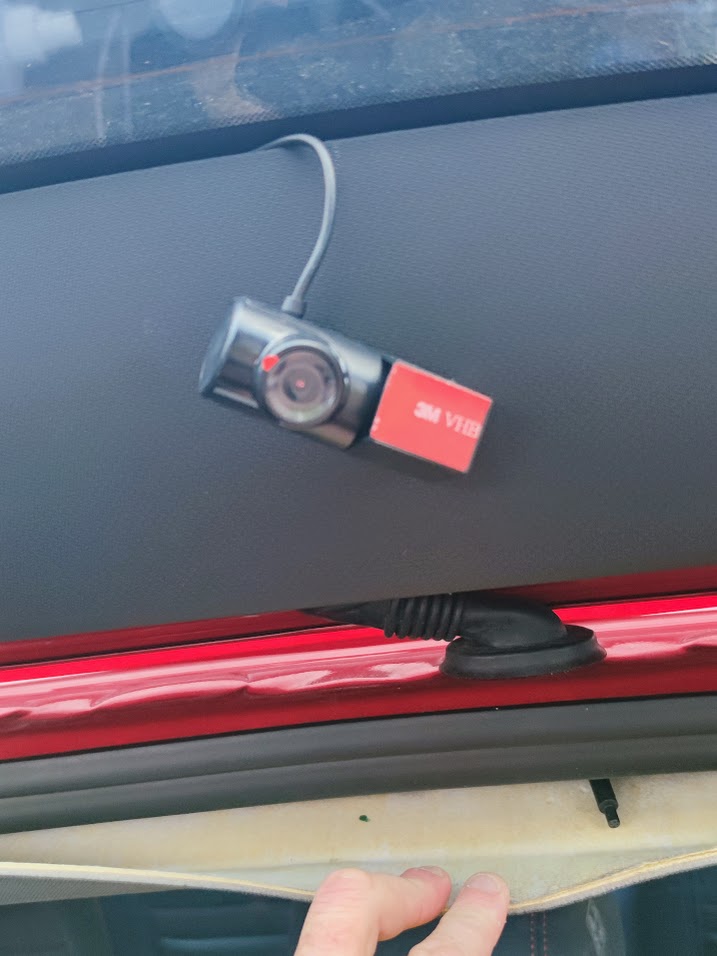
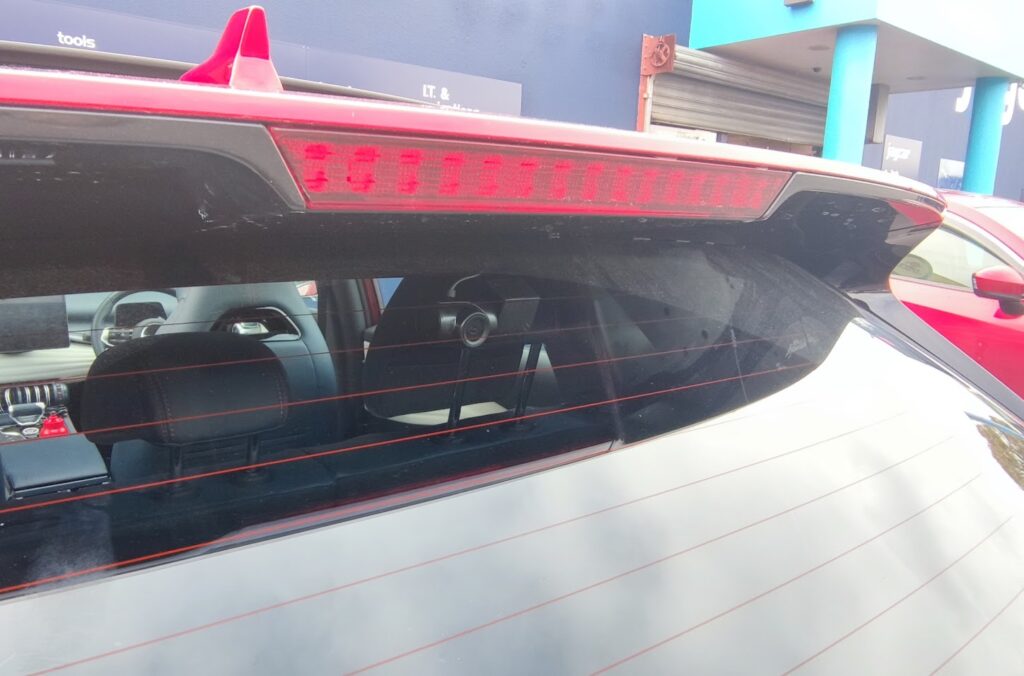
My plan was to put the main camera top of window on the passengers side. This is my common install location if the centre is not accessible, and the buttons are still easily used when driving (we have long arms). Rear camera goes as high as possible on the centre of the rear window.
Cable routes:
Cabling I generally run along the sides of the ceiling head-liner, as I need to have cabling totally hidden, no holes cut and and and installation that is completely reversible. These cameras, like many dashcams these days just stick to the window with 3M double-sided pads.
Power and connections:
Again, power connectivity needs to be non-destructive and removable/reversible. On newer cars, I usually like to use a device called a fuse tap, connected inside the internal fuse box. Think of it as a replacement fuse that also has a cable to connect other hardware. If you remove the device and replace it again with a normal fuse, you’d never know it was there.
Installation
Accessing the fuse box
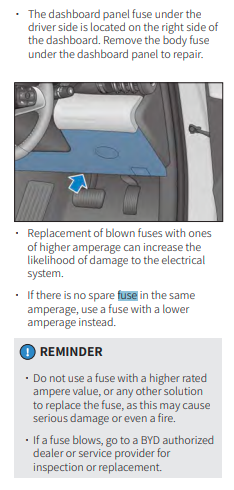
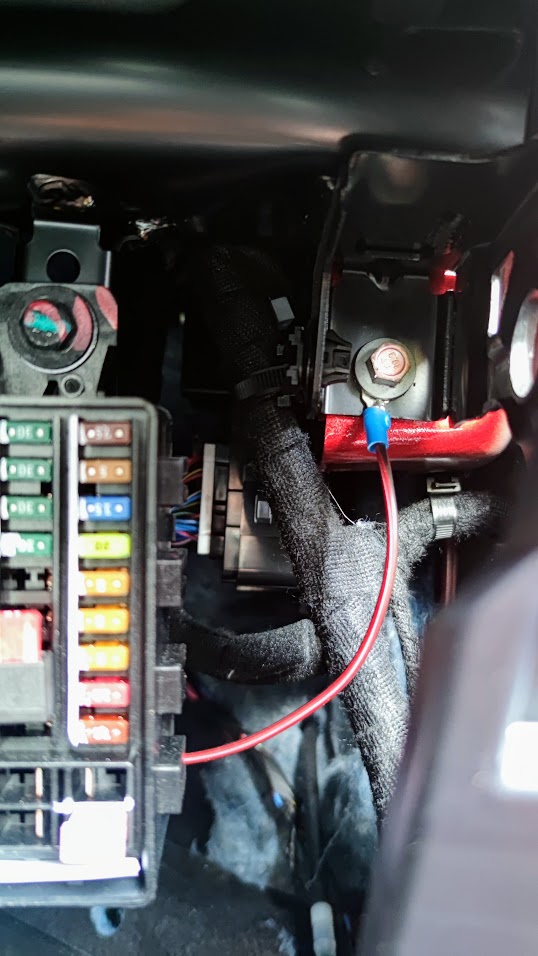
Finding the internal fuse box was interesting on the BYD, on most cars they are accessible by a simple flap. On the BYD I looked up the pdf manual which said it was at the front under the driver’s dash, and discovered that it would require removal of the panel under the drivers side dashboard. I don’t think BYD want you to access the internal fuses every day.
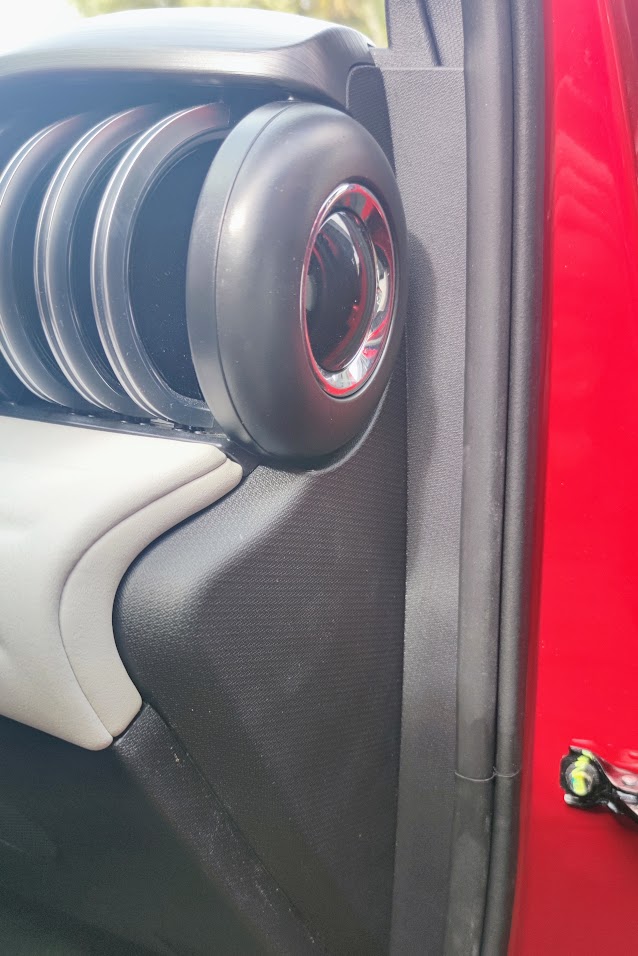
Step 1: I had to open the drivers door then remove the round side vent cover (the thing that looks like a wheel, or is it a gym weight?). I popped off with a flat plastic lifting tool, you can see some slots you can get a slim tool into.
Step 2: The side panel needed to be removed next. I could pry up from the bottom and manoeuvre it to pop it out of the door seal which it sits under. The panel clips that hold this on are pretty tight, so a fair bit or force was required, whilst I was being very careful not to scratch or damage anything.
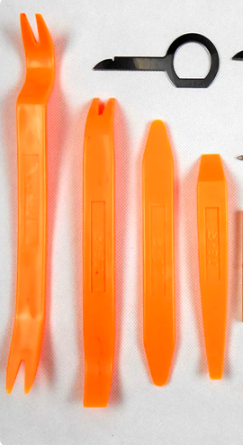
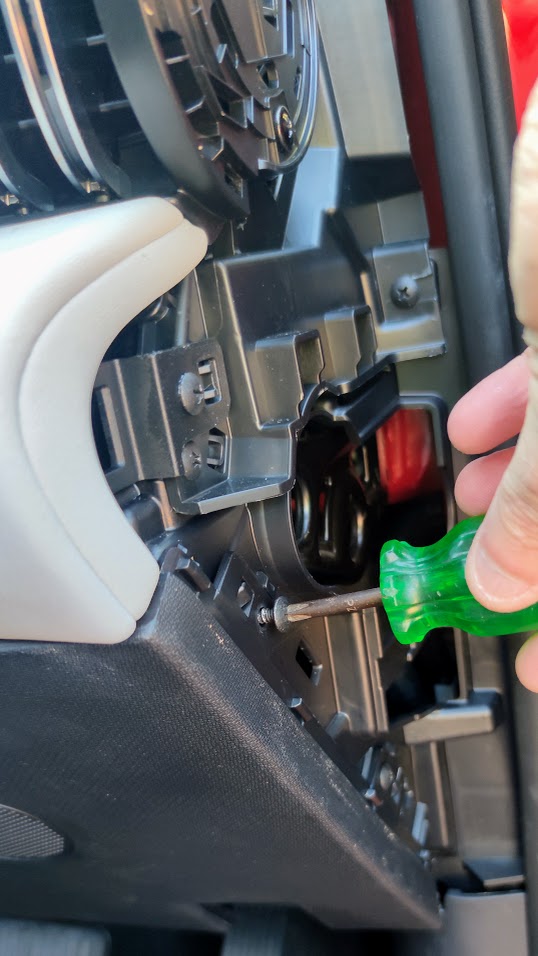
Step 3: Once the side panel was off, I could remove the two Philips head screws under it. Once unscrewed I could then lift the little flaps that the screws were holding down then remove the whole panel. Again because of all the panel clips, I needed a fair bit of force. They seem to be pretty decent quality clips though so I doubt any would break even with a few repeat removals. When the front panel is off, the fuse box is nice and accessible.
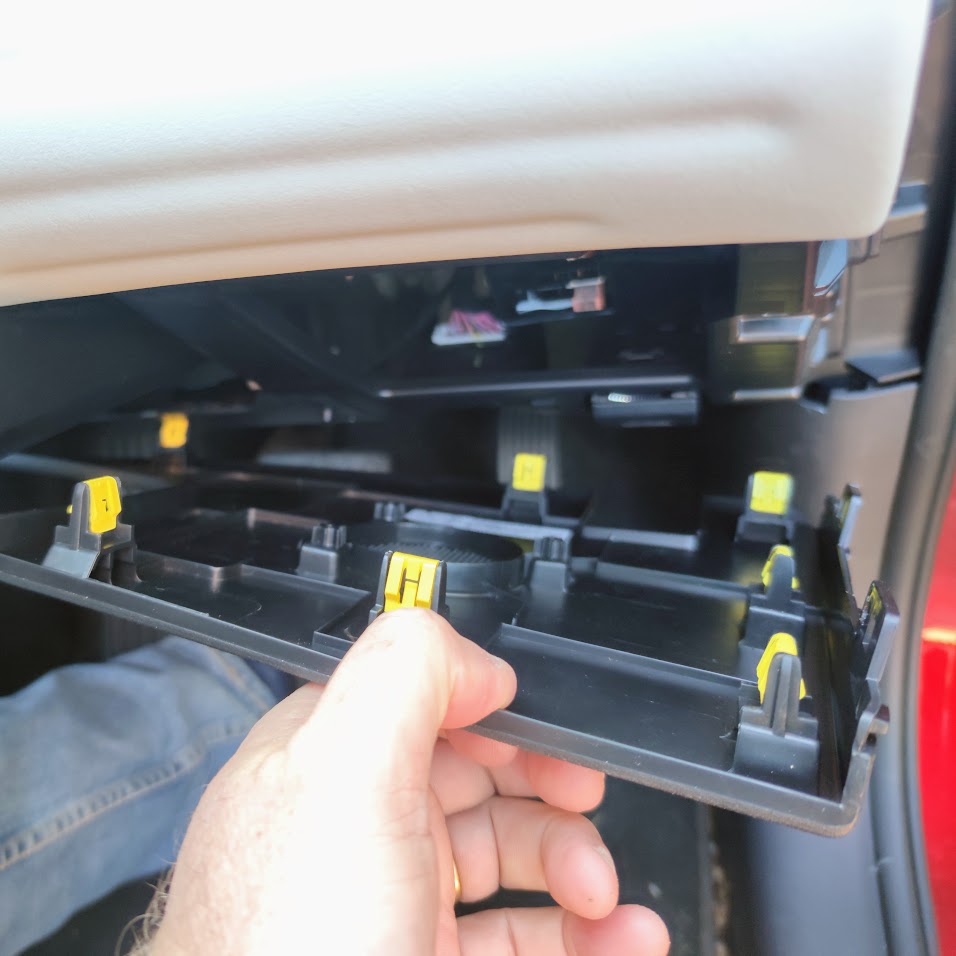

Camera Power
Most dashcams require 5V rather than 12V directly, and often just have cables that plug into a USB A socket. Yes, I could just plug into the car’s USB port, (or round cig lighter socket with adaptor) but I wouldn’t get continual power for carpark use, and won’t have the connections hidden. You can buy various car 12V to 5V adaptors that plug into the camera directly (the camera is powered via a micro USB plug/socket) eg this, but this camera also has the GPS antenna in its custom power lead, and I prefer to make my own anyway.
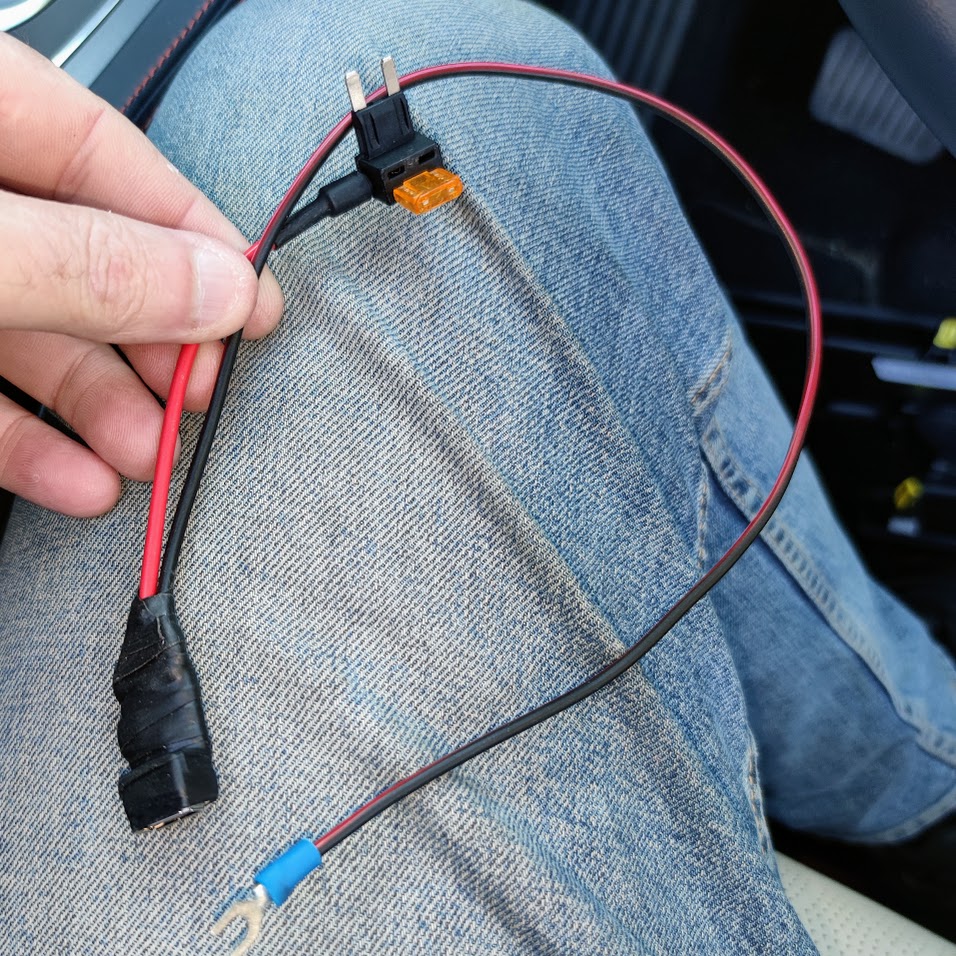
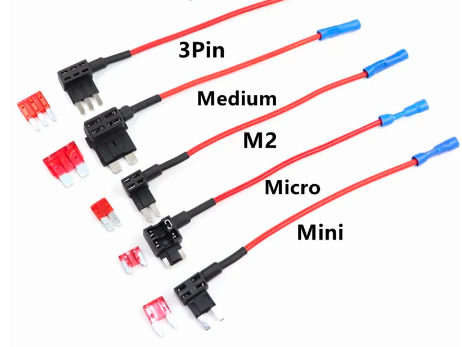
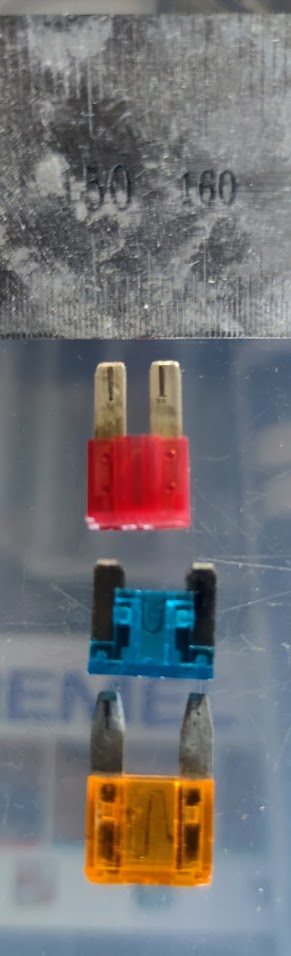
Once I could access the fuse box, I found that the Atto uses the very tiny Micro 2 ATP fuse which is only 9.1mm wide (not a mini, and smaller than a regular micro). I needed to find the right tap adaptor as the local vehicle accessory stores had none in stock (but could order them in). A bunch of online suppliers have them however.
As mentioned, I prefer to make up my own 12V fuse tap to 5V buck converter (example buck step-down here, but there are many), with a flying ground lead. I like to use a buck that is rated well over 2A so it doesn’t get warm, and I wrap it in self amalgamating tape for strength.
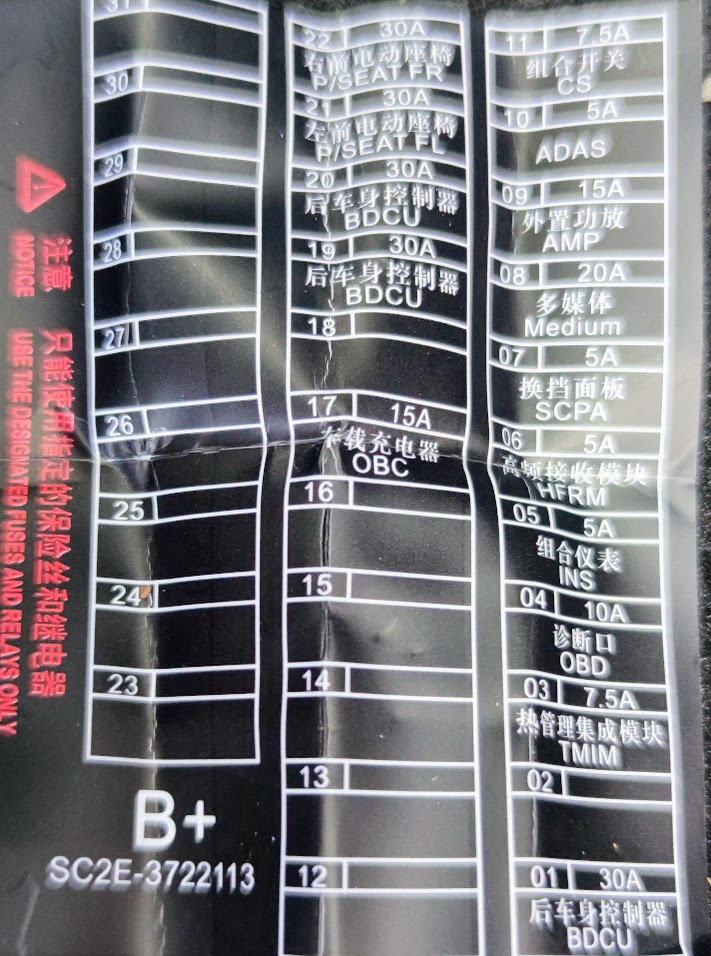
There are a heap of spare fuse slots in the BYD, the middle ones don’t connect to anything, but most appear to have a 12V permanent feed. I used a 10A fuse as that is what I had, but a 5 or 7.5 would have been equally fine.
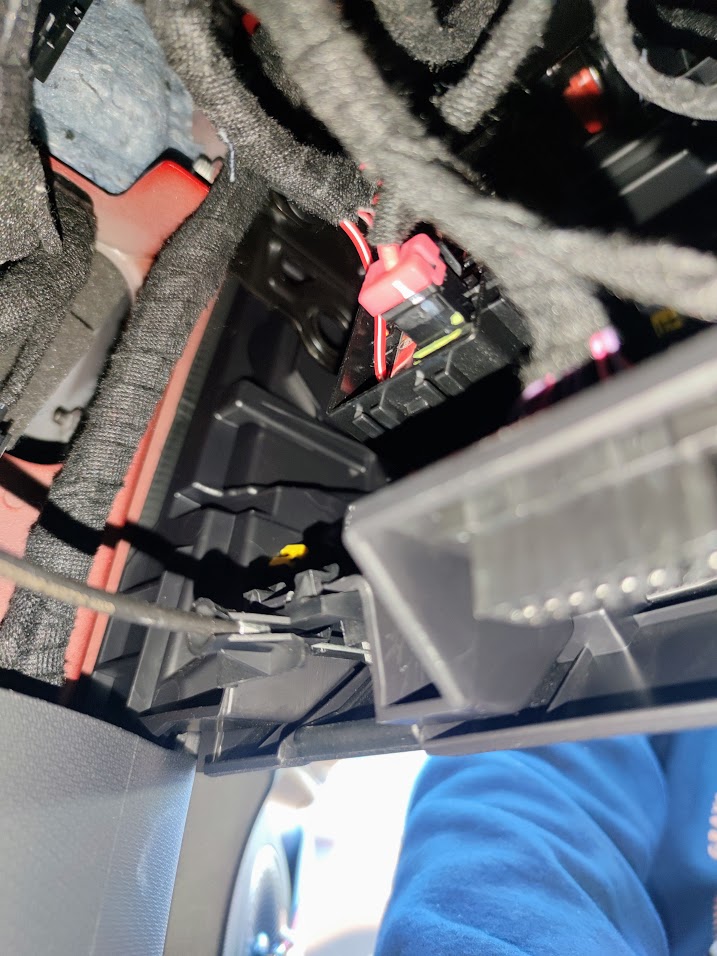
There seems to be a wealth of easily accessible space up under the dash, and I’ve shown a photo of where I connected the ground (a spade connector under a 10mm bolt). The bolt was easily accessed with a long socket extension. Due to all the empty fuse slots, I didn’t actually need the tap to be in place of another fuse, so the bottom slot in my fuse tap could stay empty.


Cabling
Front camera
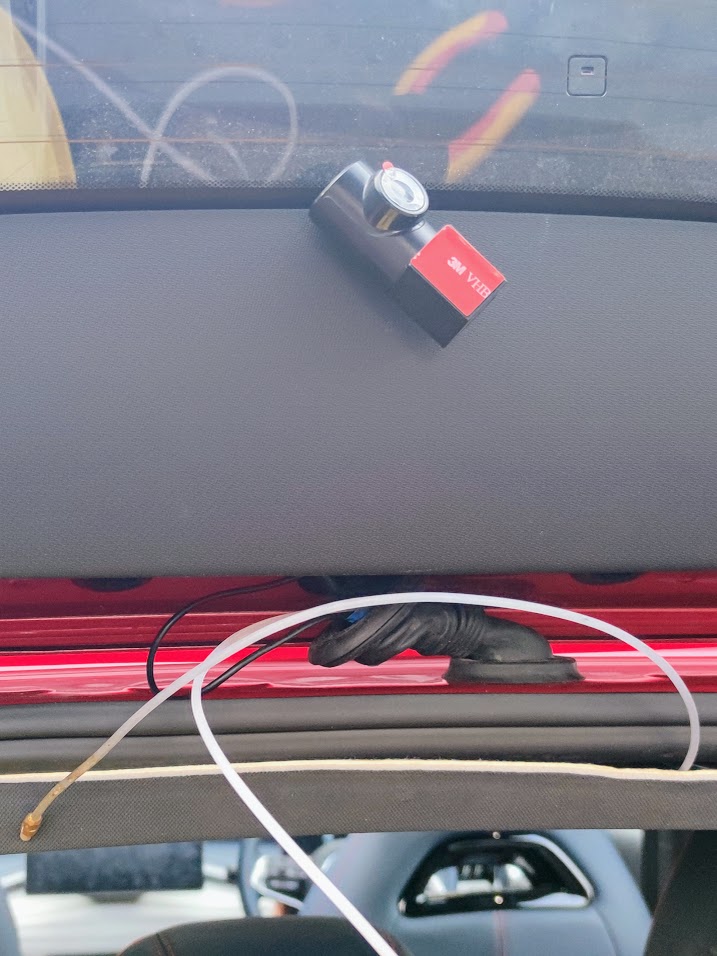
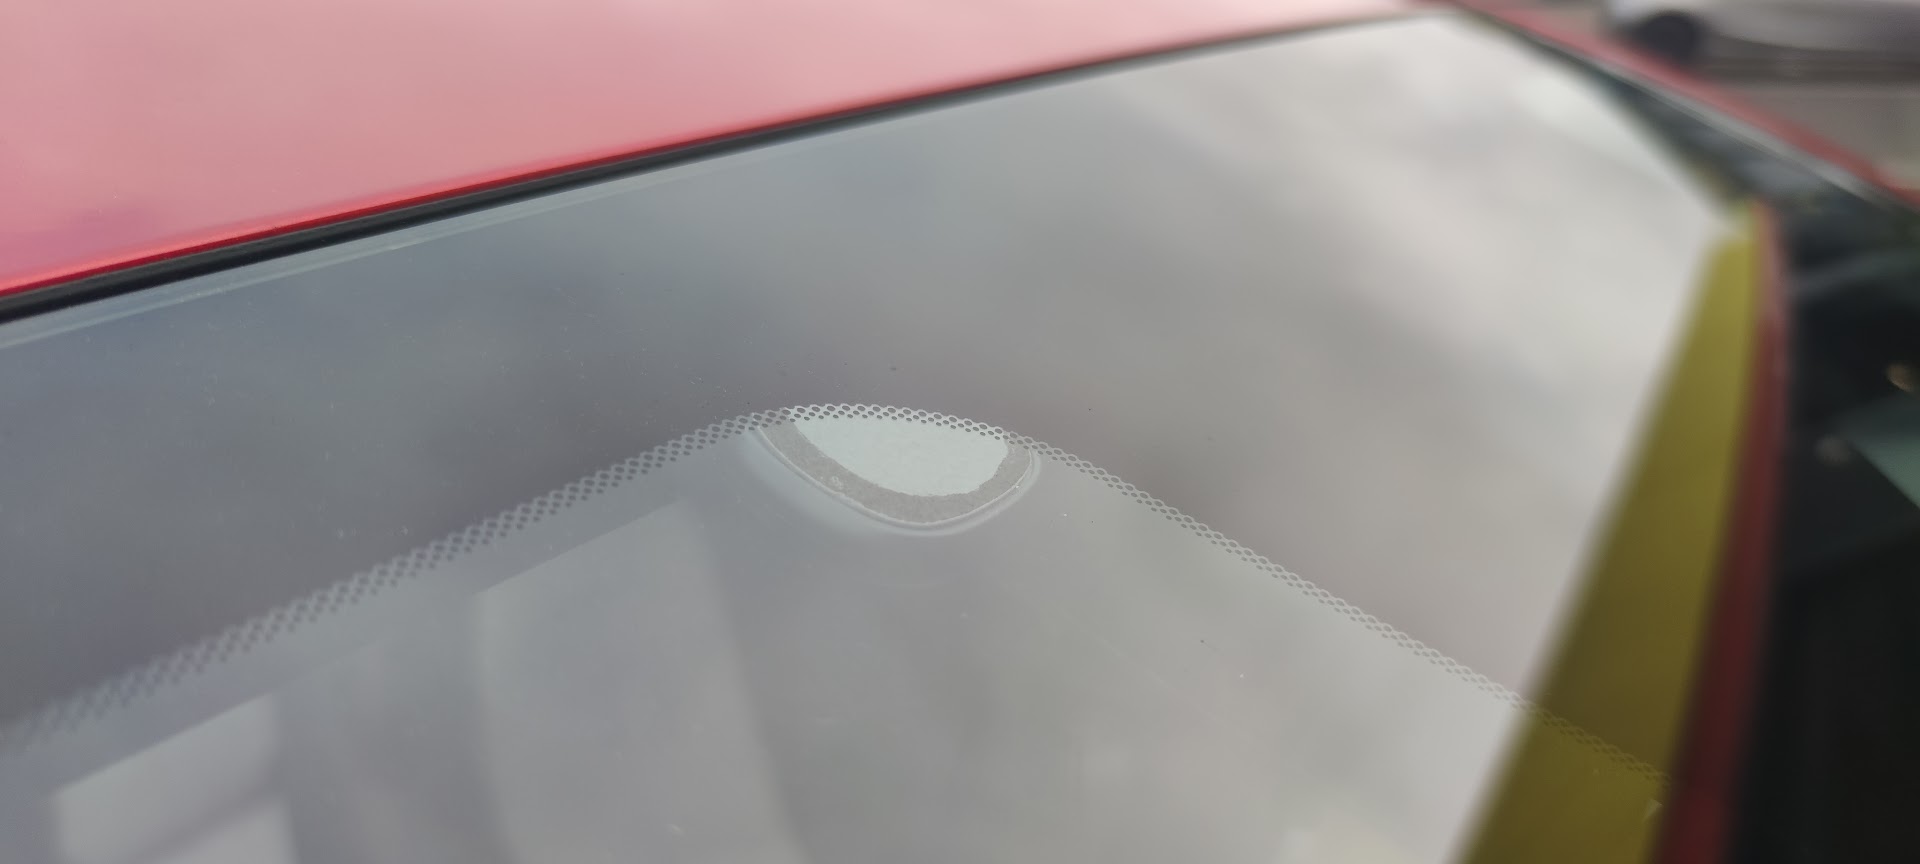
I first ran the cable for the front camera from the camera location, under the front of the headliner, down the side of the A pillar (door seal side, as it is easier than windscreen side once you get to the dash). At the same time I mounted the GPS antenna which (only just, with the cable length) fits to the top left drivers side screen, with cables still hidden, but antenna exposed behind the glass.
Rear camera
The hardest part is mounting the rear camera. On a liftback, I like to start at the camera side and feed the cable from the top of the rear windscreen and through the hatch flexible wiring grommet. your don’t ‘have’ to go though the grommet… you could just come out of the trim and have a wire hanging across to the window, but I think that looks a bit naff.
I use various tools such as a fibreglass snake, and bendy wire to get it though. With these grommets on modern cars, they are usually pretty full of cables, so great care has to be taken not to damage anything and not split the grommet or lower the quality of the water seal. A little silicone spray can help.
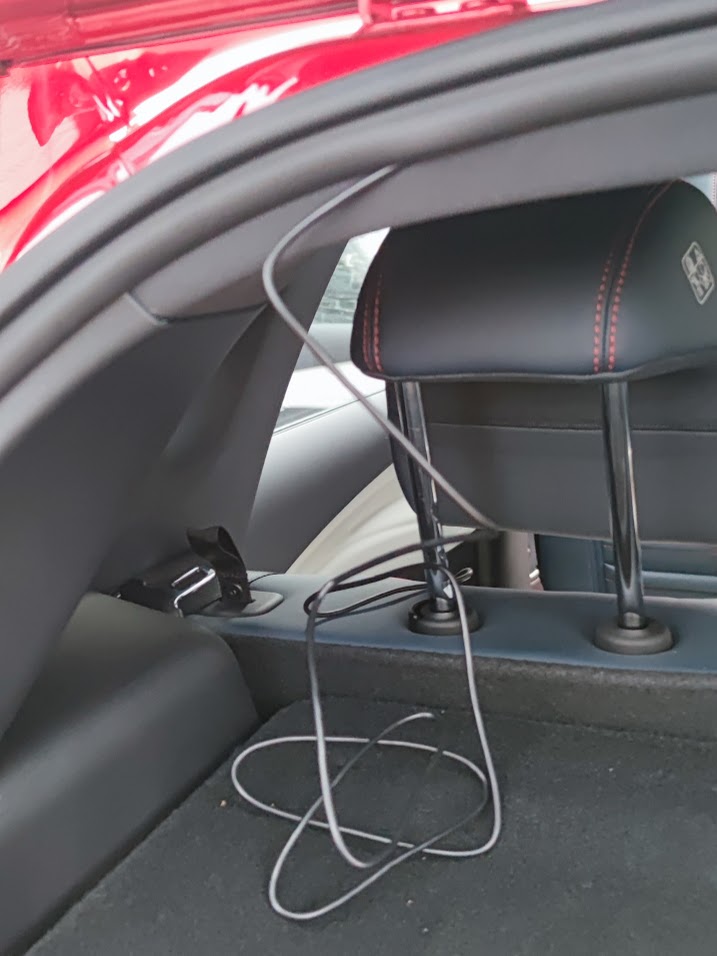
Rear camera to front camera cable
With the right plastic pry tools, running the cable from the rear to the front along and under the headliner on the left hand side is not too difficult, but it is time consuming to get tidy and protect the plastic trim. Also, it is important to get the cable under the trim and headliner and not in the door seals. Leaving a bit of a loop at each pillar to tuck in around the trim corners is a good plan. There was quite a lot of length left for the rear camera cable and in hindsight leaving this in the rear or side trim would probably have been better, but it tucked in fine to the front headliner above the camera. I certainly wouldn’t want to cut this and attempt to re-join the fine cores.
Once set up and plugged in, the trim needed to go back on nicely and everything tidied back up.
Fixing the cameras & GPS aerial into place
Mounting the cameras is with 3M pads. It is, of course important to clean the window well with some alcohol or window cleaner before sticking. Where I mounted the front camera you can slightly see on the image the centre window electronic box on the bottom right, but other than that it gives a very wide view (the camera touts 170°) and just cut off at the bonnet. The cable length from the GPS antenna meant that was about as far to the left as it would go, but if it annoys me in the future I’ll move it.
The rear camera was mounted as high as I could on the rear window but in a way that allows a view below the rear spoiler. I’m always careful to not mount on rear window demister wires, as you have no idea how tough they are if you need to take off the adhesive. You can just see it in your rear vision mirror, but it certainly doesn’t get in the way and the Atto doesn’t really have great rear visibility anyway.
Post Install Notes
Software
The settings on this camera were done by connecting my phone to a Wifi Direct connection on the camera and running an Android app called “TiCam”. Turning off networking completely (ie mobile networking) is a good idea as (if your phone does network bridging) the app throws a bunch of fullscreen ads before getting into the settings. Turning off networking seems to prevent this. Luckily all you need the app for is setup, although you can grab all the video/photos via the app too if you want to (otherwise… remove the SD card). Interestingly the wifi direct works to my lounge, so I can download video and change settings from the comfort of my couch if I wanted to. Changing the app password is important, otherwise anyone can connect via wifi and download/delete you images.
Camera Views
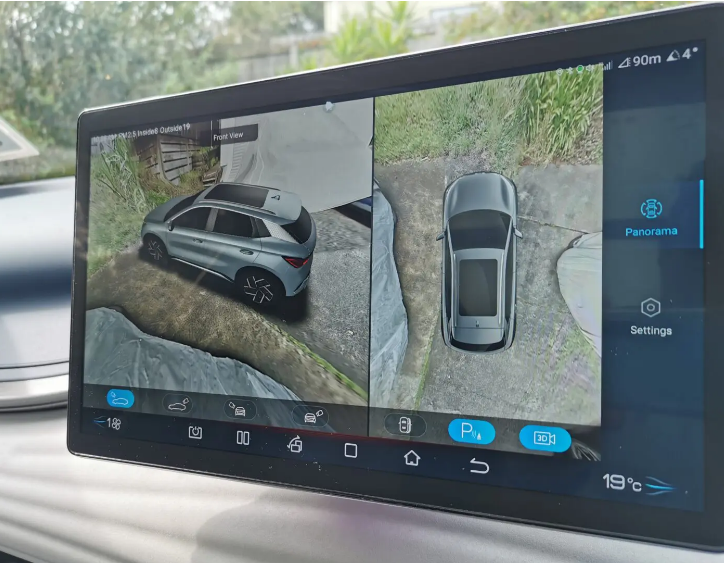
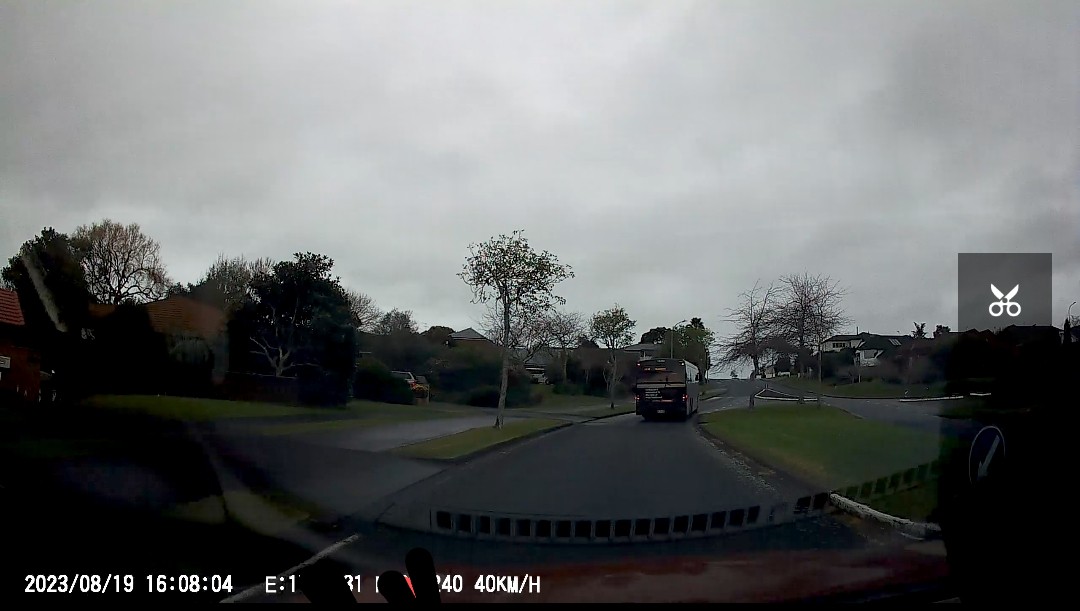
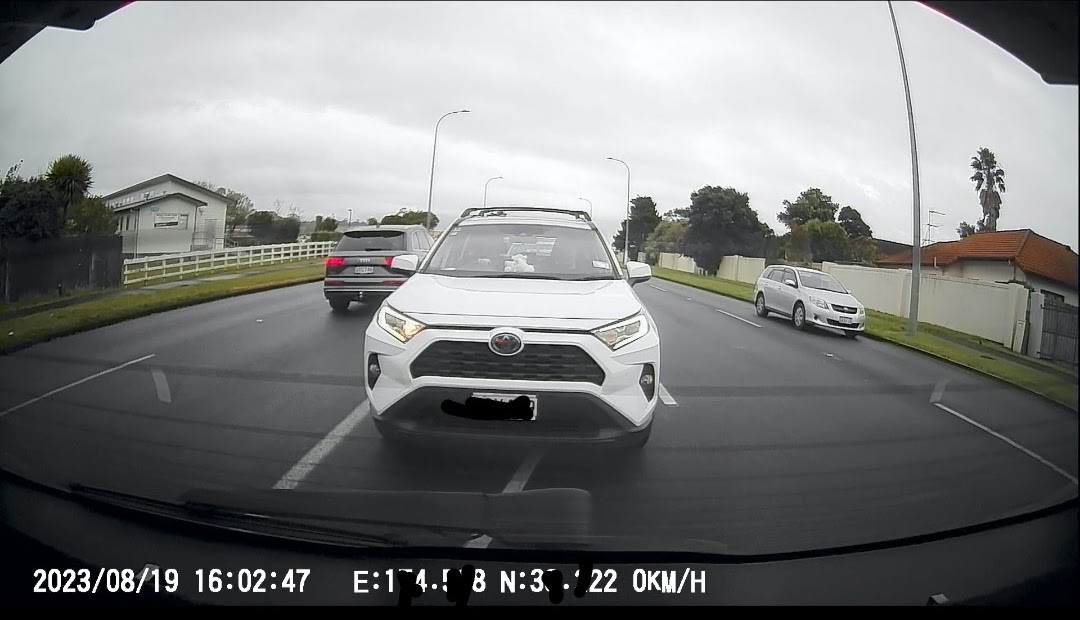
I note that the video and images from the front camera appear slightly darker then the rear, and I’m not sure if this is dues to the cameras or if there is a slight tint getting in the way on the front window. The camera is low enough that I’d have thought tint wouldn’t effect it. To be honest, the front view with this camera (170 degrees) is a bit wide as you can see by the image below. There is a lot of wasted image (eg sky…). The rear view is pretty good though.
SD Card
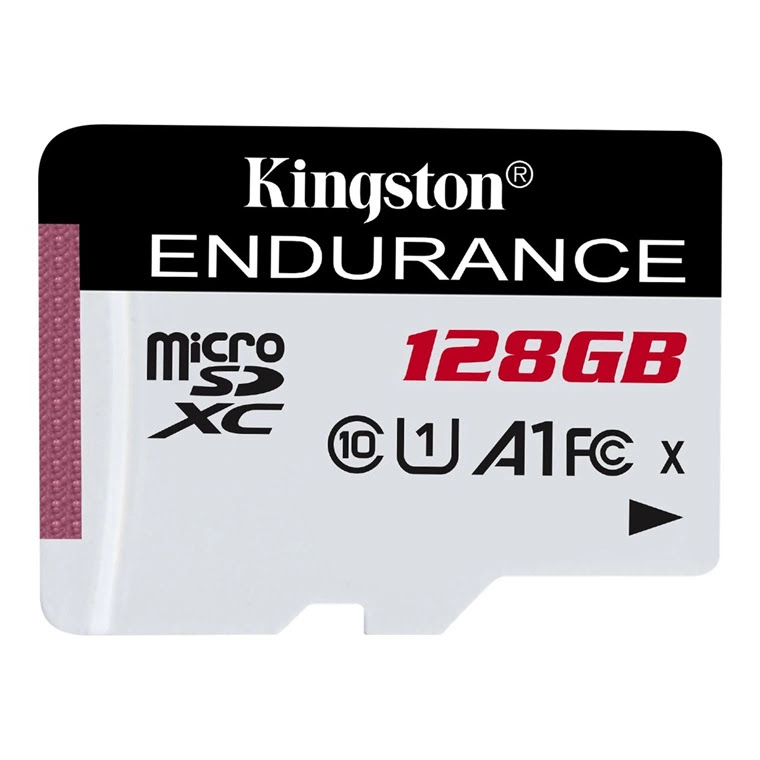
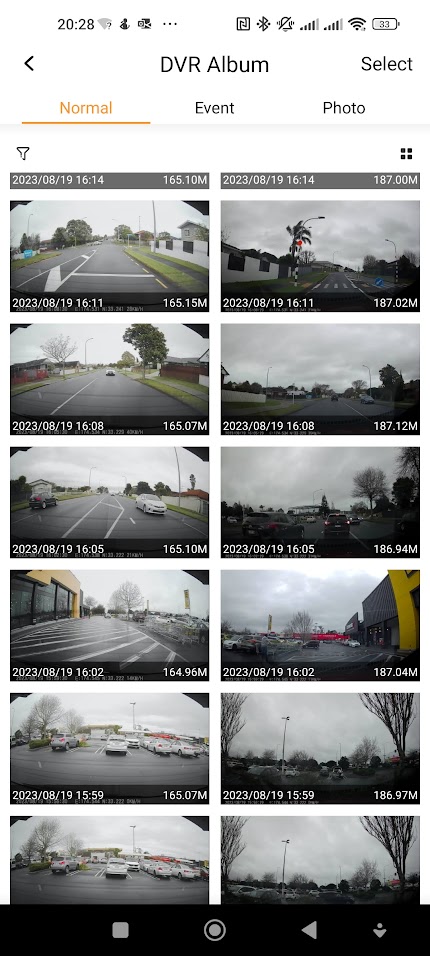
I got a decent SD card, and 128GB should be plenty for my use. I’ve been recording at 1080p front and rear to start with and will try switching up the front resolution later. A front and back recording in a busy session takes up about 350MB, and a lot less when there is no movement, to the point that a 128GB card lasts about 36 hours with continual recording.
I’ve found over the years that SD cards don’t last long in a dashcam, the heat and continual use kills them pretty quickly. I find the Kingston High Endurance models are quite good. The software for this dashcam warns you if you use a card that has too slow a recording speed, and to record two video streams at high resolution it will need to be pretty decent.
Camera Settings & Features
I need to play a bit more with the camera settings, but as I just want continual, 24/7 recording, there shouldn’t be too much to change. It is set up for 1 minute interval recording, but there is a 3 min option that I may play with later (other cameras I use I generally set to 5 min). You should be able to set it up to record at a lower frame rate when parked.
Normally, the two lit up buttons on the camera just flash away to show that the recording is working. The one button push for recording a video (the blue button) and photo (red Wifi button) work well. When you press the blue button, it flashes a bit faster for a while to show you are saving a video file to the archive folder (which won’t be written over)
Time (and regular checking) will tell if the camera is robust enough and will keep recording and rolling its images over.


How the battery works when the camera record’s 24/7? It can be drained
On the Atto, the 12V battery is topped up automatically when needed by the main drive battery. It is a very small current draw, and would be a couple of days at least before it would need topup.
How did you wire the ACC part? It seems all the fuse slots have constant 12v supply even when the car is off.
I didn’t use ACC, it is a constant supply (ie the camera runs 24/7) and this was the intention. An EV with a battery that size won’t even notice the current draw, and the Atto seems to be quite happy keeping the 12V battery topped up from the traction battery. The main issue is longevity of the SD card and potential failure, so a decent card is needed and I suggest checking it every few months.
By the way, I took the acc from the lighter cigarette socket… Of course I wired it via fuse… Works great and now my camera entering to parking mode after switching off