Home EV Wallcharger Setup & Installation Tips
Definitions
Before you continue, here are some good definitions you may want to familiarise yourself with if you haven’t already:
Charging Modes: This from Complyguy is a good explanation of the charging modes (home charging and DC Fast charging) Some people refer to these as ‘Levels 1-4’ rather than ‘Modes’.
Types of charging plugs/sockets: This from NZTA is a good explanation of the types of charging plugs available with pictures.
I’ll use the term EVSE & wallcharger, or charging point… but generally here this will interchangeably mean, either a portable EVSE device, or a fixed wallcharger (unless specified). See this useful definition.
Summary
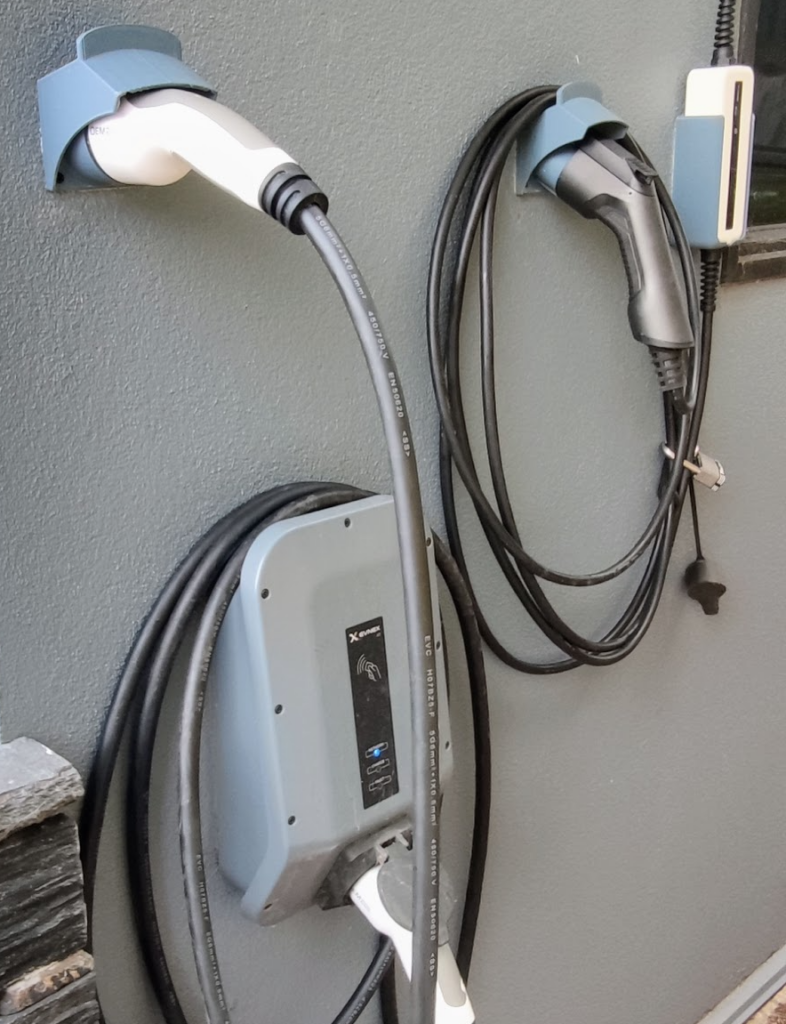
Having had electric vehicles for a few years now, I thought I’d share a few tips and photos regarding our current EV charging setup. We currently have 2 EVs (both that live outside) and 2 charging points, one beside the other.
After charging our 2014 Nissan Leaf, for about a year or so from a simple 10A “granny” charger (the ‘out the window method’), we obtained a 32A capable, single phase Evnex (NZ Made) smart wallcharger. It came with a plug-in Type 2, to Type 1 cable. We used this for a few years for the Leaf but more recently purchased a BYD Atto 3, which can make better use of its full 32A capability (well, really around 31A is the most the Atto pulls).

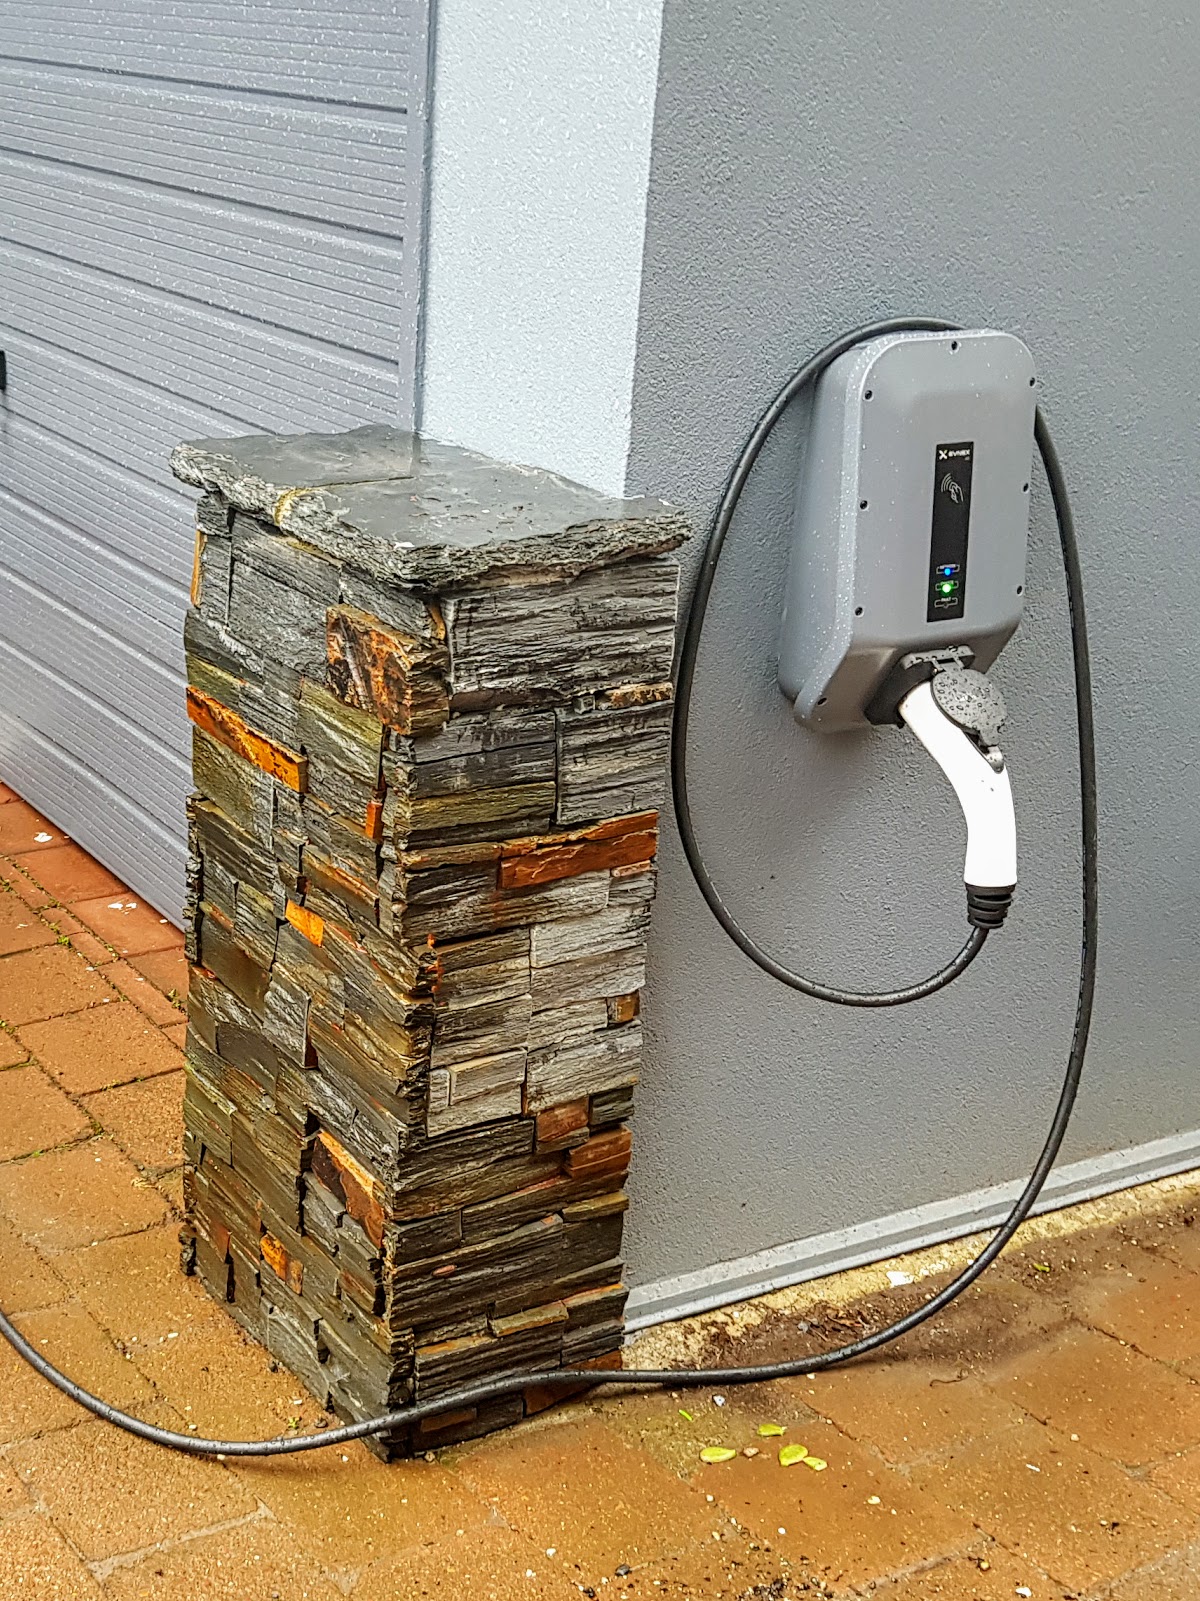
The 2nd and more recent charging point I set up was an EV Power Classic, 16A portable EVSE with caravan (commando) plug. These are IP65 rated for outdoor use and you can get wall mount holders for them. The Leaf’s onboard charger (the car is a Japanese import) can only take up to 16A anyway so this is a great, cheap and tidy solution. It is not ‘smart’, but power monitoring and control can be done by other means.

Also, for something like a Nissan Leaf, a dumb 16A charger with some of your own controls can be at least, or more capable than a ‘smart’ type.
It should be noted that you don’t HAVE to install a wall mounted charger for an EV. A portable EVSE can be perfectly fine and save you money, especially if you don’t do a huge amount of driving in your EV (or it only has a small battery).
Photos of our wallcharger Setup


Monitoring power use
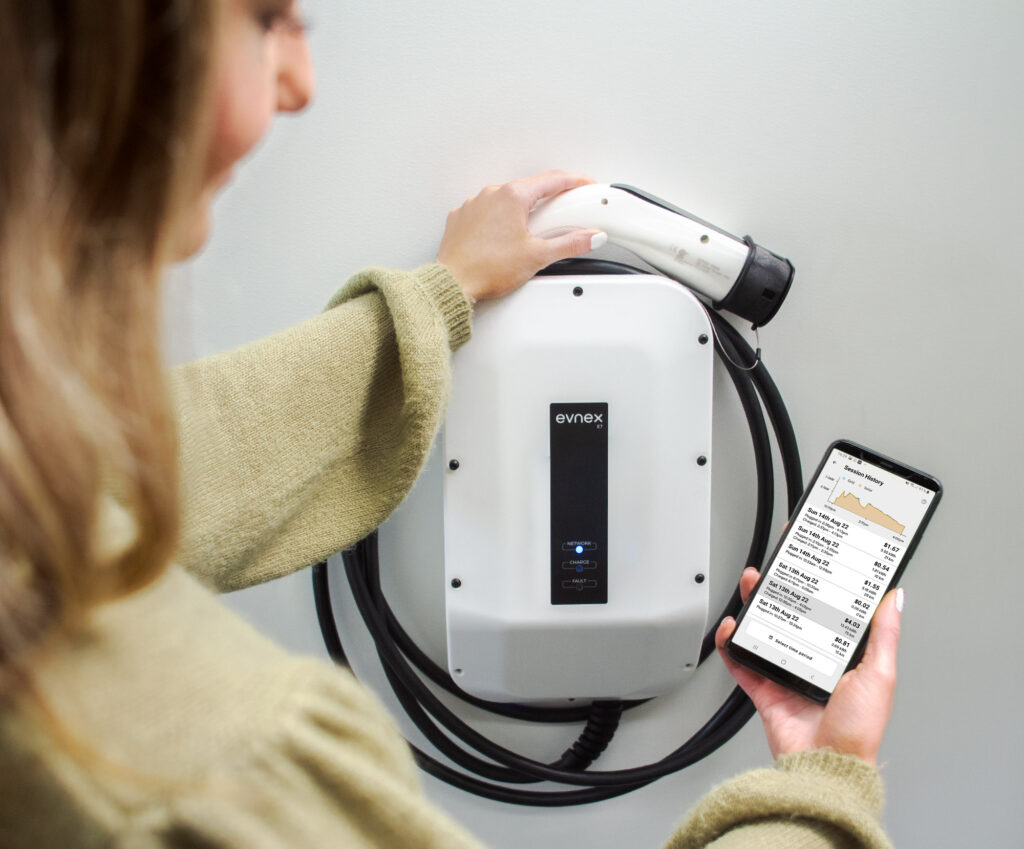
Yes, many wallchargers have apps and cloud services to do the monitoring of how much electricity you use (and actually, this is one of the main benefits of smart wallchargers), but what if you want to log your own and don’t want to be beholden to a cloud?
Well, really you need to monitor the current supplied and have a method of putting it into a log or database. This usually means some sort of home automation system.
I had a pretty extensive Home Assistant, Node Red/MQTT setup so this was what I did. You can read more details of how I set up power monitoring, scheduling and reporting here.
My EV power monitoring system:
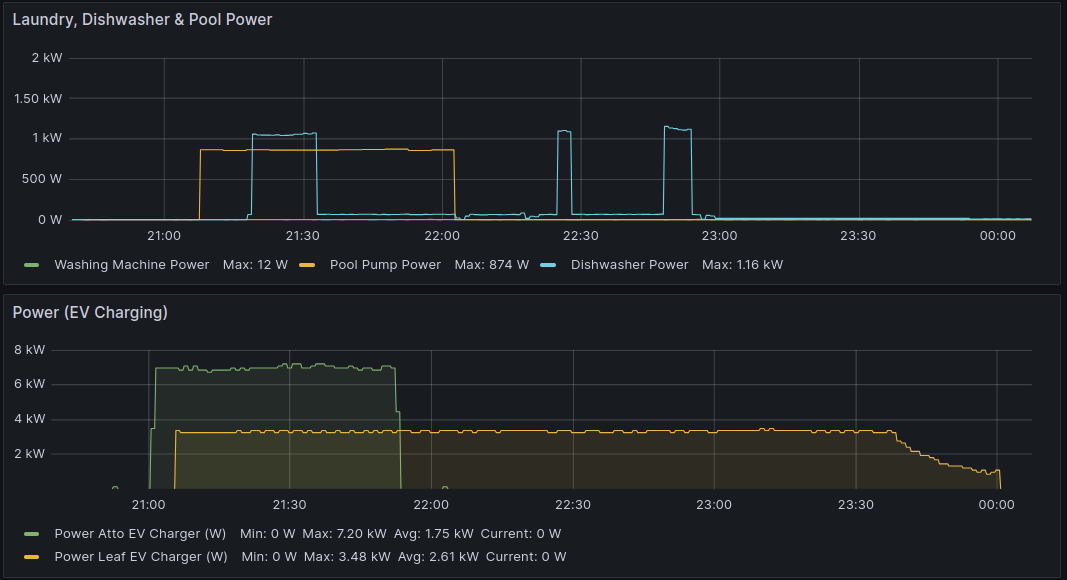
- graphs power use
- automatically creates a nice daily/weekly/yearly spreadsheet (csv logs)
- announces by voice, and on our TV screen in the house when charging is completed
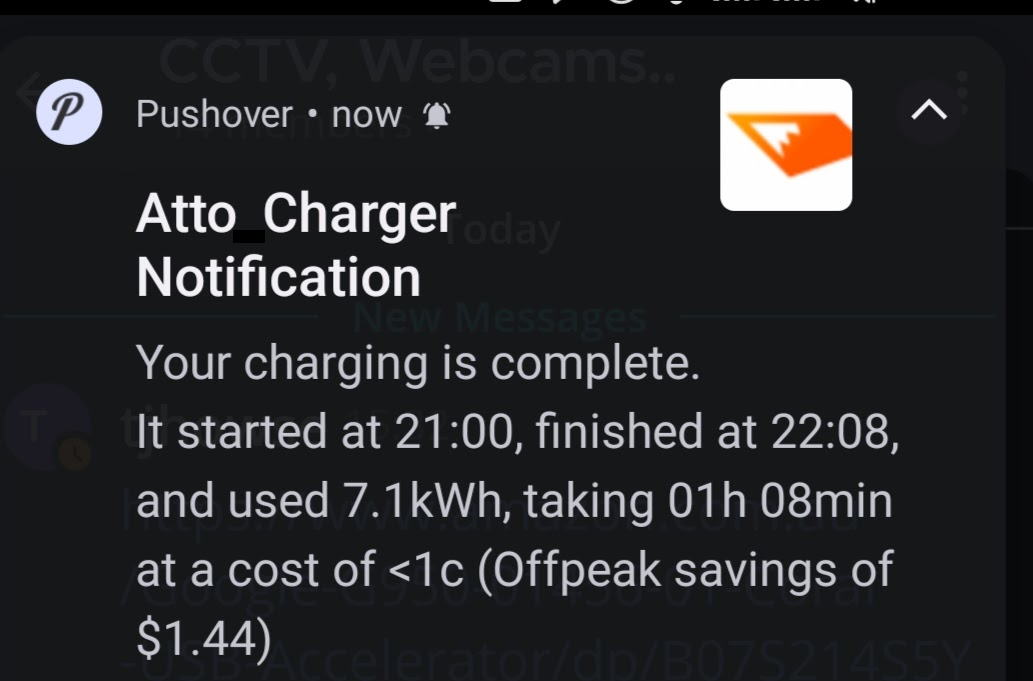
- notifies my phone when charged (with calculated charge cost, time on charge and kWh used).
Choosing when to charge
You can charge your car anytime you need to at home right?
Well it is becoming more common for power companies to offer peak and off peak power costs. Charging offpeak (usually after say 9pm) can be a LOT cheaper, and in some cases free for one or more hours.
You should be able to use your EV’s internal charger to schedule charging for offpeak times, or a scheduler in a smart charger, but having your own system be able to do this can be even better.
However, in saying this, I know plenty of people who don’t bother scheduling and don’t change their power plans or charging habits. You have to do a fair bit of research yourself to find out if this works for you, and for some people the efforts aren’t worth the savings.
Notes on scheduling:
- Some cars’ internal charge scheduling is not perfect, eg the Nissan Leaf had problems with scheduling on the 10A EVSEs (setting ‘start time to full charge’ seems calculate based on a 16A charge).
- The Atto also had scheduling issues with the Evnex wallcharger that may or may not have been resolved with recent Atto firmware updates (I haven’t yet checked). I solved it by only using scheduling in the Atto itself.
- Using the internal vehicle scheduling can be better to ensure the car keeps the 12V battery topped up. More modern cars can grab a bit of 230V as a topup for the 12V any time needed… as long as the EVSE is connected. Scheduling on the wallcharger… as with turning it off completely, will interfere with this (The Nissan Leaf only tops up the 12V battery when the HV system is switched on… ie the car is switched on, or it is charging)
- As well as now topping up the 12V, only scheduling in an EVSE/wallcharger can prevent you using other car features, such as with the Nissan Leaf you can schedule (in the car) for the heating/cooling to come on at a particular time in the morning.
- If you want to charge when the grid is the cleanest in terms of renewable electricity, there are a number of sources around that will tell you, including the MBIE dashboard (which is sometimes down). You can use this to ‘manually’ determine when to charge and switch on, or there are some APIs I believe. Our Evnex app also has a live report of Grid Emissions.
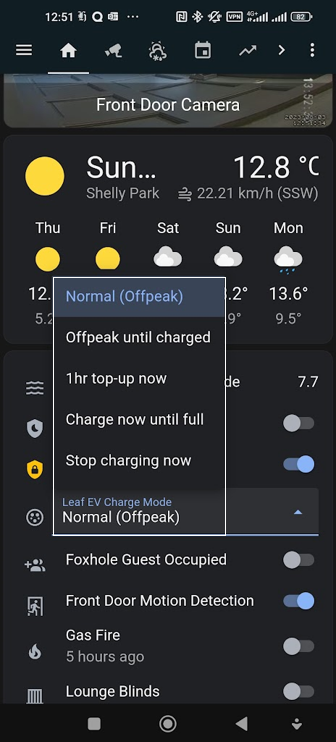
The advantage of having your own controls on a dumb EVSE (as with the Leaf setup now) is that I have get my own ‘modes’ for charging. Normally, it goes on at 9pm and off at midnight, which is our cheap offpeak period. Most of this time this gives me a full topup. Occasionally however, I want to top up fully, or charge immediately, so I have created custom options in my (Home Assistant) home automation system (see the screenshot of my phone selections).
Enough power available?
Does your house even have enough electrical capacity to charge your car, or maybe even two cars?
Most modern houses have a single phase supply and will allow you to draw up to 60A or maybe 80A from the main board. A basic EV such as a (Japanese import) Leaf will draw up to 16A (with appropriate EVSE) and bigger EVs will usually let you draw up to 32A, some can pull 50A or maybe more. So you can see that you may not even have enough current available for a car charge and a family full of electrical devices, and certainly not for a full charge for 2 cars at the same time.
What are the options?
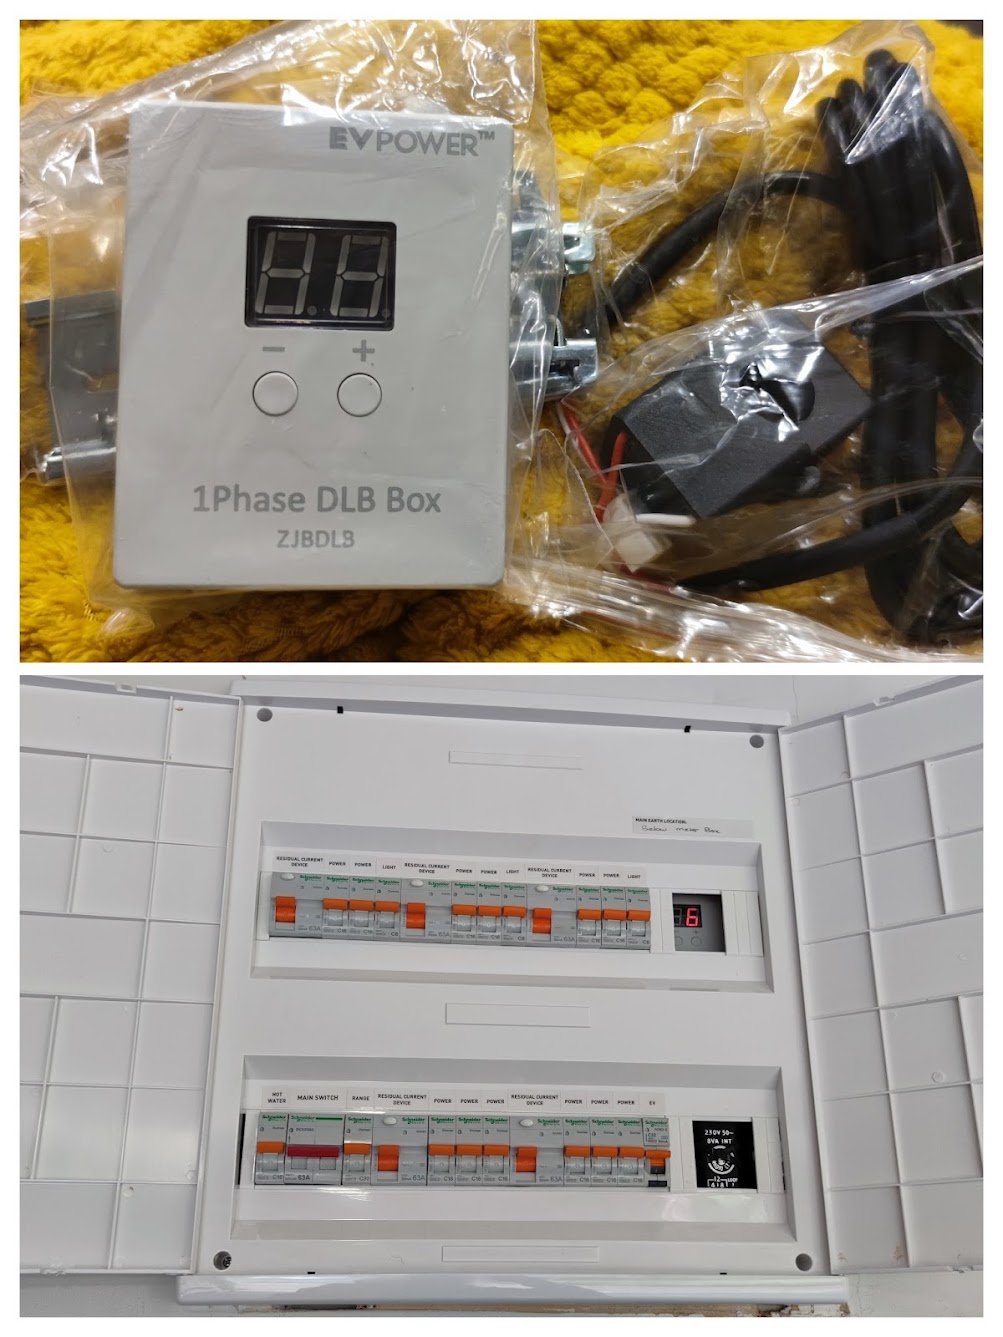
- Some Wallchargers (eg this BCP model I installed at my Parents’ house) have a power monitoring device that sits in the main house board. You can set it to a ‘maximum that the house board can draw’ (eg 50A), and it communicates to the wallcharger (usually by serial with a data cable) and will ramp down the car charging accordingly when you have heaters, or other large current devices going in the house.
- With your own control system (or by using your cars’ timers), you could schedule charging so they don’t happen at the same time. It does mean that if you get it wrong, you are going to pop circuit breakers so this is not a great solution.
- If you just have one charger, you can swap it between cars as needed. Easy solution.
- Some houses (eg mine) have 3 phase from the street. This usually means you have a lot more current available and you can either use a 3 phase charger (this splits the load across 3 phases, IF your car supports 3 phase charging… not many do), or if you want to run two chargers, you can put one on each phase (which is what I did). Here are some (non-NZ specific) notes on 3 phase charging.
Safety
There are a couple of things to consider when using either a portable EVSE or wallcharger, otherwise charging an EV is perfectly safe with lots of built in protections.
A skilled electrician, who knows about EV charging and the latest regulations/advisories will be able to advise you on the below whilst ensuring you have a safe charging setup.
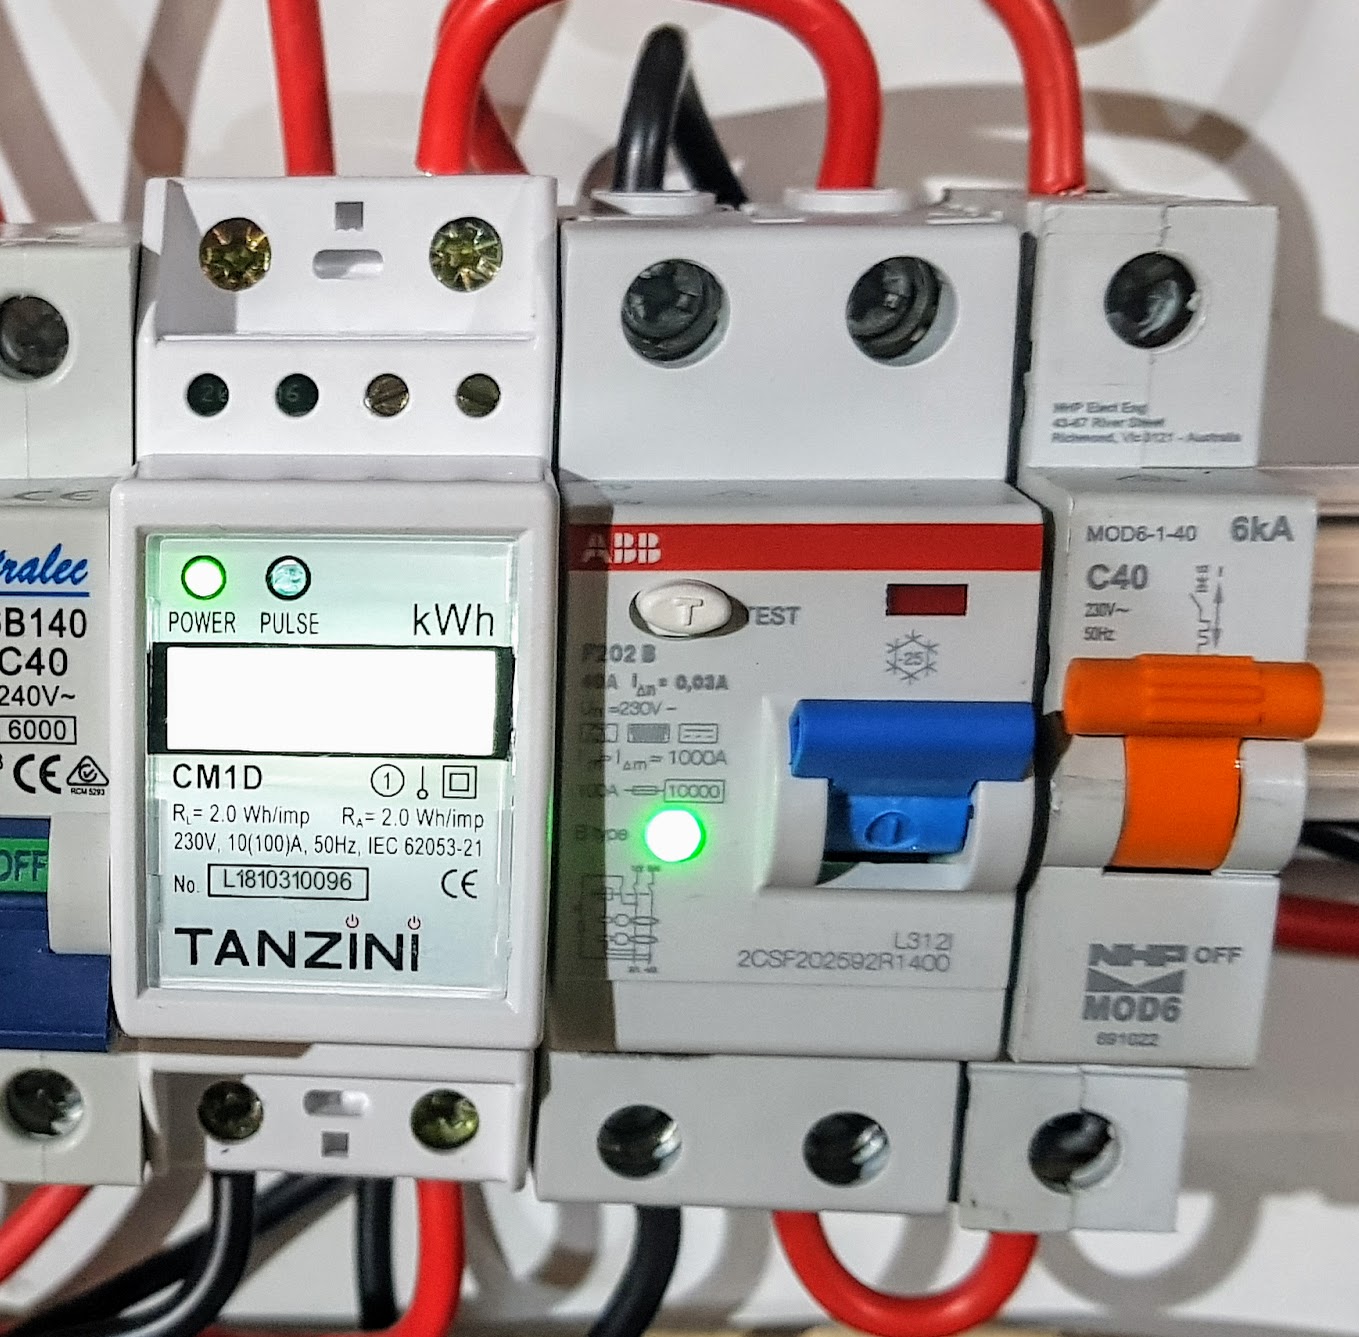
Regulations require you to have a Type B RCD in your switchboard for a wallcharger (see the photo of the one in my switchboard), and these can be expensive. The great news with modern wallchargers are that this type of protection is now built into the charger, so these are usually not required (check the model you are buying!)
The quality of your electrical system is important, if you have an older house you might want to check before plugging in and running even a portable EVSE. Yes, there are other electrical items that draw large currents, but not usually for as long as an EV, which can give a serious risk of overheating and fire. Current regulations state that all EVSEs and wallchargers should be on their own circuit, with nothing else… yes… even the plug in ones. Most houses, (by design) will have 2, 3 or more sockets on the same circuit.
Although many EVSEs and wallchargers are rated as fully waterproof or IP65, I highly recommend keeping them under shelter, and if using a portable EVSE, some people put the controls part in a plastic container or box, or at least cover them from rain in some other way.
Monitoring 2 Cars, with one charger
If you need to use one charger for two cars (or more?), you might like to see how much each has used independently, so how do you know which car has used it?
Well, when we got our second EV, this was a nerdy problem I wanted to solve.
The simplest way for me was to have a virtual switch on my home automation system, and each time the switch was changed the logs would be directed to a different database (I don’t have a picture of this unfortunately).
Other options I thought about were to use a physical switch on the wall, and improvements I explored was having a BLE tracker on the end of the connector and a microcontroller to determine if it was close to one car than the other. Or maybe an NFC tag/reader setup with the reader on the wall and tag on a keyring, or even a tag on the car with the reader on the plug.
I didn’t have to think about this for too long as got a second wallcharger pretty quickly so only used the dual charging tracker a few times.
Charger Security
If your wallcharger is out in the open (and depending on your level of pedanticness and where you live) you might want to stop others from randomly charging on it.
One way to do this is to have it switched off, if you can do that remotely (mine don’t come on until offpeak anyway).
My charging location has a couple of CCTV cameras, and some decent movement controlled lighting… the lighting really helps when you come home and charge at night.

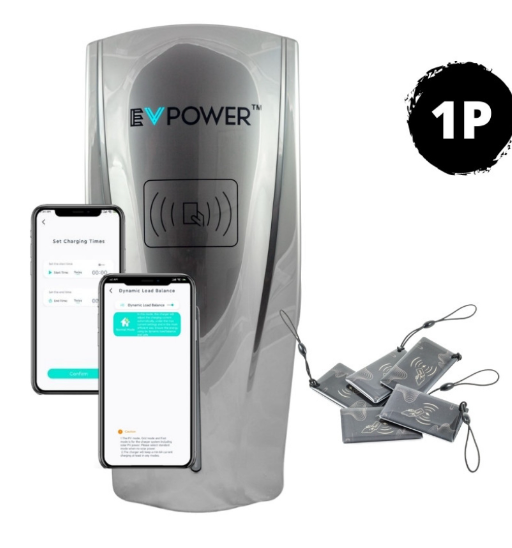
Some wallchargers come with NFC/RDID reader onboard and some tags for use (eg this BCP Model from OEM Audio I installed at my parents’ house). Many can be switched on and off in their app.
Securing the cables is a good idea too, as they have been known to occasionally been unplugged and stolen (EV cables aren’t cheap). Of course if you use a plugged in EVSE, the whole thing could be taken (Most EVs now lock their cable connection on the car, but this is often not a failsafe).
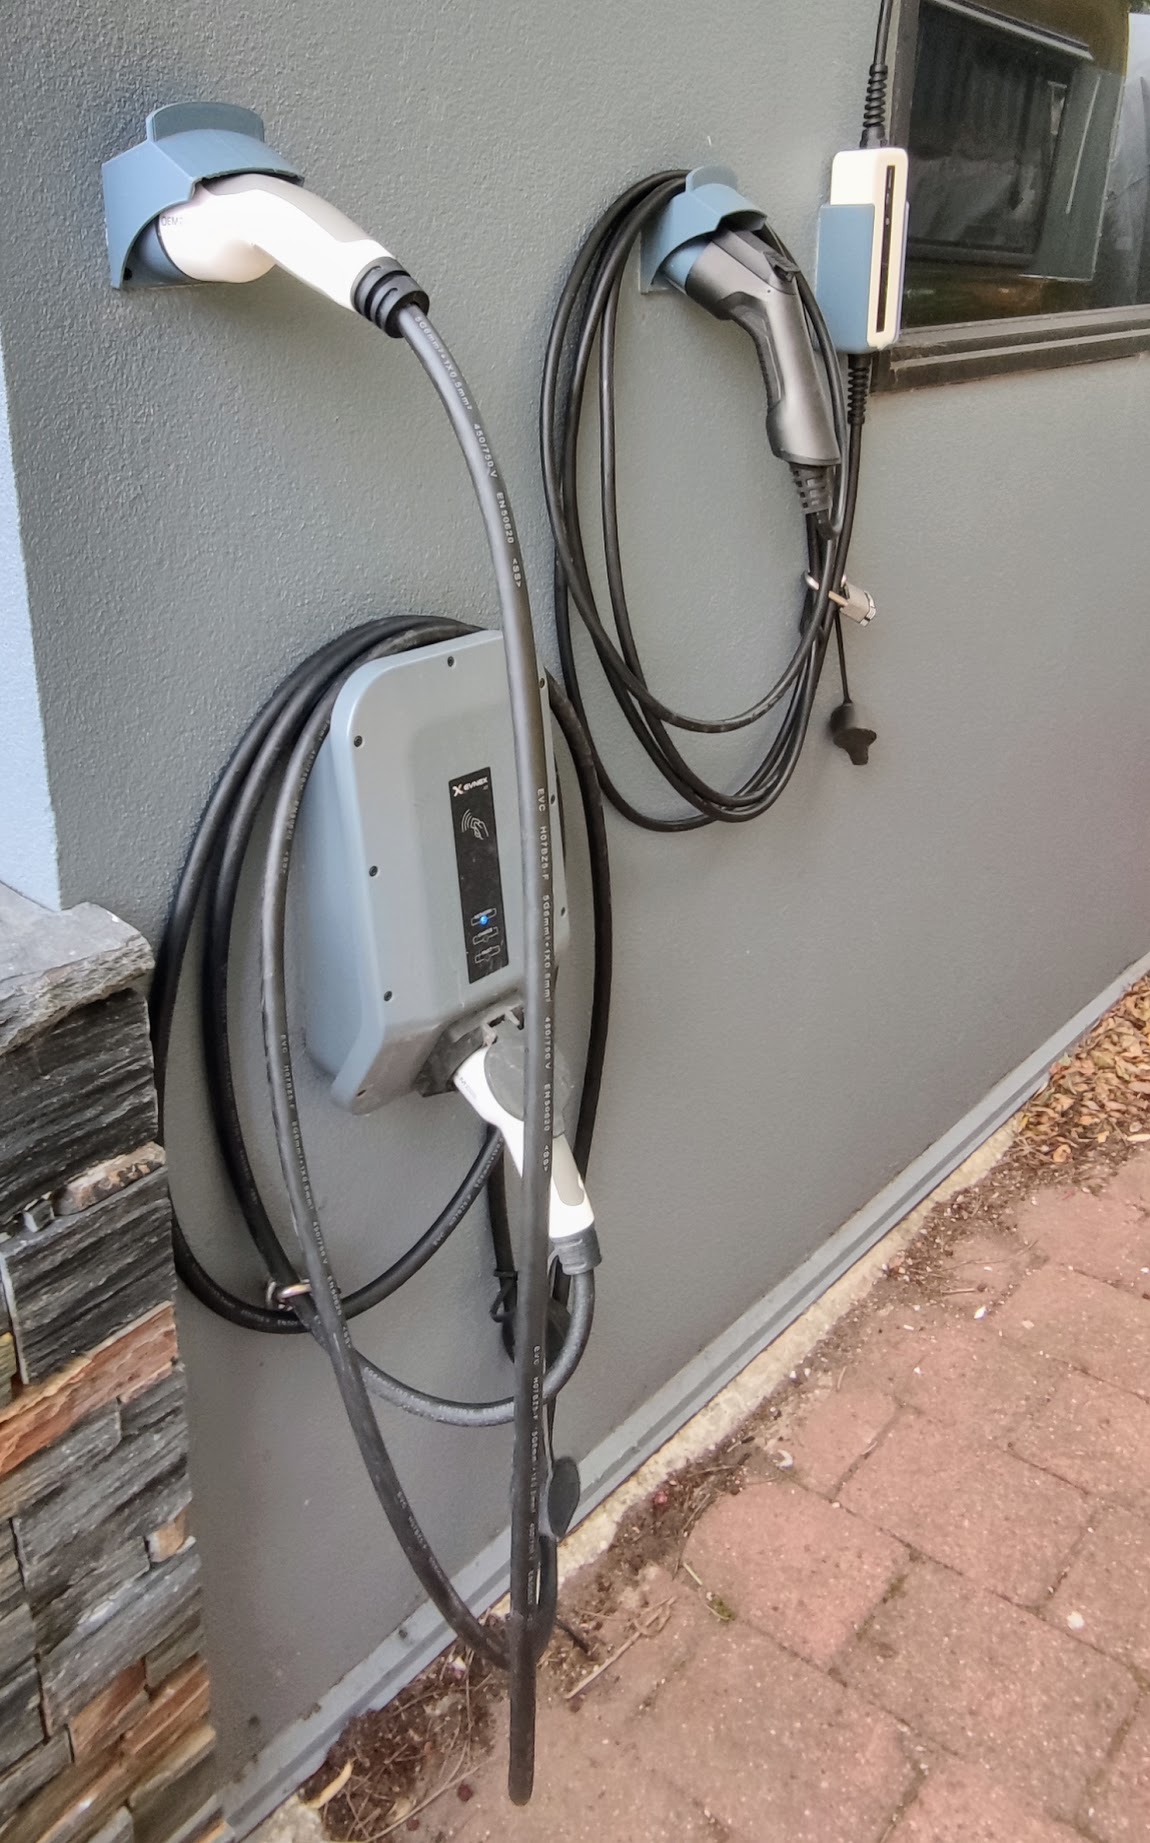
I mounted a couple of solid marine eyelets to the house, and used some long shackle, keyed alike padlocks to secure the cables (see photos).
Cables and connections
Tethered vs Plug-in cable solution: I prefer the idea of a plug in connection rather than using a tethered/fixed cable. As long as nobody will steal your cable (see security above), a plug will allow you to change the cable in future if needed.
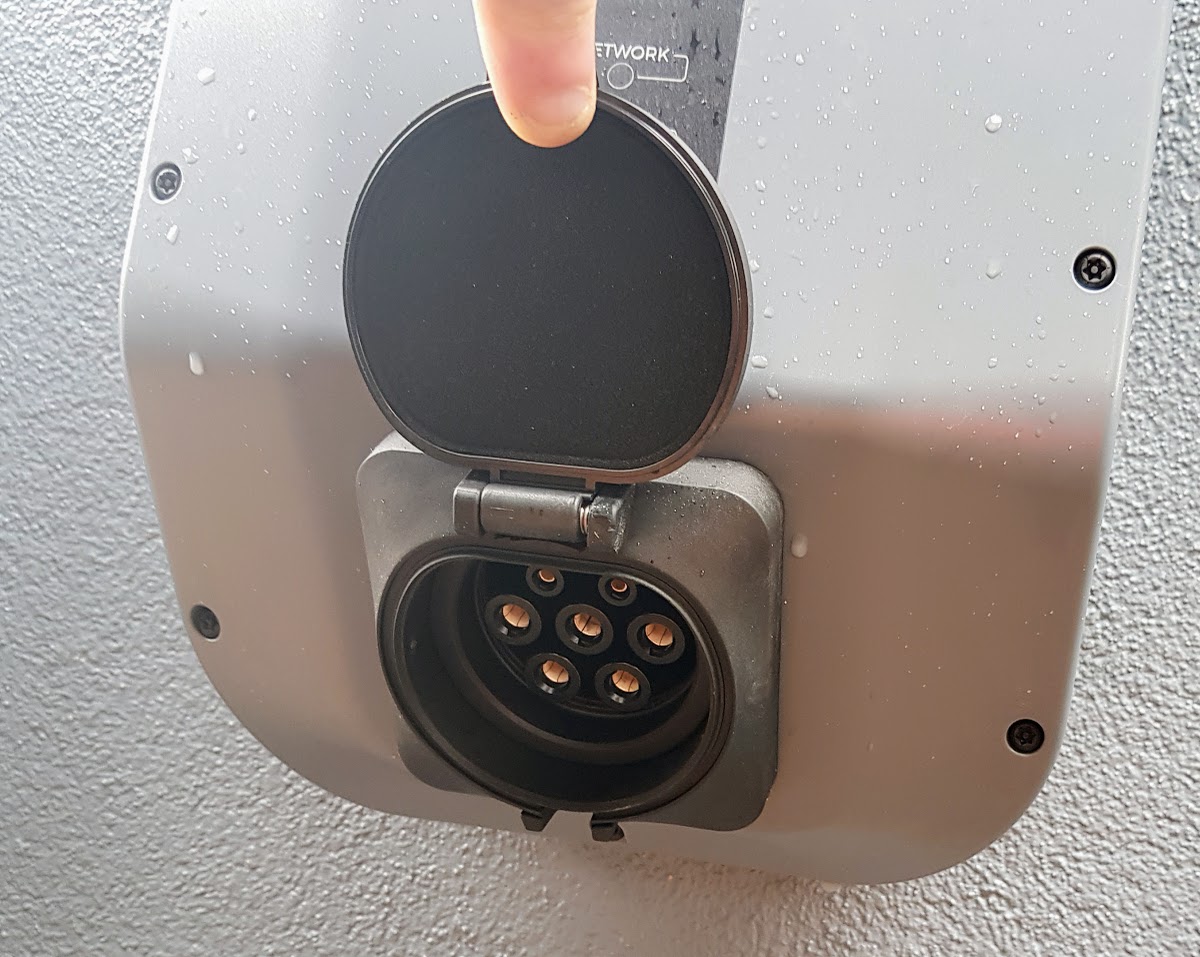
Our Main Evnex wallcharger has a type 2 socket (there was the option of tethered when we bought it), and originally had a type 2 to type 1 cable for charging the leaf. We replaced that with a Type 2 to Type 2 for the Atto.
You can also unplug this connected cable to take with you (eg to a mall for some Mode 3 charging whilst shopping). I find however that I like to keep my cable attached, and have another type 2 to type 1 cable in the leaf for the occasional mall topup.
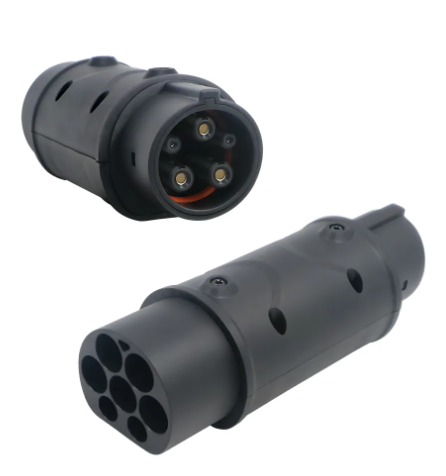
Cable Adaptors: Note that type 1 to type 2 cable adaptors or short adaptor leads do exist, and I have a simple type 2 to type 1 adaptor (see the photo). I don’t recommend them in terms of electrical safety, and I’ve only used mine once when there was no other option available to charge the Leaf at a destination. I’ve heard a few reports of adaptors getting stolen whilst charging too (or left behind accidentally).
3 Phase Cables: Finally, remember that the majority of EVs around at the moment only support single phase charging. Cables can be 3 phase or single phase, and if you are only charging with single phase… even though a 3 phase cable will work fine (and may future proof you if you upgrade vehicles in the future), single phase cables are usually cheaper and a bit more flexible.
Tidyness
It might help to think about aesthetics when putting in a charging point, especially if it is front and centre and visible, as ours is at the front of the house.
Some tips:
- Talk to your electrician about how cables can be hidden. It may cost you more, but having a bunch of visible conduit and switchgear of differing colours can look awful. Have a look online for a few pictures. At the very least ensure they get everything lined up nice and straight. I’ve seen so many tatty looking wallcharger installs where people get the cheapest installer they can and are reluctant to just spend a bit more on hiding cabling. Yes… their may be a bit of a wall to repair afterwards, but you’d expect these to last a long time and add to your house value.
- It was nice that the Evnex charger we got first was a grey colour to match our house wall. If it were white, I might have considered painting it. If you can’t change the colour, I’ve seen some pretty good setups all enclosed in a nice wooden painted, or stainless outdoor box. A bit of trellis in front can do wonders too. Obvious watch you have adequate airflow for any setup.
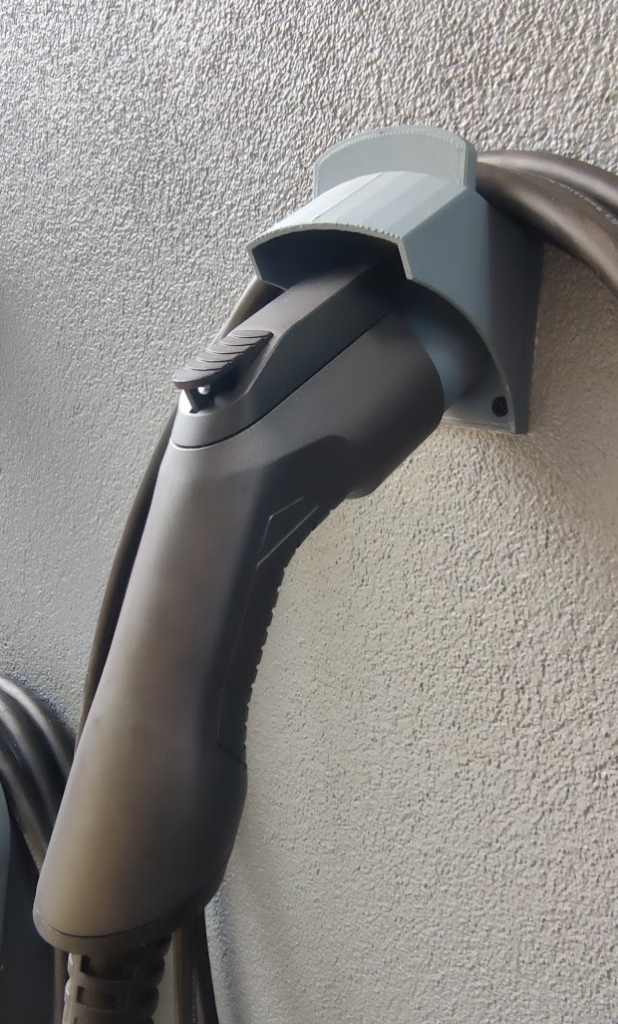
- Dummy cable sockets are great, they are a place to put the plug when not used and helps with tidiness. You can get type 2 and type 1 sockets 3D printed, and I got mine printed in a nice grey colour again (see photo) I also got a holder printed for the newer (white colour) 16A EVSE I use for charging the Leaf now. Here are some great 3D print designs from Paul Kennett, and I paid Paul to print some for me.
- Finally, I chose some cables that aren’t too long to avoid additional cable mess. The one we use now for the Atto is only 3m long as the car is pretty close. It goes from the wallcharger to the car without hitting the ground. (We have a longer one in the boot if needed).