MAME Cabinet Raspberry Pi 4
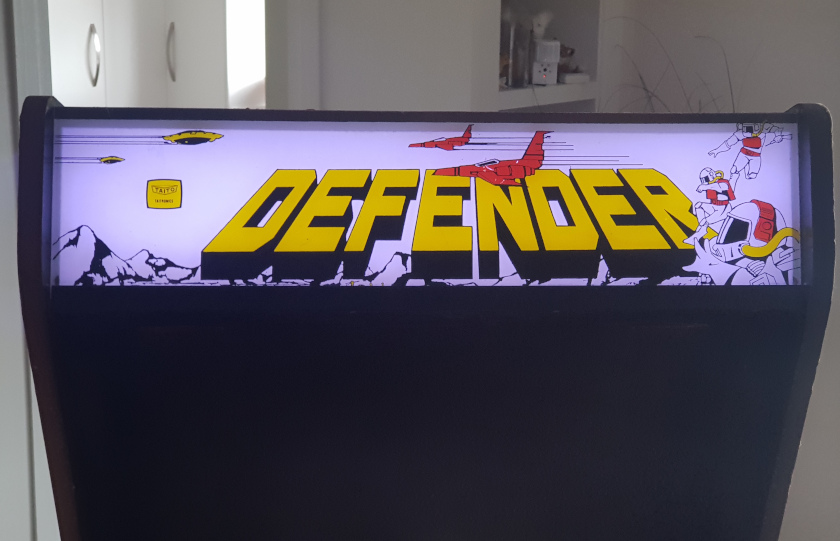
I had an old Taito standup arcade cabinet that I’d previously kitted out with MAME, one of a couple of full sized cabinets I have had for about 12 years. I just got it back from storage and decided to refit it with something more maintainable. MAME and emulation should be a lot simpler now than it was back then.
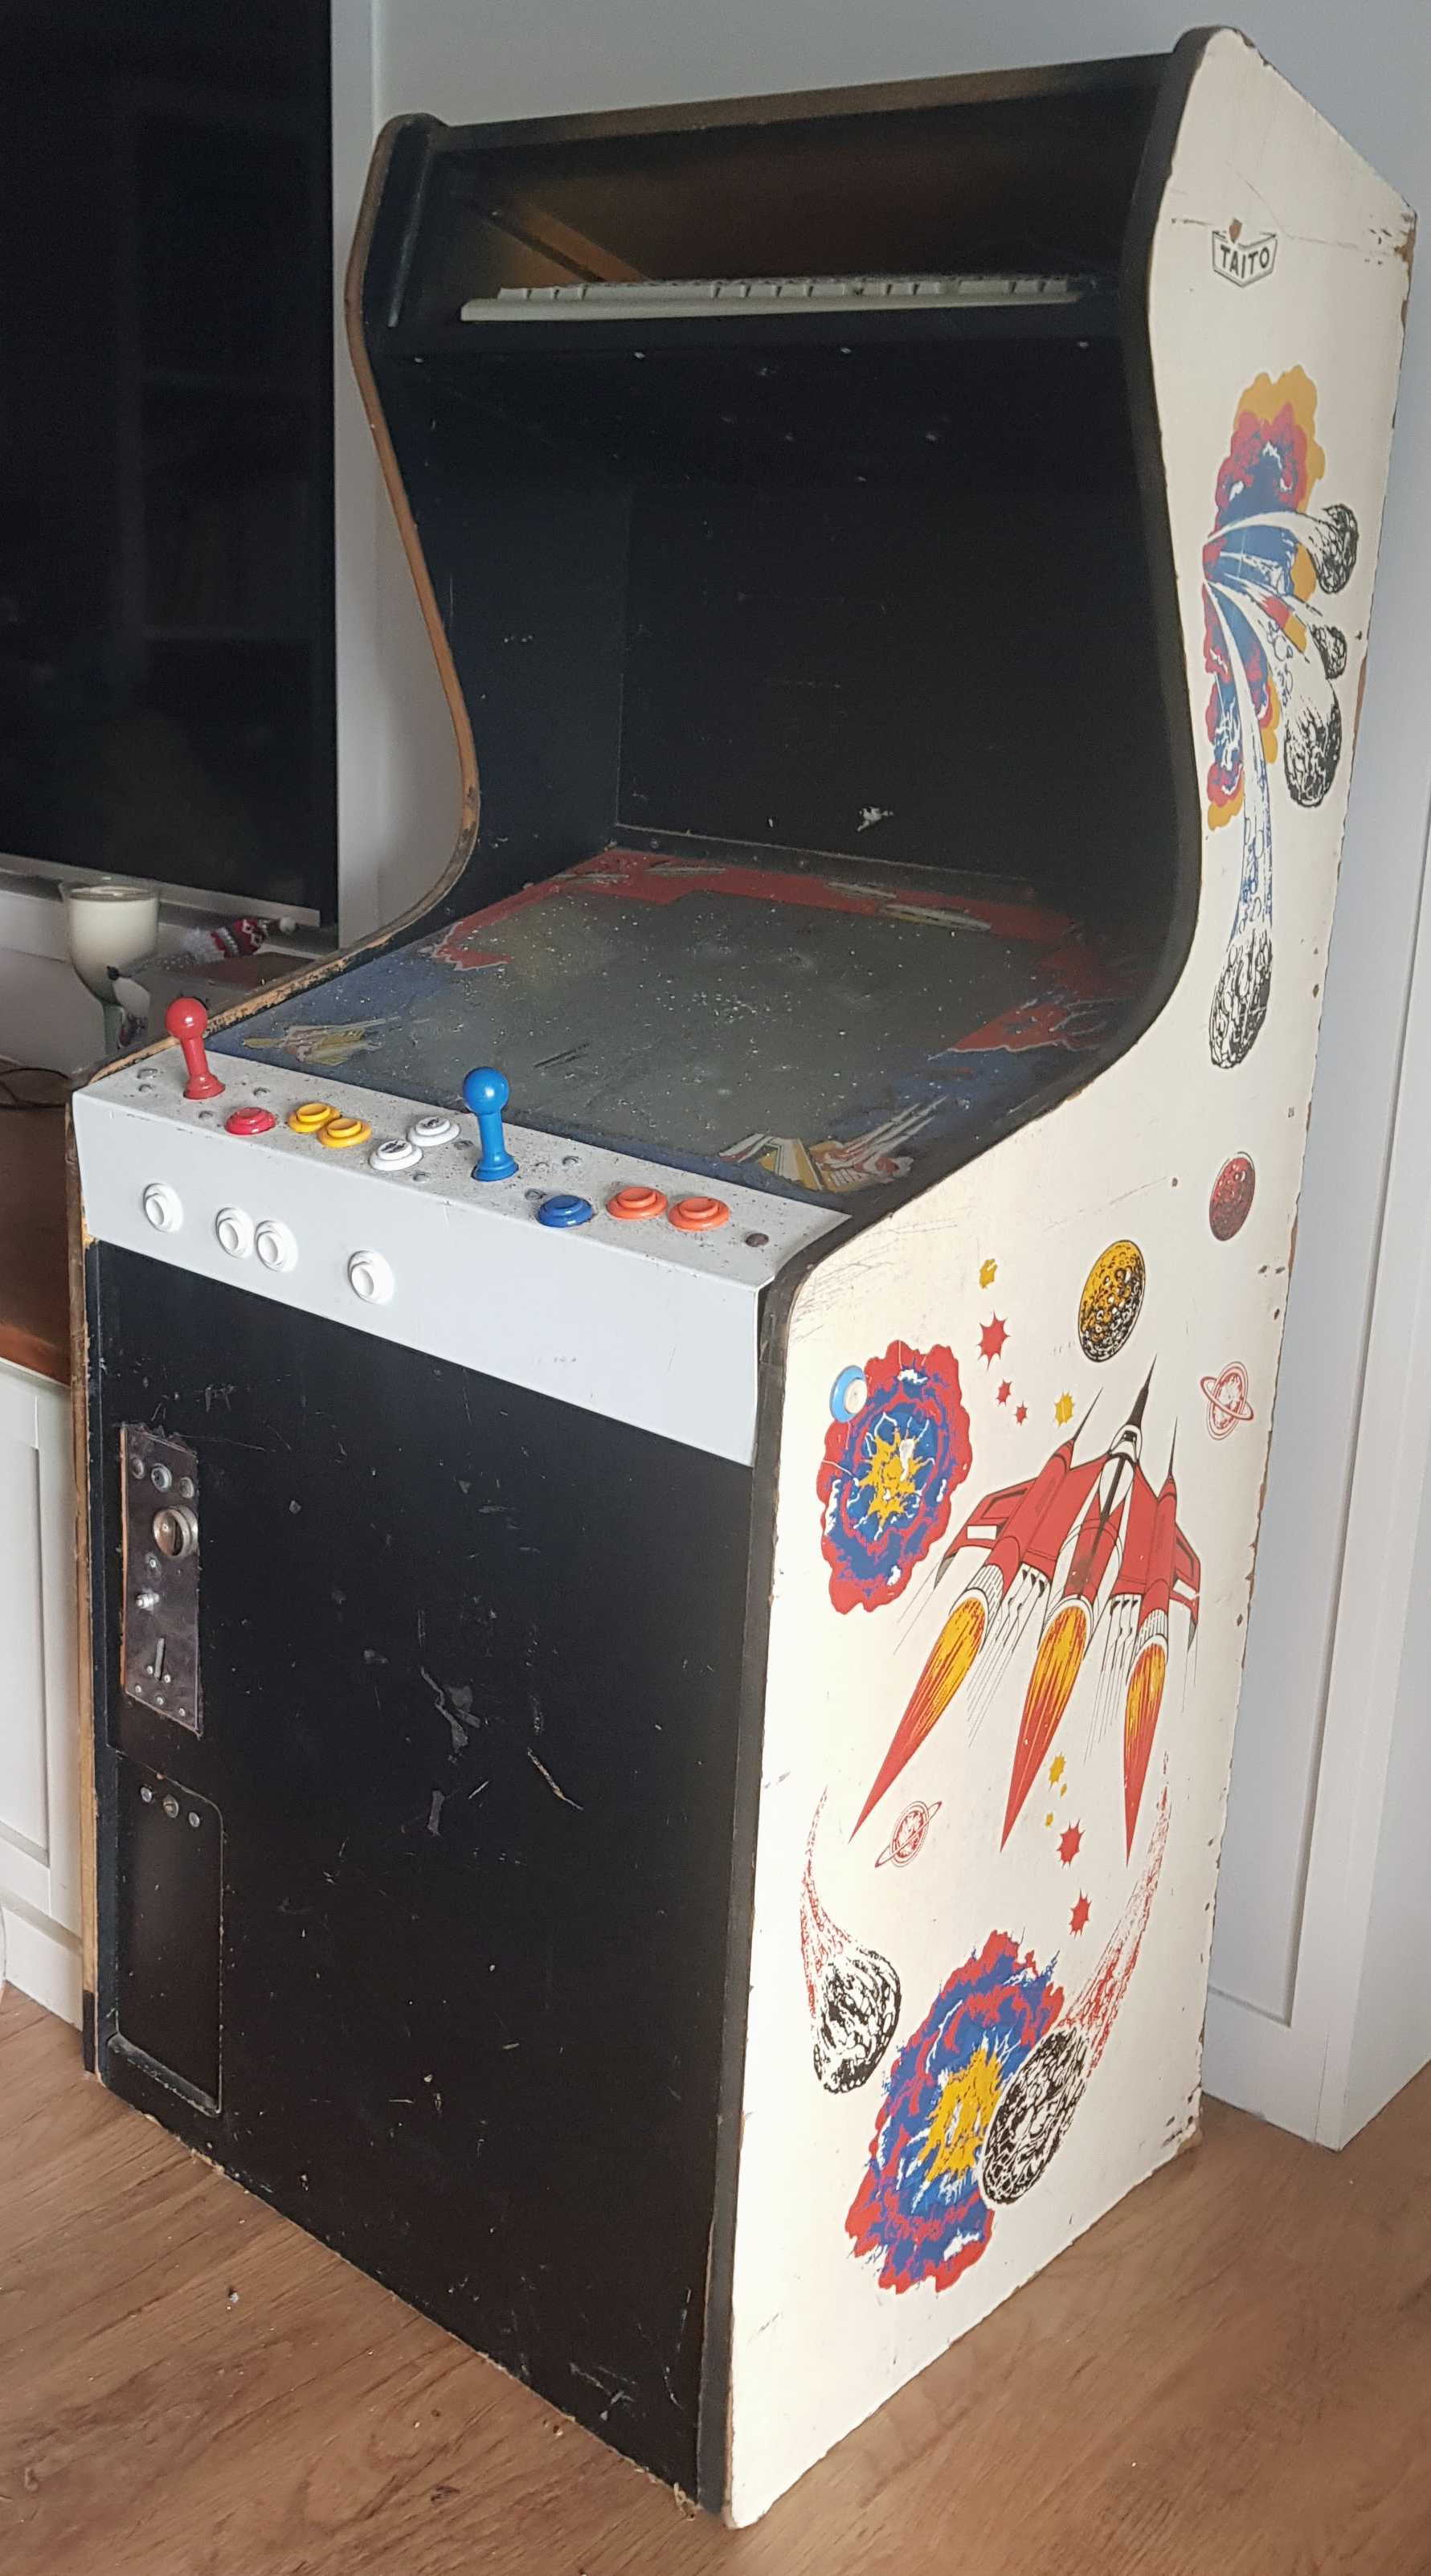
It previously had a Pentium 4 generation full motherboard, hard drive, graphics card, PCI wireless and more. I had rebuilt the joystick/button controls back then, and used an X-Arcade Keyboard encoder I had got second hand.
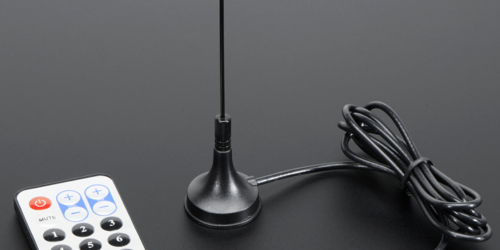
This cabinet has an old school 21 inch Philips TV in it (which is really pretty dangerous… as the tube has been removed from it’s case). I’d like an original 15hz arcade monitor to display games as they were meant to be displayed, but this is probably the next best thing. Arcade cabinets with modern LCD just seem a bit weird to me. Whatever I use, I’d need a composite video output.
The plan for the rebuild was to use a SBC of some sort and spend as little money as possible.
I did already have sets of MAME ROMS (from the days you sent blank CDs off to someone in another country and they returned them full of a ROM set), but knew getting a more modern set was now easier.
TL/DR: Final Solution
I ended up buying a Pi 4. The Pi 3 solution below, did work, but I needed it for another project so bought the other one. So much for a cheap build! I added a switch behind to start up and shut down, and you can see the 3.1 speaker setup (sub and 3 speakers secured behind the marquee).
The rest of the setup shows a relay set to control the LED marquee lights, and various other pics show the keyboard controller and coin wiring.
I’ve let the family know they can stop collecting old style 20c coins now, I probably have a couple of hundred!
Video
The rest of the post below is mainly notes about the journey I took using various versions of hardware and software. I went though a number of iterations before I settled on the Pi 4, and Batocera. Hopefully it is useful for someone who is going through the same process.
1. Raspberry Pi 3 (With RetroPie)
I felt that the Pi 3 was overkill and was reluctant to use it for such a simple project. I started with some large prebuilt images (128GB) and it was just a waste. I’ll likely really be interested in playing about 20 or so games, from the arcade era. I can use the Pi4 for something more productive. I had recently just bought a Raspberry Pi 4… just the 4GB version. I knew about Retropie and knew you could get masses of prebuilt images for the Pi4.
I started by playing with Retropie which seems to be well maintained, but it is a bit all over the places with menus for emulationstation, retropiesetup etc. The process is not particularly intuitive.
Composite TV out wasn’t really useful. I used a cheap HDMI -> comp adaptor but really that was set at 16:9 and gave major overscan. Not really possible to fix that I could see.
2. Early Raspberry Pi (With RetroPi)
I had a few early Raspberry Pis spare so why not try one of the first Pis? I tried with a Raspberry Pi B and again, RetroPi. They even had composite outputs by default.
Well, it booted and worked with RetroPie but man was it slow. Way too slow to be a usable box that you could turn on and off when you wanted to play it. I did get the composite going on this though. Minor overscan issues that may be fixable if I spent more time on the forums and with the config.txt.
3. Orange Pi Zero (with RetroOrangePi)
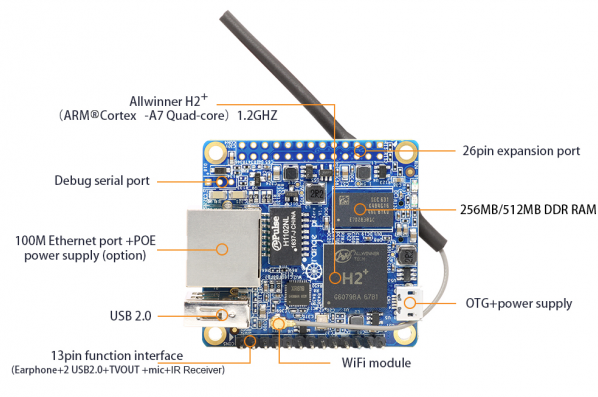
I have a few Orange Pi zeros, and soon discovered the RetroOrangePi project. Unfortunately it is no longer maintained.
I got out an Orange Pi Zero, and tried RetroOrangePi V4.2 which was the latest I could use at the time. This has a composite output, so seemed perfect. I decided this was my favourite option so far, as it is cheap, tiny and plenty fast enough. Replacing a shoebox sized PC with a matchbox sized one would be fun. It has 3 USB ports (with the daughter board expander), wireless onboard and even IR. I could even use the NAS expander if I really wanted to (SATA and EMMC) but that would probably be pointless for this application.
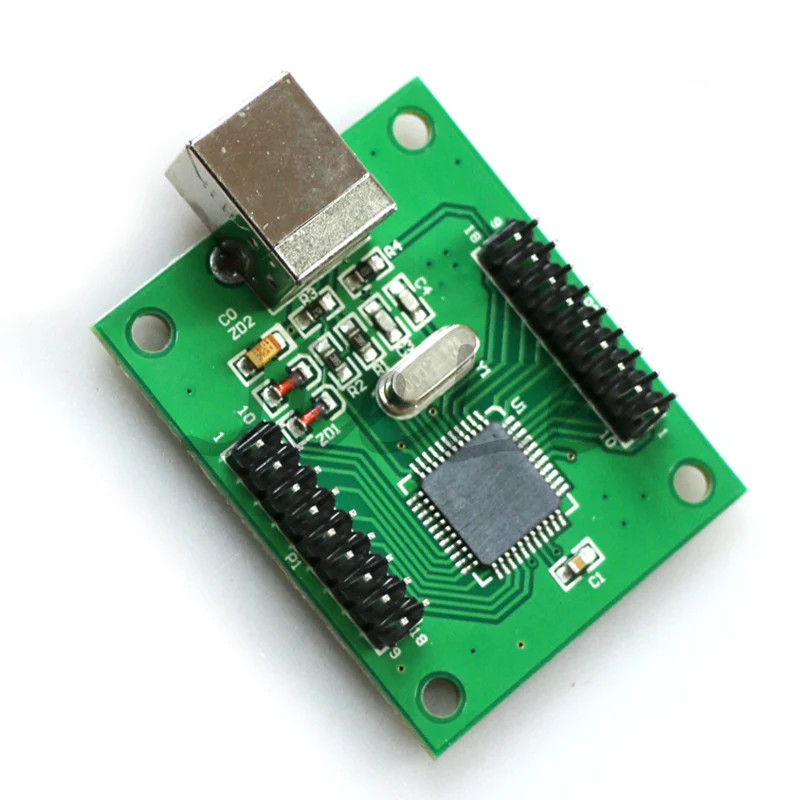
I set it up and worked with the image a while, overscan was manageable with the emulationstation theme and then decided the keyboard interface was a bit clunky, so saw there were other controller based interfaces quite cheap now. I ordered a Xin-mo 2 controller board locally and waited a couple of days for it to turn up. I got it from Aliexpress, but there are other suppliers obviously.
I had an idea to try… there were a couple of 4.2 builds of RetroOrangePi for the OPizero, but they only differed in that one had a full desktop so NOOBs could copy and paste ROMS. Surely they wouldn’t have built the kernel into none of these or both right? Well, a build of this worked, and the Xin-Mo controller was recognised.
Long story short, even after getting the Xin-Mo recognised, I couldn’t get the setup all working and chose another route.
Orange Pi with RetroOrangePi Notes:
- The chip gets pretty hot (Allwinner H2) but I could use a heatsink and fan
- I can get composite out working BUT I had to be mindful of the 4 pin TRRS connections… it is not the same as the raspberry Pi (last RS for video/GND is swapped) and NOT the same as the usual modern camcorders etc. I found I had ONE cable that would work with that… and it was very dodgy… requiring a lot of wiggling. I obtained a couple more from China.
- I built it with the previous version of RetroOrangePi (4.2) based on a slim version of Armbian. Looked good, but some overscan was still there. Probably acceptable.
Xin-mo, OPi zero, Retro OrangePi Notes
- I spent a few hours wiring up the Xin-mo board. I put together a simple 5v relay interface so I could use some of the player 1 controls when there was no need for a player 2. Also I could switch off the function and other front buttons if I wanted and make it coin operation only (I’d probably never do it, but it wasn’t difficult and the 20c coin slot is pretty cool)
- Once set up, I rebooted the OPi and waited for the controller to be recognised. Nothing.
- Tried a whole bunch of other things, before resorting to the last straw… posting in the help forum (for a previous release… or a pretty dead project). I held my breath for a response, but nothing unfortunately.
- Downloaded and tried the newer release, but I wasn’t expecting it to work as the newer kernel does not support the TV out function (and nobody plans to work on it). No go.
- Hours of googling showed my a bunch of ideas about kernel parameters, but these didn’t help.
- – lsusb showed me the device was actually there, just there seemed to be no drivers in the kernel.
- I thought about wiring the controls to the GPIO (this is supported), but could I really be bothered? Only if I had to as the Xin-Mo board was nicely up by the controls and connected to the OPi with usb.
- Could it be the hardware? I tried another OPi zero that I had spare and also tried a third that was in use… they were all the same. Tried two different expander boards and swapped around USB connections. Still not recognised (and still no bites on the forum)
- I probably should have plugged it in before rewiring the cabinet…
4. Orange Pi PC Plus (with RetroOrangePi)
I also had an Orange Pi PC Plus. It was plenty fast enough for what I wanted, but poorly made. That thing buzzes like crazy, and gets really hot. I could likely live with the buzzing and provide some cooling.
I’d struggled to get the composite out working in the past, but had more info re Armbian now. It has 8GB eMMC on board that I could use if I wanted to for game ROMs.
I managed to get it working by modifying the right FEX file and knew about the right kernel build. Still no easy way to get the image right with overscan etc though that I could find.
In summary, RetroOrangePi is a pretty good project, not perfectly polished but pretty good.
So… I looked for other possible distros to try. Lakka and Batocera.linux popped up. There is Recalbox too, but it seems more commercial and only supports raspberry pi so didn’t bother trying it at this stage (or at all as it turns out)
5. OrangePiZero (with Lakka… H2 build)
I looked into Lakka as there was supposedly an OrangePi build. Turns out it only supports specific boards.
I tried a similar board with the H2 processor but had to use the HDMI converter (kernel was too new), so the same screen issues and I found it a bit unintuitive. It just came up with a menu and not even a very pretty one. And then I fount that the build wasn’t close enough – issues with wifi and other stuff put a stop to it. Lakka might be better on some decent hardware, but it wasn’t to be.
6. Raspberry Pi B again (with Batocera)
Batocera.linux – Weird name, but wow this is pretty awesome. Not supported on the OrangePi (although there are ODroid builds….).
I put it on the Raspberry Pi B. It has a fantastic interface, emulationstation is integrated into other parts also and is far more polished. The build also is heavily cut down too (think of it like LibreELEC) with use of busybox etc.
Unfortunately however, couldn’t get the composite working. Similar to other forums… this has been a question a few time where it is either
- met with silence https://forum.batocera.org/d/4005-video-composite-av-out-does-not-work
- answered with a link to a completely different and likely irrelevant project https://forum.batocera.org/d/2941-video-by-rca which points to a wiki that has moved anyway (with no direct redirect)
- possibly joy here (but didn’t work for me) https://forum.batocera.org/d/740-240p-support-over-built-in-composite-output/3
- had methods that require more fancy hardware https://github.com/raspberrypi/firmware/issues/683
So, maybe I’d try some other hardware. Rather than pulling my Odroid XU4 away from its trustworthy job as a NAS, I borrowed a Raspberry Pi 3+ that I had in another project. It is ‘the most widely supported’ right?
Some links from my notes that may be useful
TVOut and /etc/rc.local
https://forum.armbian.com/topic/7827-orangepi-pc-tvout-overscan-issue-solved/
https://retropie.org.uk/forum/topic/4900/nothing-on-composite-video-output-solved
https://retropie.org.uk/forum/topic/24596/retropie-buster-weekly-image-problem-with-overscan
Raspberry Pi3 make emulationstation fit on composite
https://retropie.org.uk/forum/topic/23755/can-not-get-emulationstation-to-fit-on-crt-composite-screen
https://retropie.org.uk/forum/topic/12666/240p-composite-top-portion-is-crooked/28
Audio stutter on Raspberry Pi 3 with comp out
https://www.raspberrypi.org/forums/viewtopic.php?t=220456
https://www.reddit.com/r/RetroPie/comments/cf4zni/audio_stutter_on_one_specific_tv/
https://baheyeldin.com/linux/how-fix-audio-skips-and-stuttering-raspberry-pi.html
https://ubuntu-mate.community/t/skipping-choppy-audio-on-raspberry-pi-3-running-ubuntu-mate-16-04/7275
https://www.reddit.com/r/RetroPie/comments/6170hg/pi3_b_and_retropie_to_sdtv_composite_output/
CRTPi4 Project
https://www.reddit.com/r/crtgaming/comments/glp8au/crtpi4rca_v34fx_composite_tvout_for_your_pi4/
https://github.com/crtpi/CRTPi-Project
Raspberry Pi Settings for config.txt for composite video
disable_overscan=1
overscan_left=14
overscan_right=15
overscan_top=4
overscan_bottom=2
framebuffer_width=640
framebuffer_height=480
#hdmi_force_hotplug=1
#hdmi_drive=2
sdtv_mode=2
sdtv_aspect=1
overscan_scale=1