Conversion of Ceiling Attic to Storage
Summary
In 2019 I converted our attic ceiling space in our current house to storage (on a budget). You can never have enough home storage. This is the 5th type of install I’ve done like this (Similar in 4 previous houses), and as well as being useful, home buyers love it (if done well).

Project Issues & Solutions
Height
In this space, there is not enough room to stand in (between 1m and 0.4m), but enough for access and plenty of box storage (see dimensions photo)

Walls
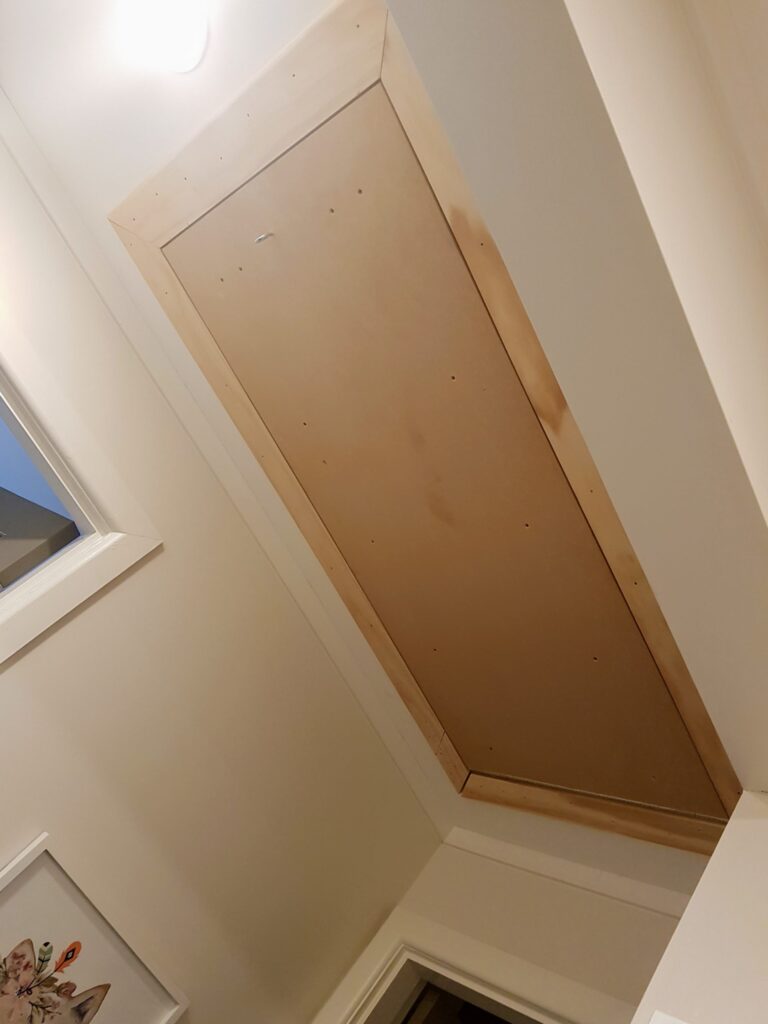
I had various sheets of ply that I could use for walls, from 7mm to 12mm. I just cut to the sizes I had. I made simple ply doors and removable panels to access other areas of the ceiling. I made a small wall at one side which was open (against an internal beam) to close the space off as much as possible.

Flooring
Flooring was 20mm untreated ply. I screwed the flooring down, mainly to stop it moving around (but not excessively so, in case I needed to lift any in future)

Insulation
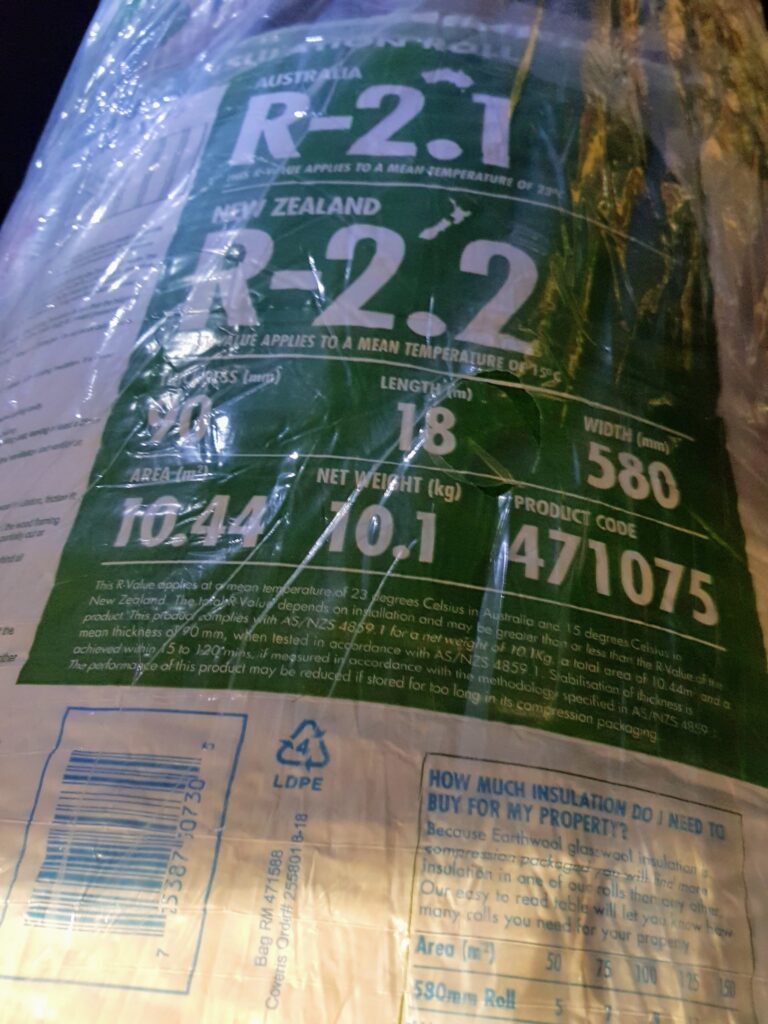
I had already rewired the house, and ensured I kept cabling below the ceiling joists. The existing ceiling had insulfluff which is horrible stuff, but being able to enclose it within the flooring was great. I then insulated the loft ceiling with batts (i.e. top and bottom of the storage loft, as well as its walls were now insulated).
Lighting
I spaced out some bulkheads with some cool white LED bulbs. The bulkheads were only about $10 from Bunnings, and they help protect the bulb when I’m moving stuff around up there.

Strength
I went over the positioning with a structural engineering friend. There are a few support walls beneath where the panels were laid (due to the age of the house, pretty much all walls are supporting walls), and fixing the new flooring helps distribute the load. We also don’t store heavy items up there.
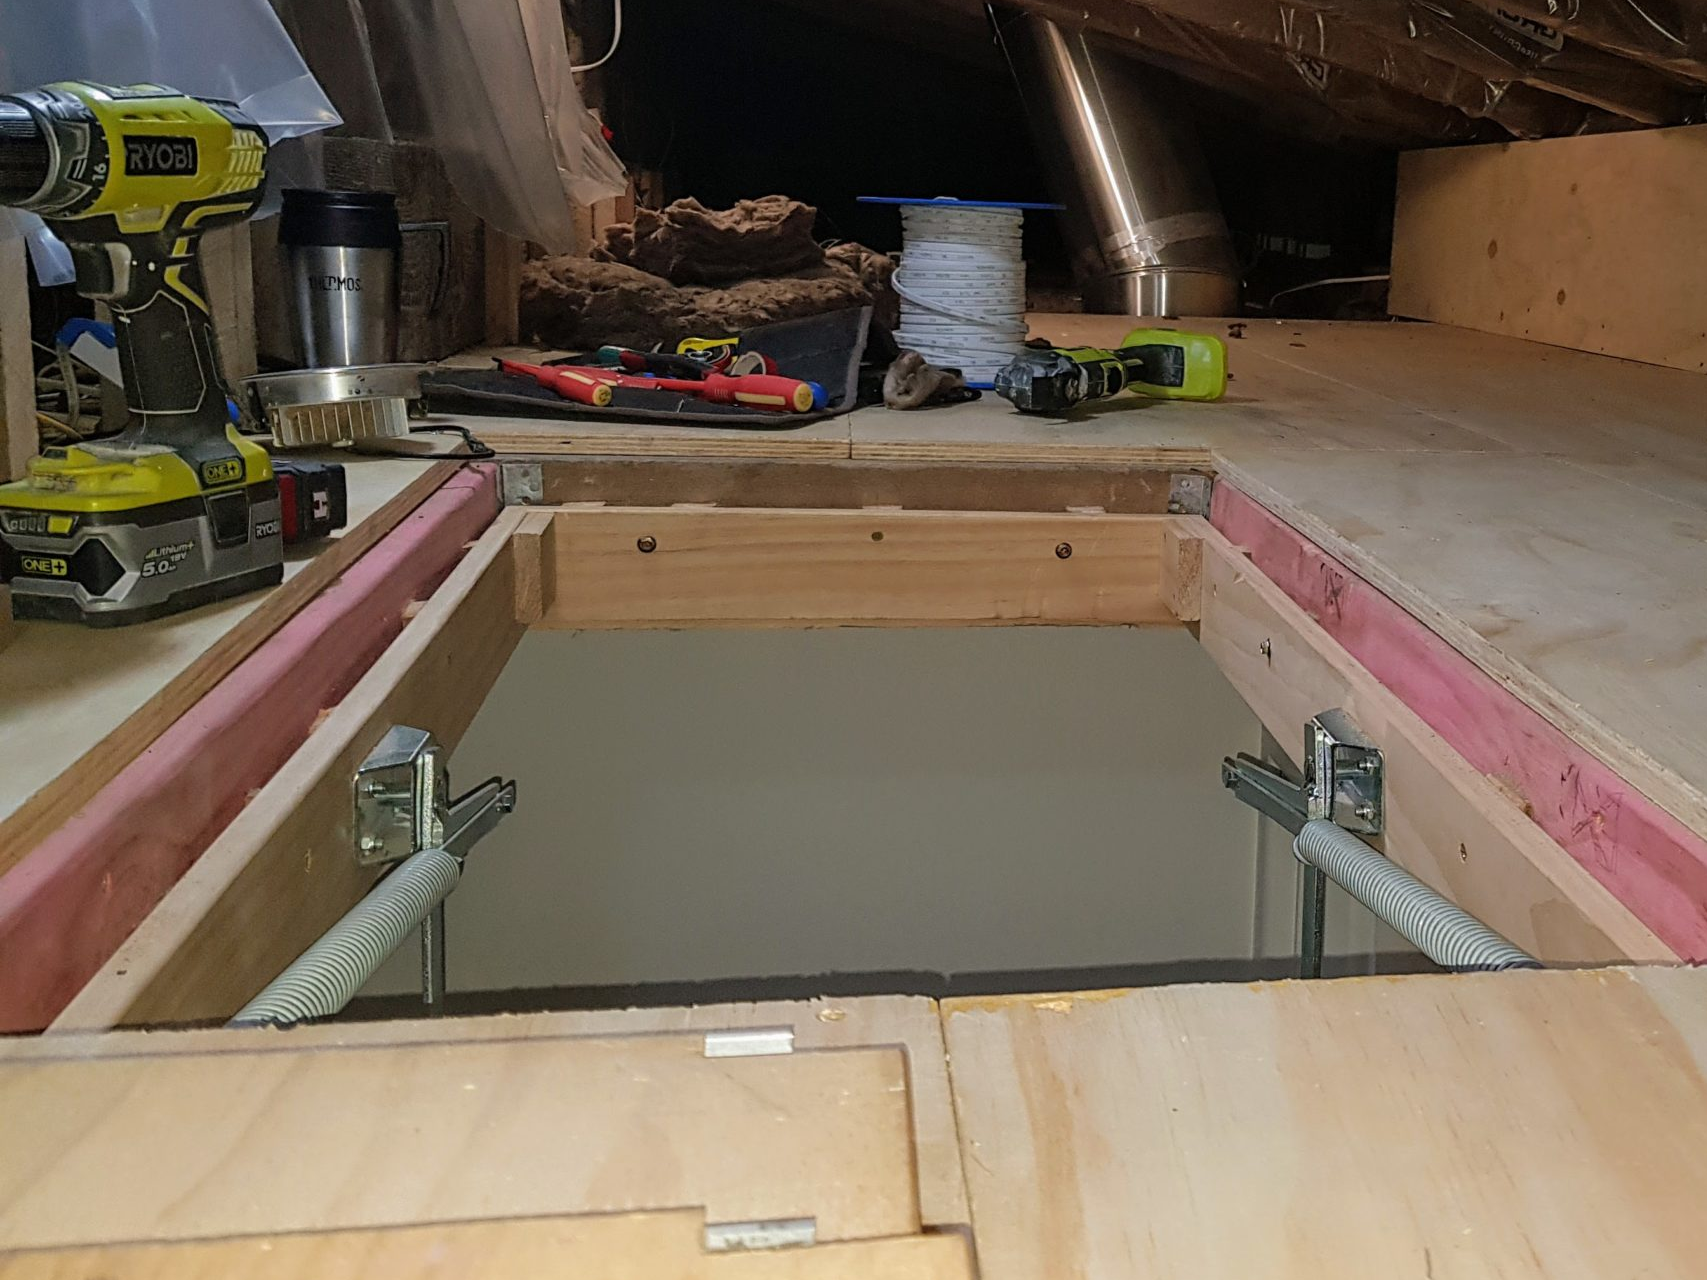
Ceiling Bracing
This project was in a 1950s house that has had extensive add-ons since, there was no cross bracing inside this part of the house ceiling. That meant one long open space. In a previous house, I had a space that you could stand up in, but it had lots of cross bracing. I cut flooring for it to fit around the bracing (which wasn’t fun).
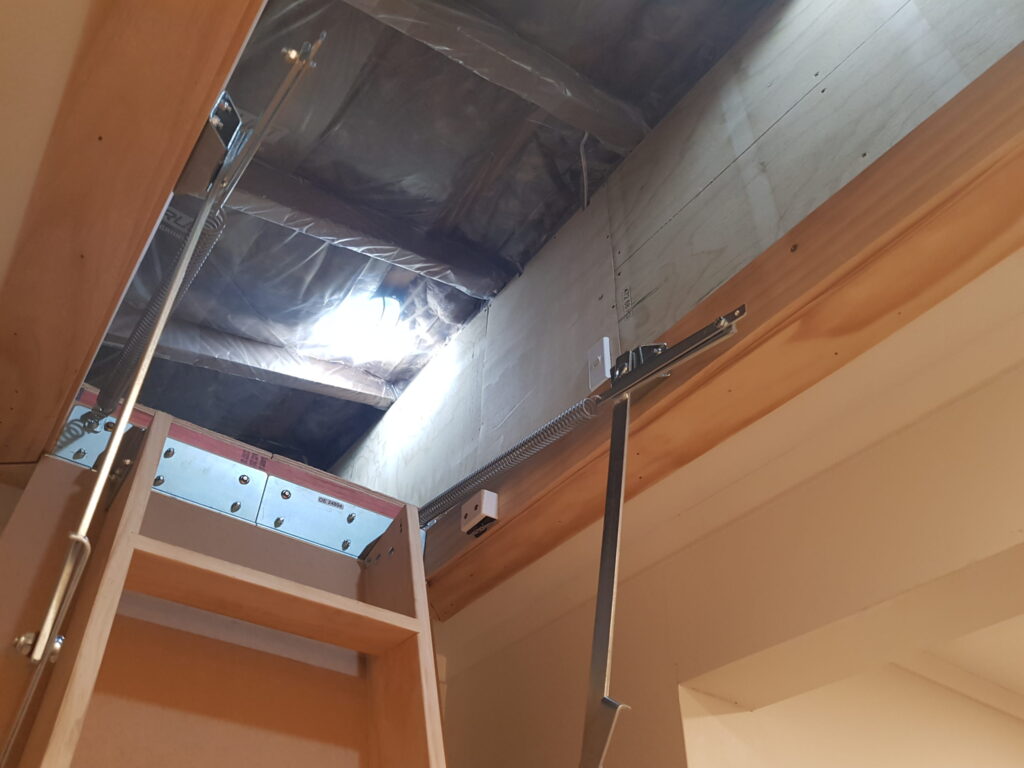
Original Roofing
This photo below shows the original roofing . The house has original iron, but new metal roofing has been laid above this. Paper and insulation were installed in this project under that (then plastic below the insulation). It was amazing how hot it got up there, and I was a bit worried about it. The insulation changed that completely.

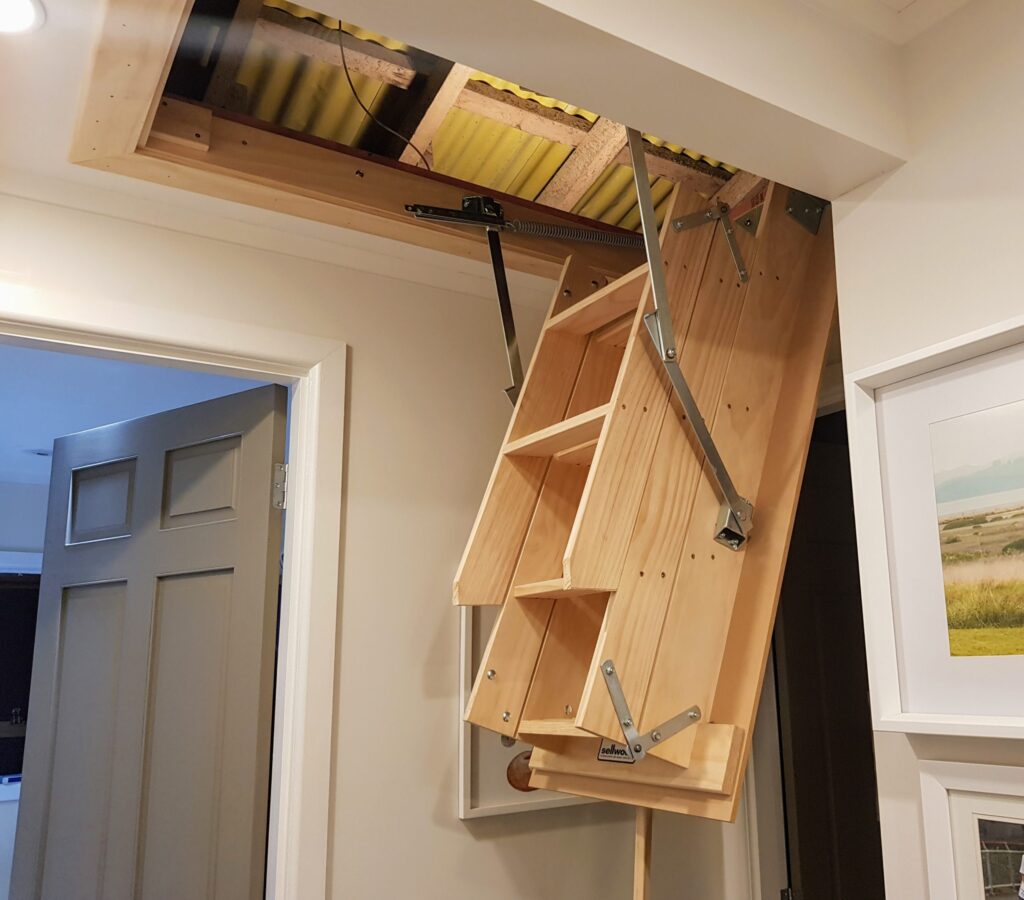
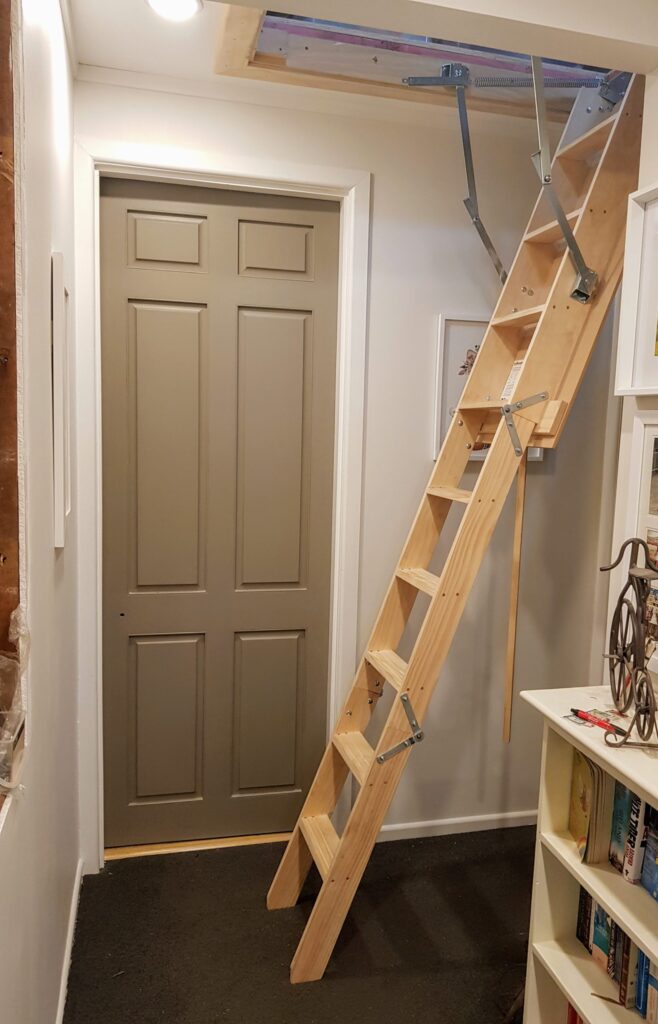
Attic Ladder
Some photos of the Access ladder once installed (this was obviously the first thing to do). When painted to match the ceiling, it looks very tidy. You can see the microswitch for the lighting in one of the photos (and the wall override switch). It also has security monitoring, and I have wired for an electronic lock (why not…)
Tips and Lessons Learned
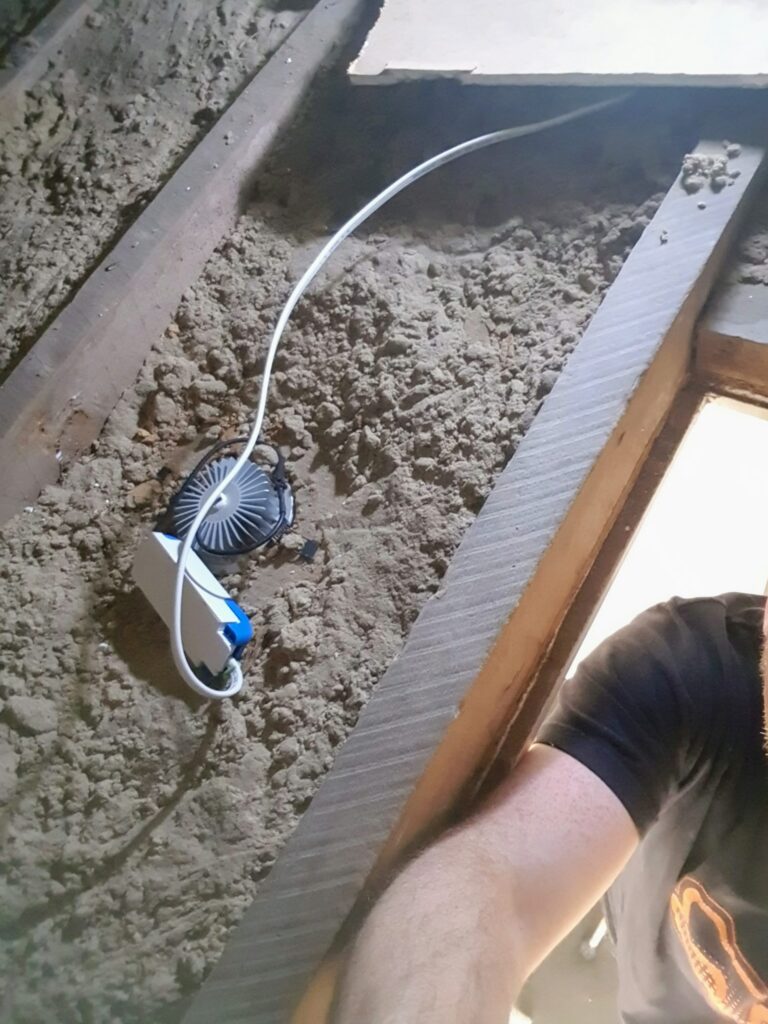
Insulate: It made an amazing difference to temperatures once insulated all around. The rolls of earthwool batts from Bunnings are cheap. I learned this from a previous install that I didn’t insulate… it was not good for long term storage of keepsakes/photos etc. If you can’t keep the temps down I recommend some sort of small quiet extract fan system on a thermostat.
Get comfortable up there: I got a pretty sore back from crawling all around fixing everything in place.
Reduce Dust: I happened to have some large rolls of clear plastic, and this was perfect for covering the insulation and preventing dust (I just stapled it). Dusty loft spaces are awful, but this is a place that is not unpleasant to go into (apart from the knee crawling to get to the far end… but that is usually my job)
Treated Ply is Better I’d suggest treated everywhere on the walls if possible. Originally I had a bit of moisture up there. However once I finished and lined everywhere it was fine. A couple of my walls use untreated ply (as that is what I had).
Check what size panels you can get up there: I originally thought I might be able to get full 1200×2400 sheets up through the hatch, but no chance… (mainly due to height… and working by myself, maneuvering them wasn’t easy). I cut them lengthwise, so they were 2400×600. This still wasn’t fun to pull them up.
Keep the area sealed as much as you can Temperature is proving very constant all year around, but if I open up and leave any of the hatches (to get into the other ceiling spaces) humidity especially can rise a lot (in winter or if raining). I monitor the temperature and humidity in the space year around.
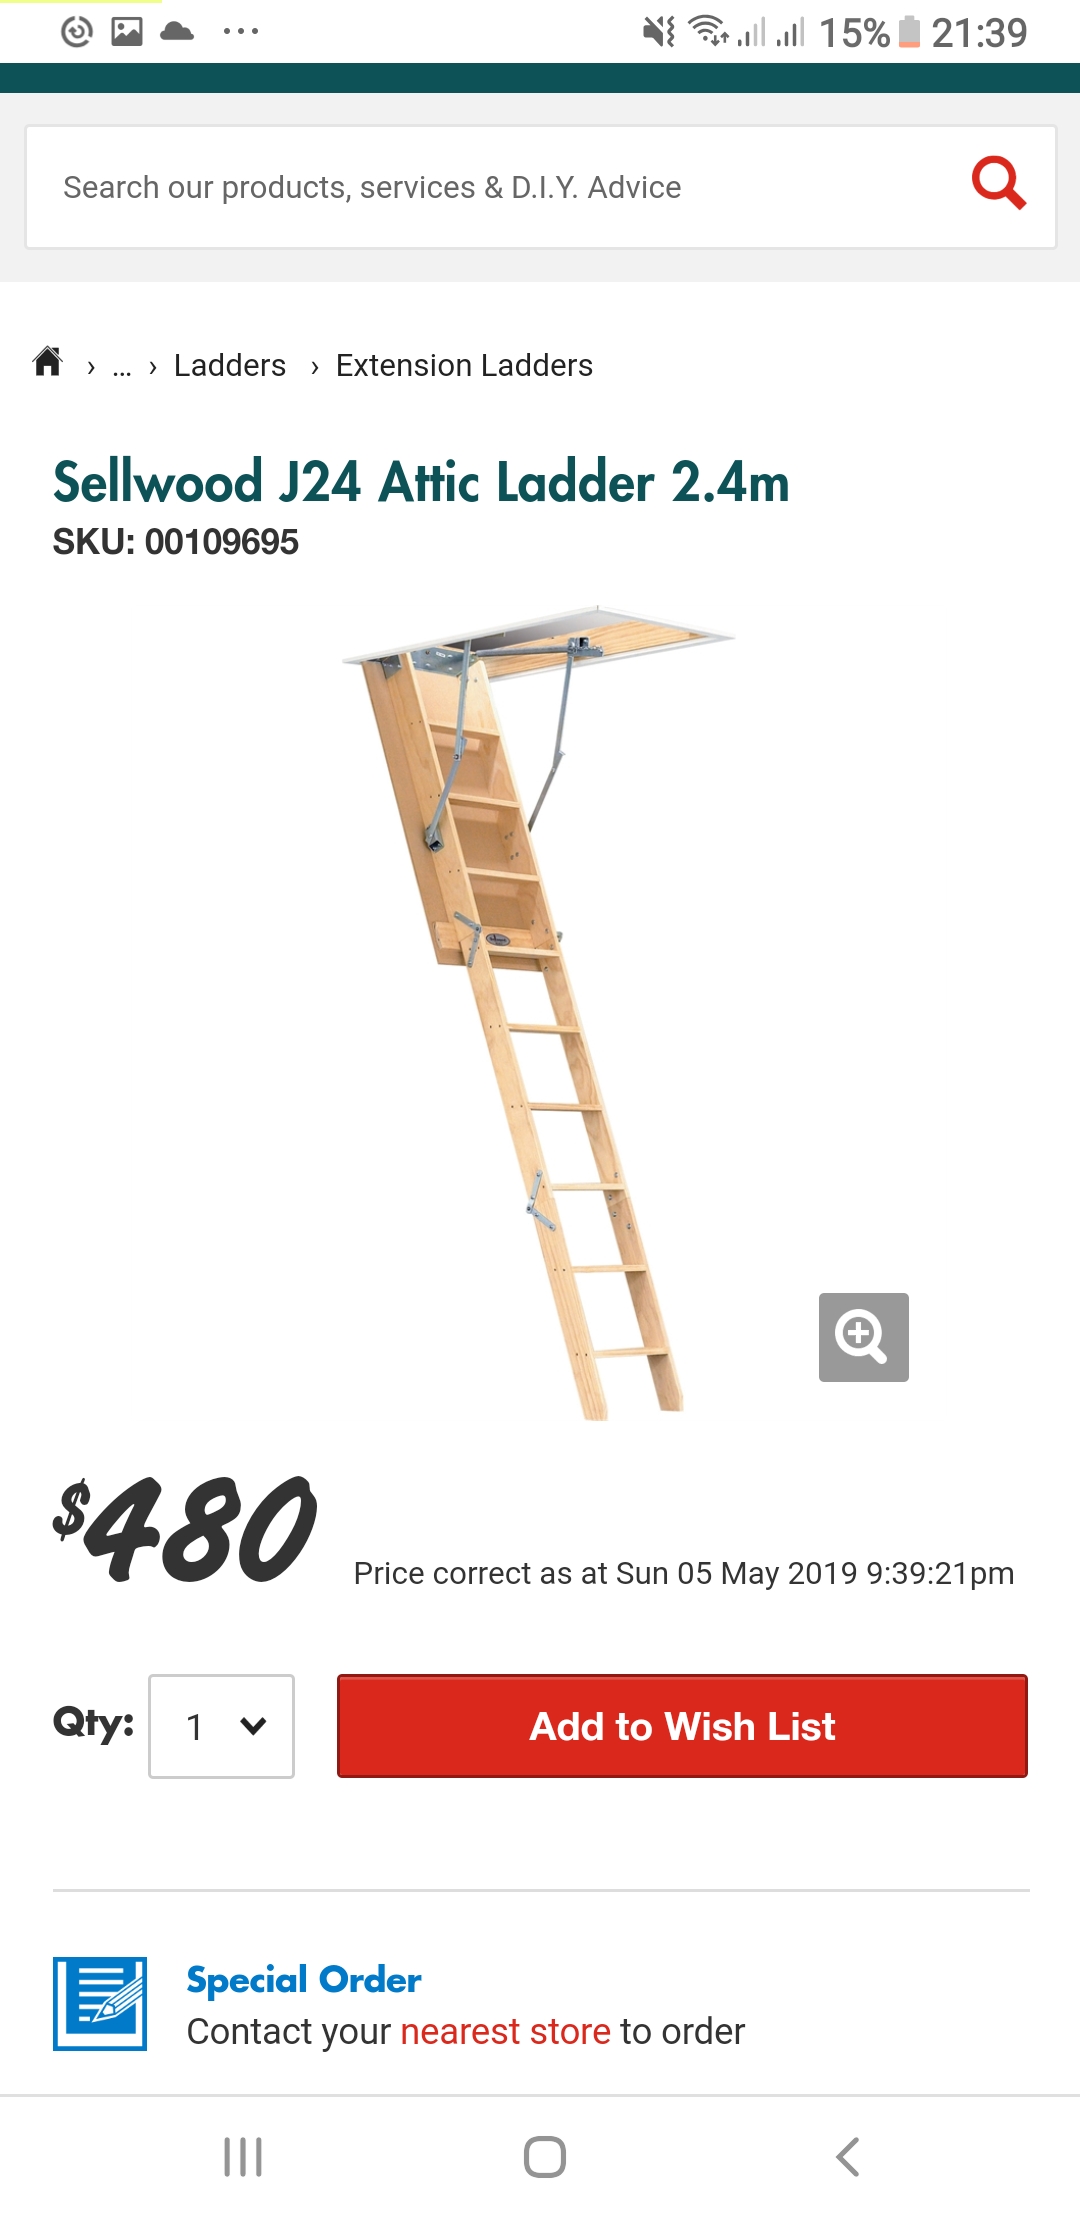
Get a decent loft ladder (see photos) If you buy a loft ladders in New Zealand, I recommend getting a decent Sellwood brand one with a good sized opening and strong steps. I used the Sellwood J24 model (was around $500). A handy hint… Bunnings and M10 both sold them at the time, so I used their 15% guaranteed lowest price. I’ve used those ‘metal ladder’ types before and they are terrible. We access the space probably once or twice a week, so decent stairs are necessary.
Put lots of light up there: You can never have enough lighting up there. Mine are switched on and off with the hatch opening (at our last place the lights often got left on… and also the lights on help when climbing the ladder). Do the lighting first… you will want it for the installation of everything else.
Additional Safety: Make sure you put a smoke detector up there. I also have temperature and humidity sensing, it is useful to see the environmental conditions when you store keepsakes etc


