WB3S replacement for Home Automation devices
Summary
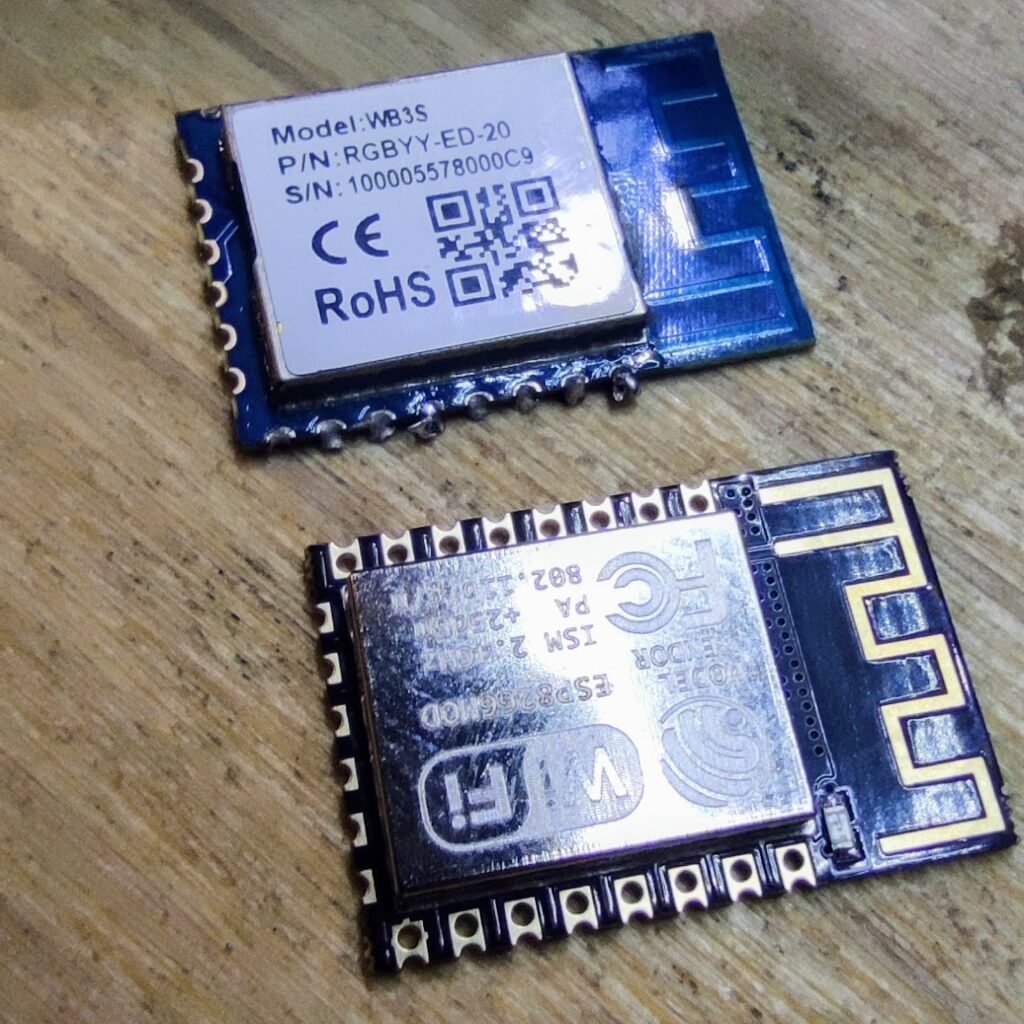
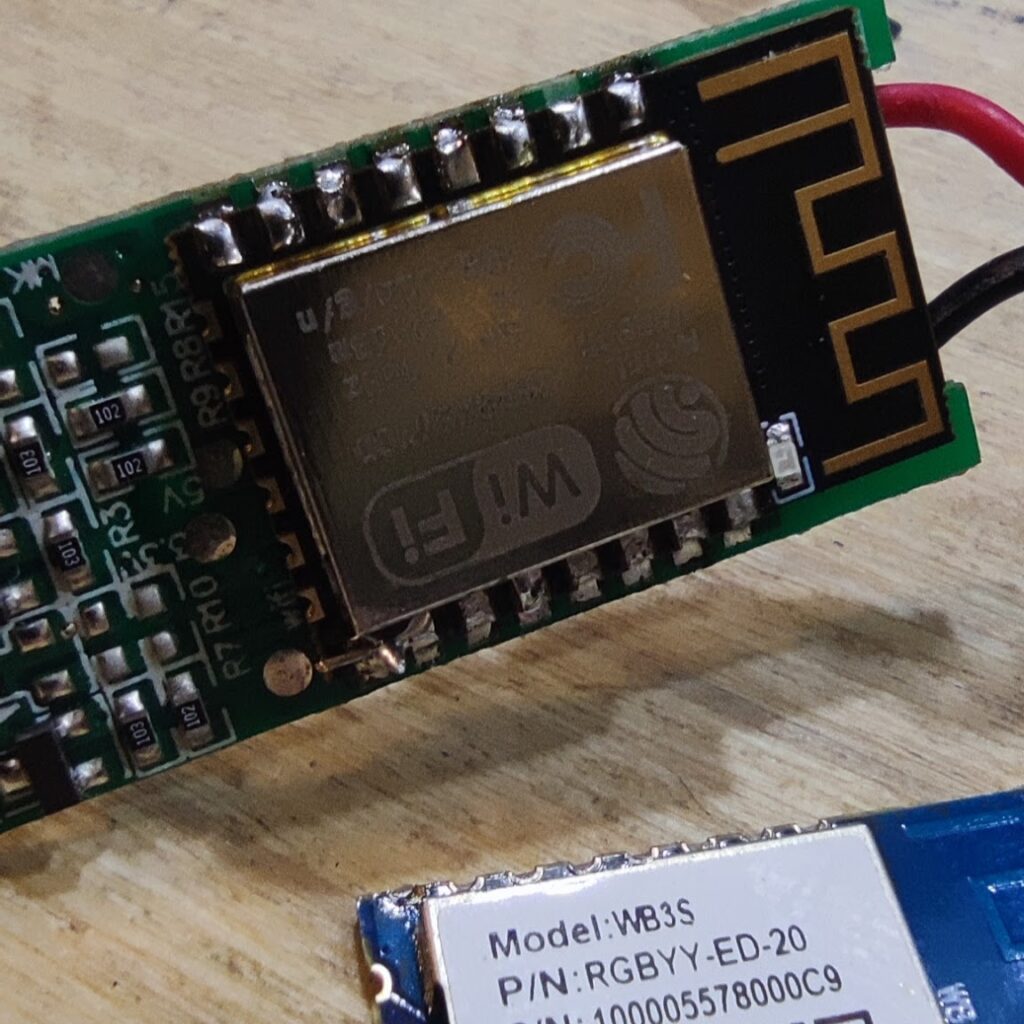
More and more home automation devices from China are coming with no ESP8266 module, especially the TUYA based ones. Some are coming with a WB3S (which is different to the TYWB3S), but this can easily be removed and replaced with a cheap ESP12F (or similar) module.
Equipment Needed
- A device with a WB3S in it. In my case the devices I wanted to use were some RGB LED controllers which were on special at the local Jaycar hobbiest shop. I have purchased some before that have ESP8266 modules, but now they all have the WB3S.
- This was the unit: https://www.jaycar.co.nz/smart-wifi-rgb-led-controller-for-led-strips-with-app-and-voice-control/p/ST3990
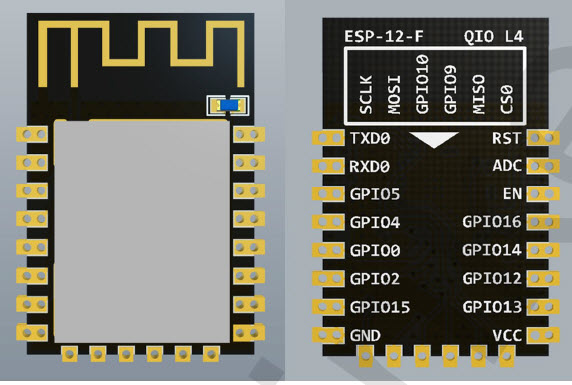
- An ESP12F module. I assume 12S, !2E etc all will work, and all have the same pinouts. Some have different aerial designs and amounts of flash. I purchased 10 of these in November 2021 for around NZ$25 including tax. https://www.aliexpress.com/item/1005003136626008.html
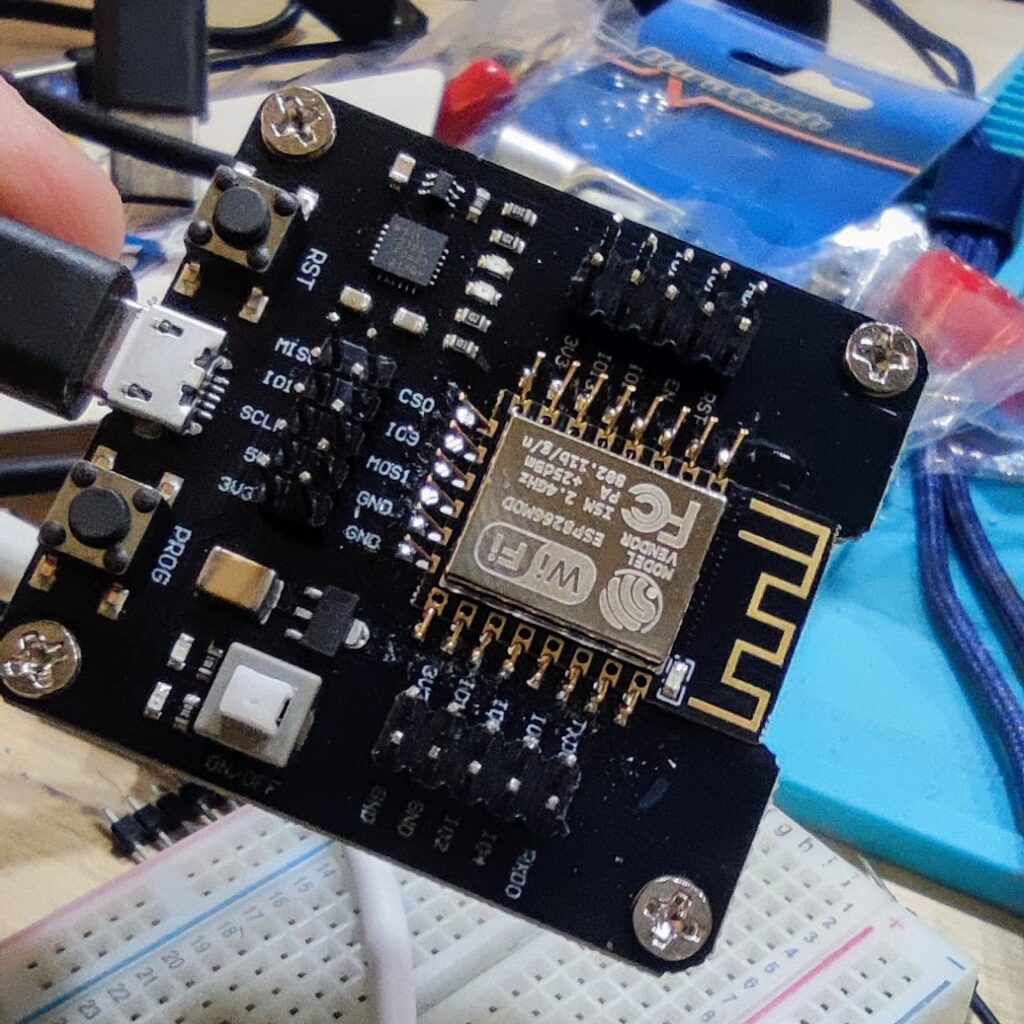
- An ESP12 module ‘burning’ development board. There are a bunch of these and they sell for about $14 NZ. You don’t have to have one, but it is much easier to flash the ESP12F module (with eg Tasmota or ESPHome) before you install it. The development boards have springy pins, so you can just pop the module in it, flash and pull it straight out again.
This is the one I got https://www.aliexpress.com/item/32812849093.html - A desoldering Heat Gun as well as a soldering iron obviously. It is sooooo much easier to desolder the WB3S and similar modules with a heat gun.
- Tasmotizer software, or something to flash your ESP8266 ESP12F module
A note about devices and ESP8266 modules
There are a lot of devices that have had ESP8266 modules in the past and now have non compatible microprocessors in them. This can be especially true of modules ordered from China… what you buy today (to put custom firmware in) may change in hardware tomorrow. Please update places like the blackadder device database when you do find things have changed.
The RGB controllers I can likely get cheaper from China, rather than buying locally but at least now I know exactly what I’m going to get. For example, I purchased some RGB controllers designed for the Magichome family of apps (a competitor to Tuya), and whilst originally they had ESP8266s in them, a recent one I bought has a fully incompatible and tiny surface mount processor (it was this one https://www.aliexpress.com/item/33005285804.html , ordered in June 2022)
Process
I had done this a couple of times before I noticed this useful video by digiBlurDIY. He goes over the process well and into more detail about soldering/heat guns in general for those who are worried about destroying their devices.
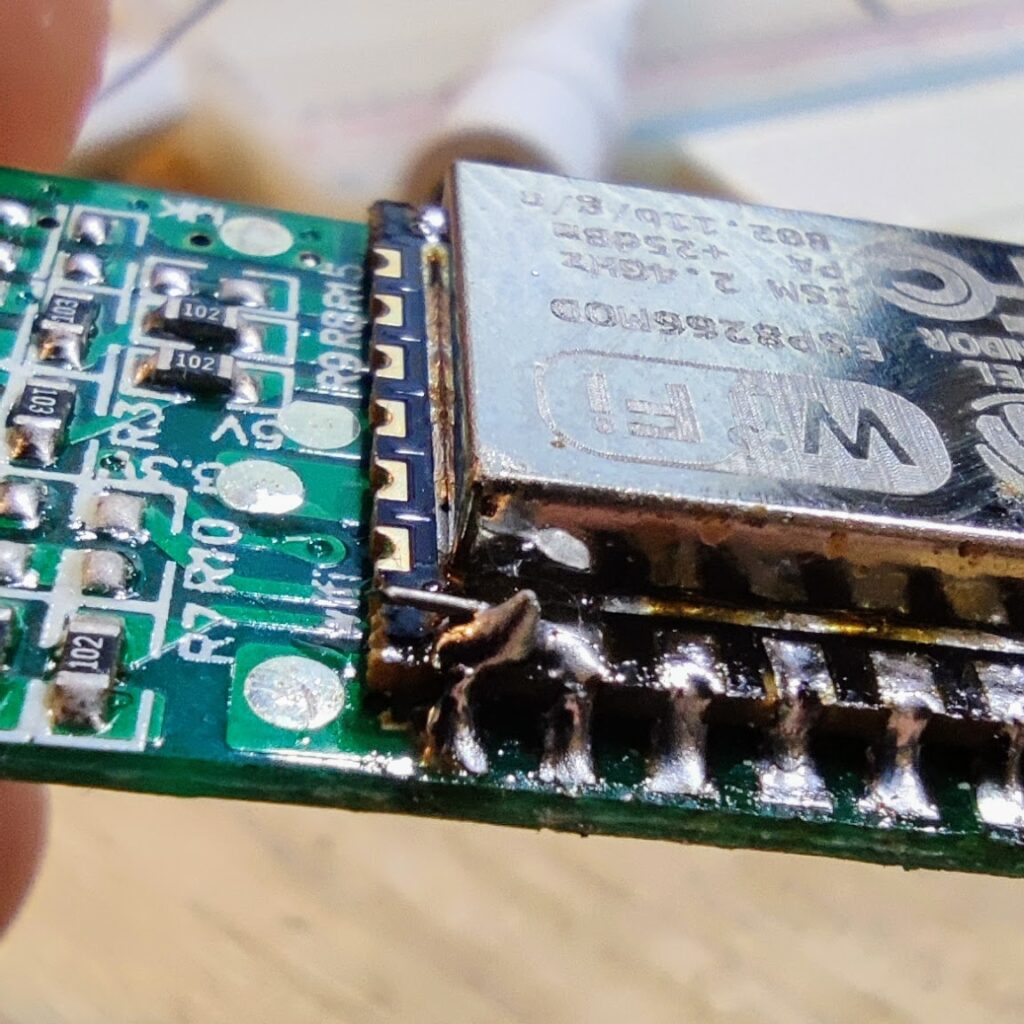
- Use the heat gun to melt the solder on the WB3S. Normally it will just fall off with gravity, but you can pop a spudger or screwdriver under the aerial end to get the WB3S off.
- Tidy up and look at the pads to see if they are OK. They shouldn’t be damaged. Not all devices use all the pads, as some devices (eg those with a seperate Tuya MCU) only use serial and the two power connectors.
- Grab some solder and pop a small amount on each pad to pre-tin it.
- Flash the ESP12F in your ‘burning’ board.
- Sit the module on the tinned solder pads, ensuring it is nicely lined up and briefly run the soldering along each one and make sure there is a connection. Check with a magnifier.
- NOTE: you must then also bridge GPIO15 to Ground. It won’t boot if you don’t do that. (boards with these modules on by default will have this pull down in place). Just bridge it with a small piece of component wire or solder.


Great tutorial, thanks. There’s an error in point 6 We need to bridge gpio 15 not 16, you’ve done it correctly in the pictures.
Cheers, fixed in the text 🙂
Hello
Just wondering as am new to this and need some advise. I have a Tuya wifi alarm system that has wifi connection issues. Can I simply replace this with a similar WBS3 module from Aliexpress. De solder old and solder in new? Thanks
Hi, it probably depends on what is inside it. If it is indeed a WB3S or a BK7321N or similar, you can now directly install espHome on it (or OpenBeken). You will no longer be able to use it with your Tuya app – as this is completely new (and free) firmware, designed to be used with MQTT, Home Assistant and other open source home automation controllers.
Hello
I have same issue with 2 alarm panel,do you successfully replaced the module with new one ?
Yes, on a few devices… however the far easier option is to now use the openbeken project on a WB3S. Not as polished as Tasmota and ESPHome but works well. I have a post on doing this, but it is even simpler now so follow the instructions at https://github.com/openshwprojects/OpenBK7231T_App